Drive Connect is a powerful tool for complete integration between Google Drive and Salesforce environments, but its first and most basic function is to link Google Drive files and folders to Salesforce records. Here, we'll walk you through the installation and setup process – your Google Drive/Salesforce integration will be up and running in no time.
Drive Connect Installation
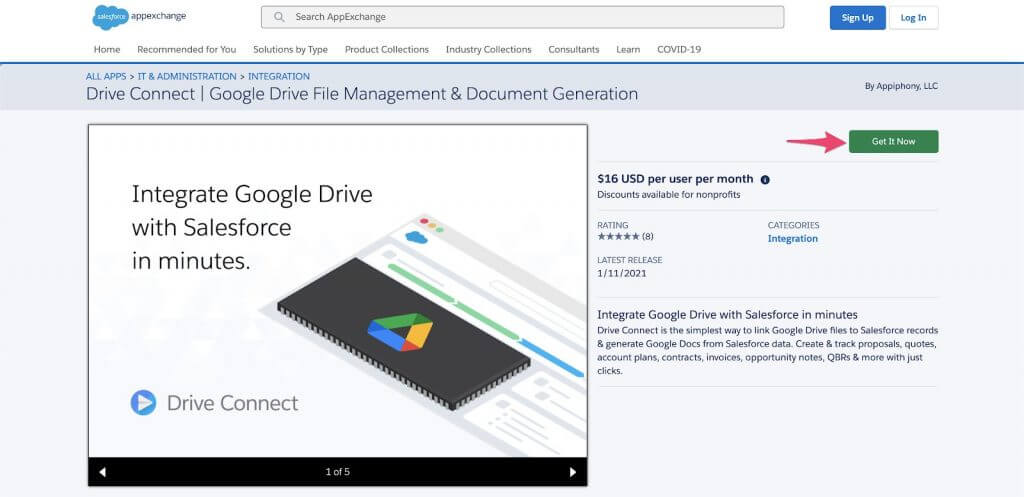
First, you'll need to head over to our AppExchange listing and click Get It Now.
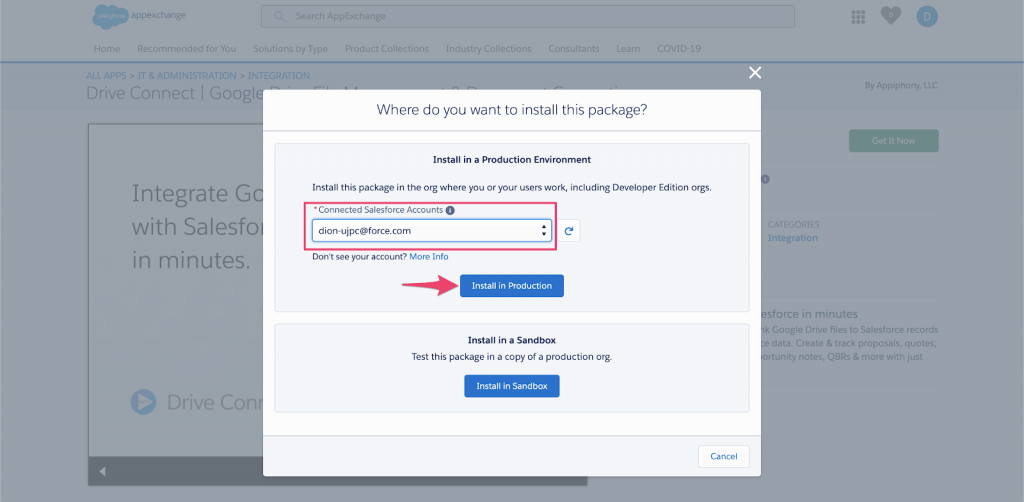
Next, select a connected Salesforce account and click Install in Production.
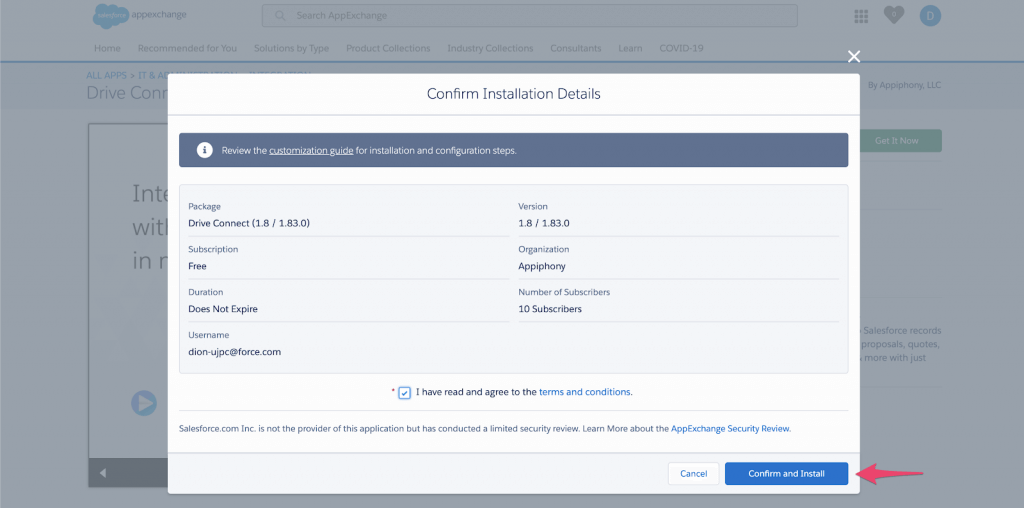
Accept the terms and conditions and click Confirm and Install.
At this point, if you're not logged in to the org where you'd like to install the app, you'll be prompted to enter your Salesforce credentials.
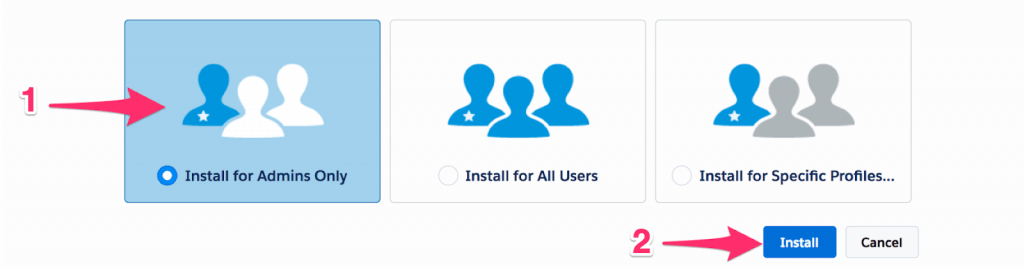
Once you're logged in, you'll be asked to select an installation security setting. We recommend Install for Admins Only, which will initially restrict app access to the installing administrator and any profile with the "Customize Application" permission.
Read more about Salesforce's various levels of package installation security here.
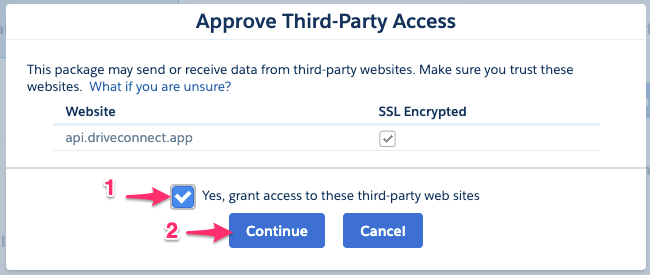
Finally, tick the box to approve third-party access to your Salesforce org and click Continue. This will allow data to be shared between your org and Drive Connect.
Drive Connect Setup Wizard
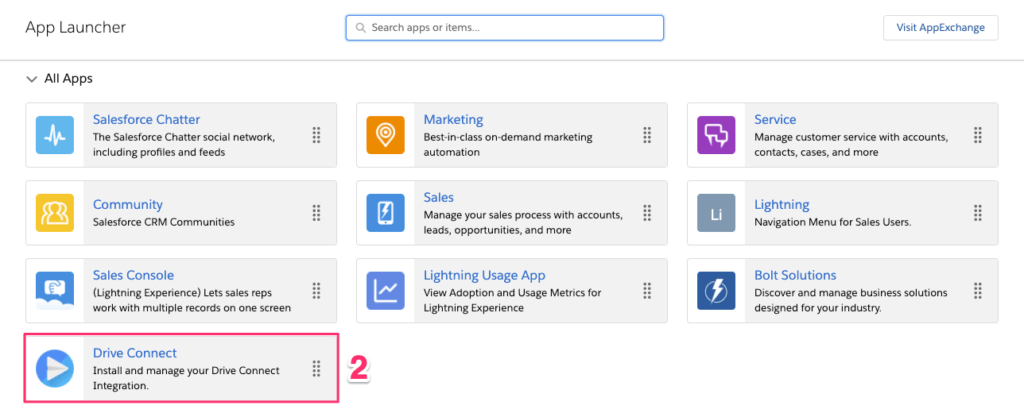
Drive Connect gets rolling in minutes with an easy-to-use setup wizard. To get started, navigate to the App Launcher and select Drive Connect.
Note: To alleviate issues accessing Drive Connect features, you must have a domain configured before beginning Drive Connect setup. Otherwise, you'll need to grant tab visibility permissions for the Setup and Template Builder tabs on the setup user’s profile/permission set to access these features.
For more information on creating permission sets and setting permissions, please see User Permission and Access.
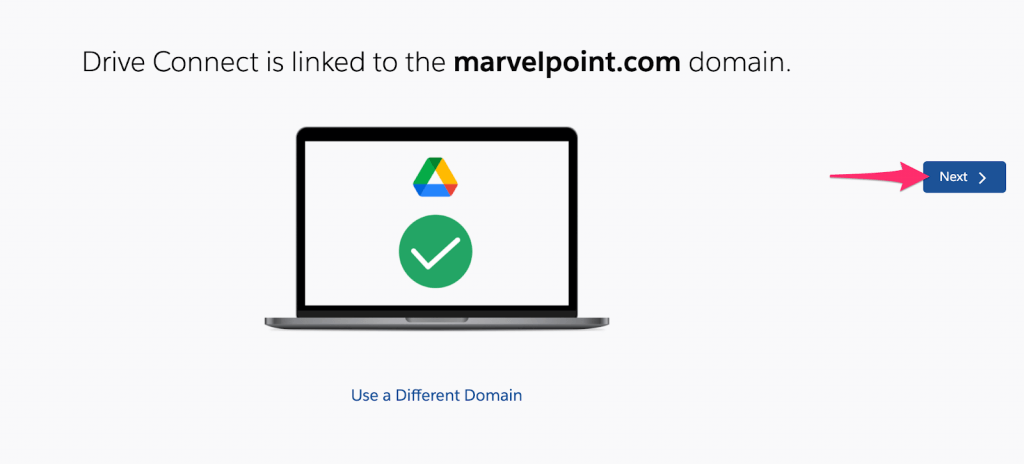
Sign In to Google Drive in Setup
You'll automatically be prompted to complete the Setup Assistant wizard. The first section of the wizard requires you to sign in to your Google account:
- Click Sign in and Link
- Log in to your Google Account using the Google OAuth flow
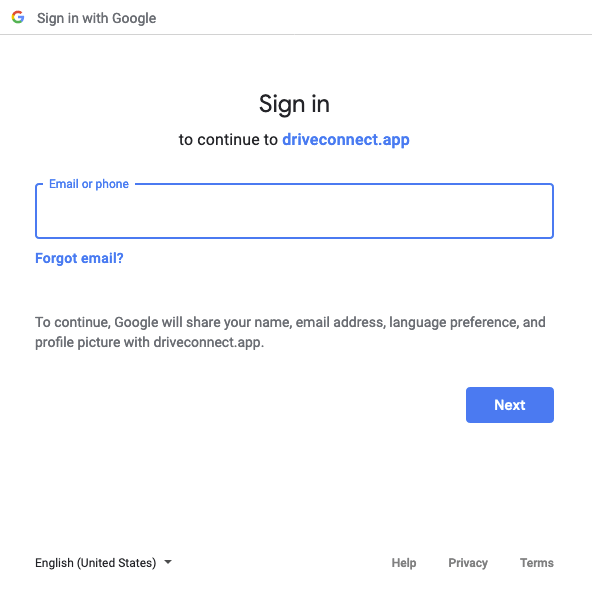
Once successfully authenticated in, click Next.
Add Drive Links Component to Page Layouts in Setup
Next, you have the option to add the Drive Links component to any of your existing flexipage layouts. You can always add the component to additional Lightning pages using the Lightning App Builder.
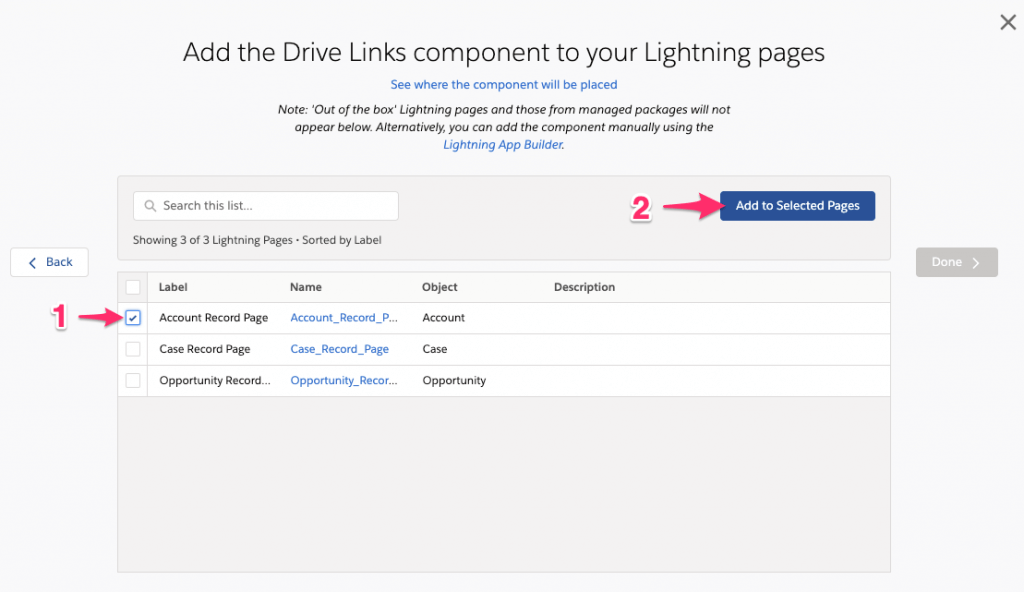
Click Done when completed with this step. You can continue Setup if you'd like to set up your organization for document generation with Drive Connect, but you're ready to start linking files and folders now.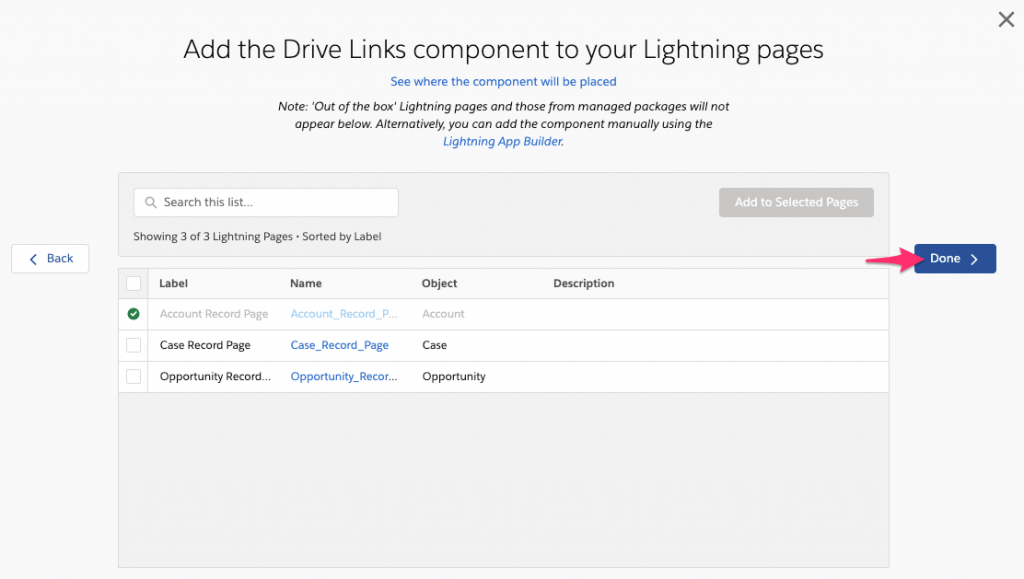
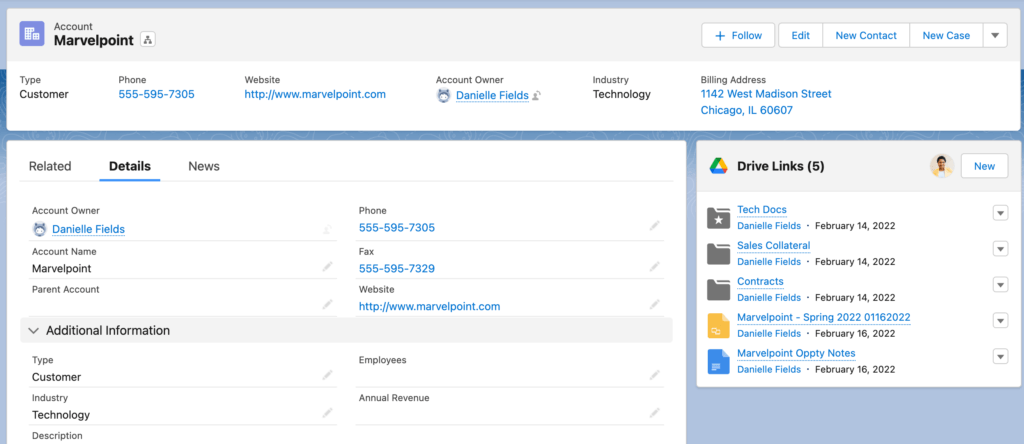
Navigate to one of the pages you added the Drive Links component to in Setup, and the component should be visible and ready for use.
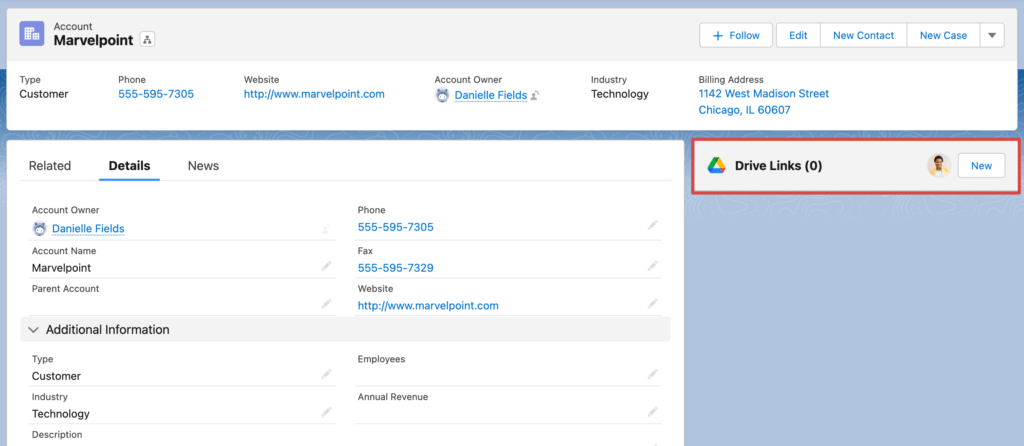
Click New to add files and folders from your Google Drive environment to the Drive Links component. You can always unlink Google files from Salesforce without affecting them in Google Drive.
Again, this is just the most basic function of Drive Connect. Once you've mastered linking Google docs to Salesforce records in your org, you may want to play with some of the app's more sophisticated features, like document generation or process automation. Start exploring with a 14-day free trial.
Try Drive Connect for Free
You can use the app for 14 days with no credit card required.