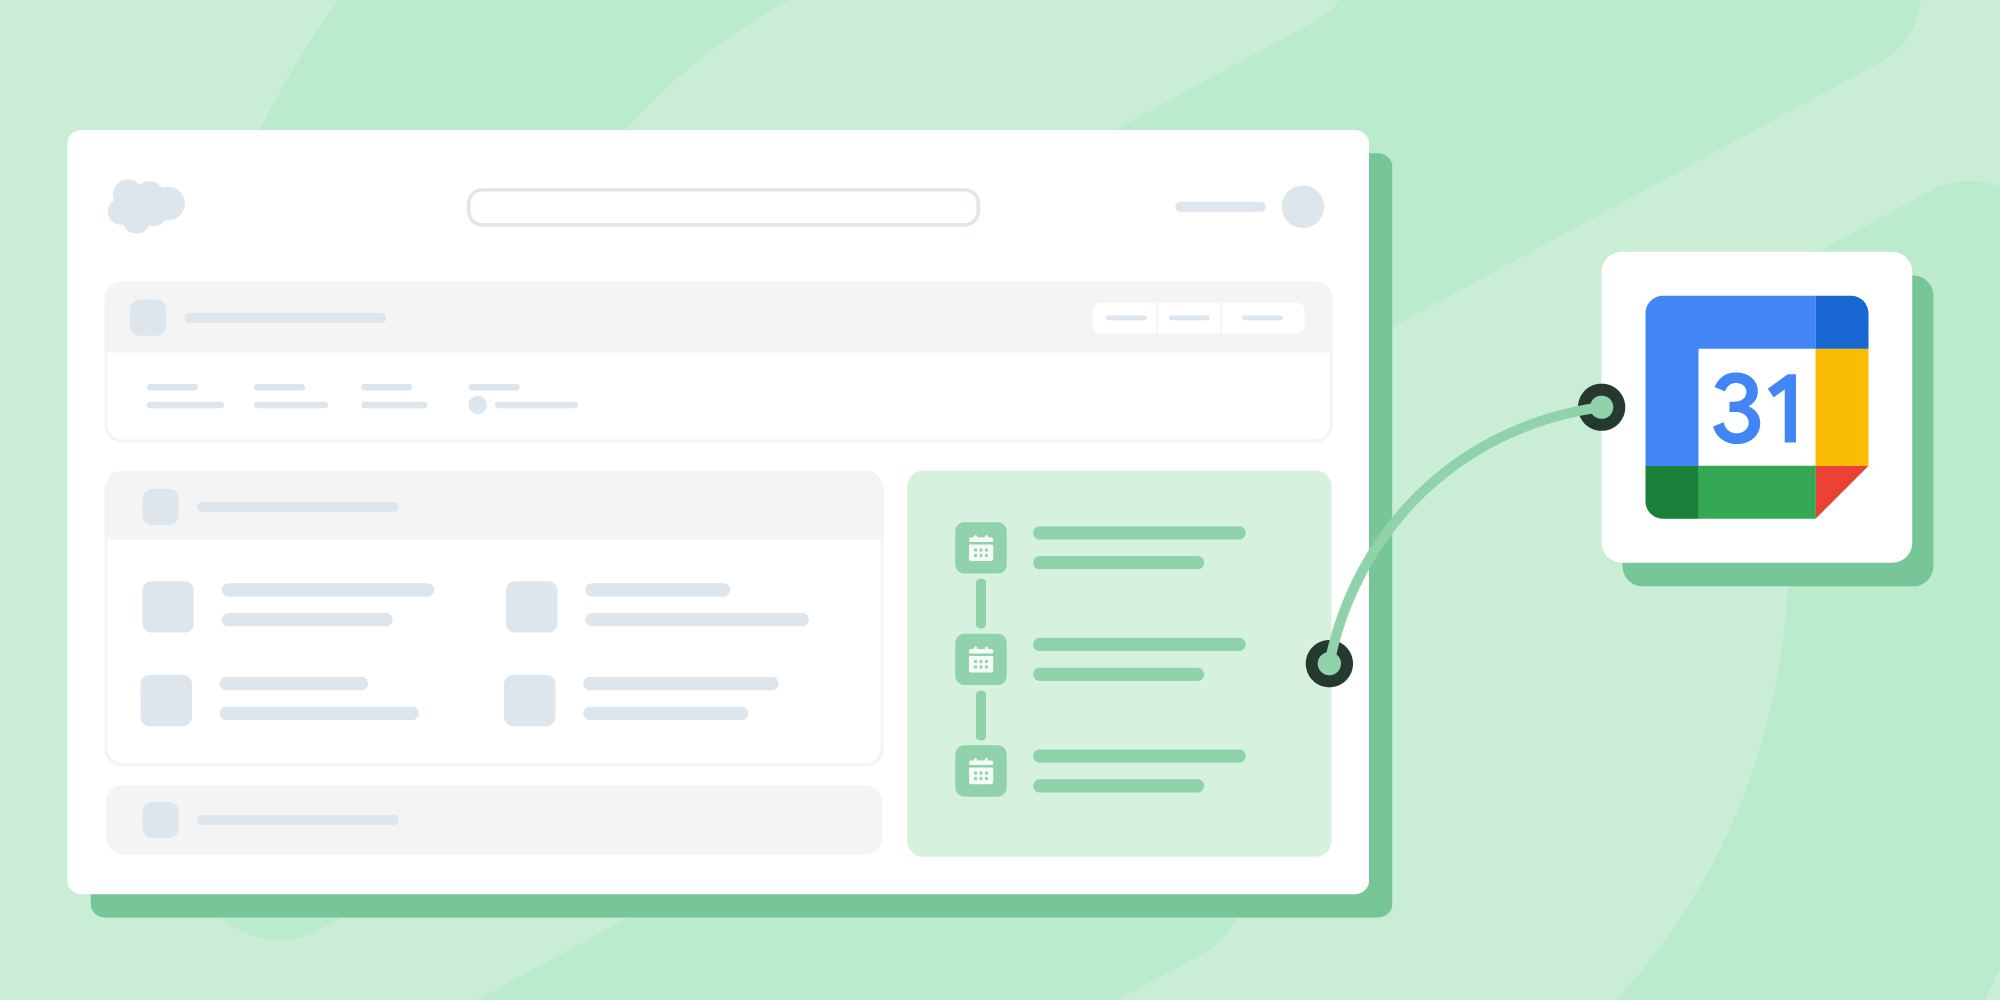
Set Up a Google Calendar/Salesforce Integration with Einstein Activity Capture Standard
Questions? We're here to help! Drop us a line and we'll get back to you as soon as we can.
In our last post, we broke down the basics of Einstein Activity Capture, Salesforce's solution for syncing with third-party email and calendar apps. Now, we're going to walk you through the process of setting up a Google Calendar/Salesforce integration with Einstein Activity Capture Standard, which is free for up to 100 users with a Sales Cloud license.
So: You have a calendar in Salesforce. You have a calendar in Google Workspace. Naturally, you want to sync the two. As with so many things in the Salesforce ecosystem, the good news is that there's a built-in tool designed to do just that – the bad news is that it's a little complicated to set up.
Enabling a Google Calendar & Salesforce integration via Einstein Activity Capture Standard is a two-part process – first, an admin will need to set up Einstein Activity Capture for your org; then, individual users will need to authorize their Google accounts to sync with Salesforce. Let's go through both parts, step by step.
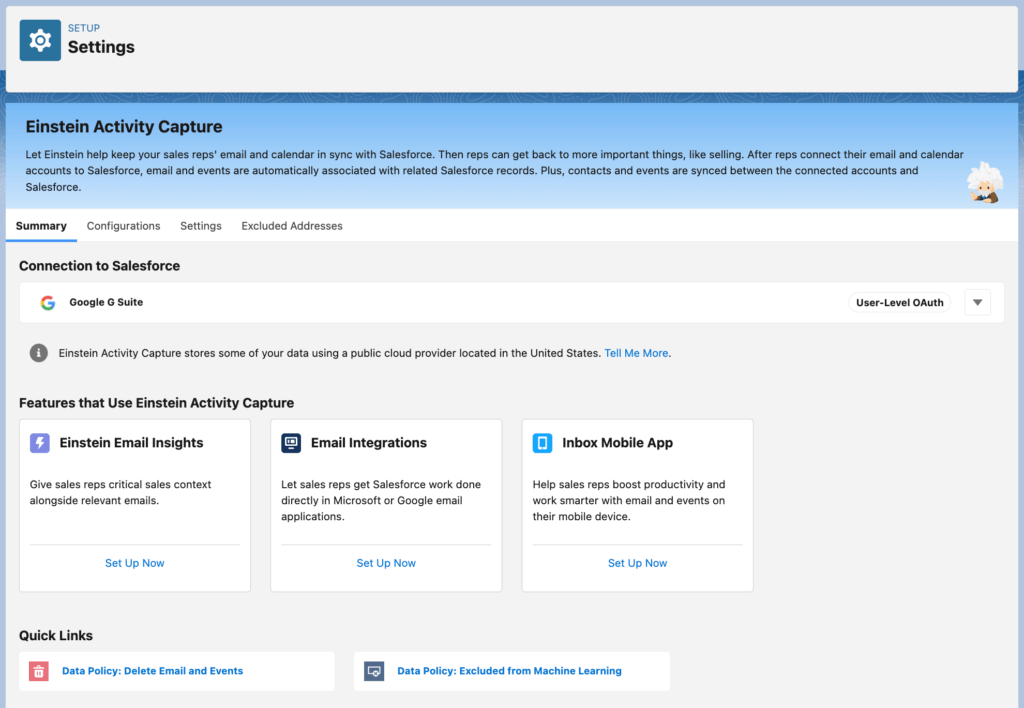
In Setup, search for Einstein Activity Capture and select Settings.
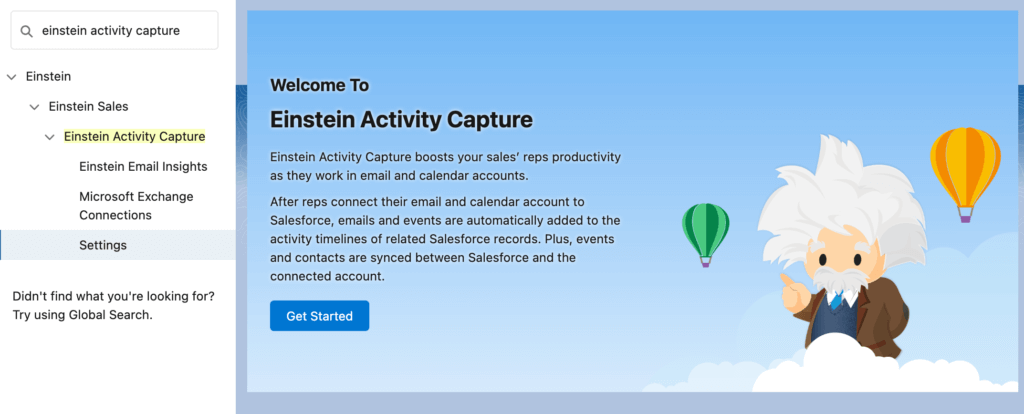
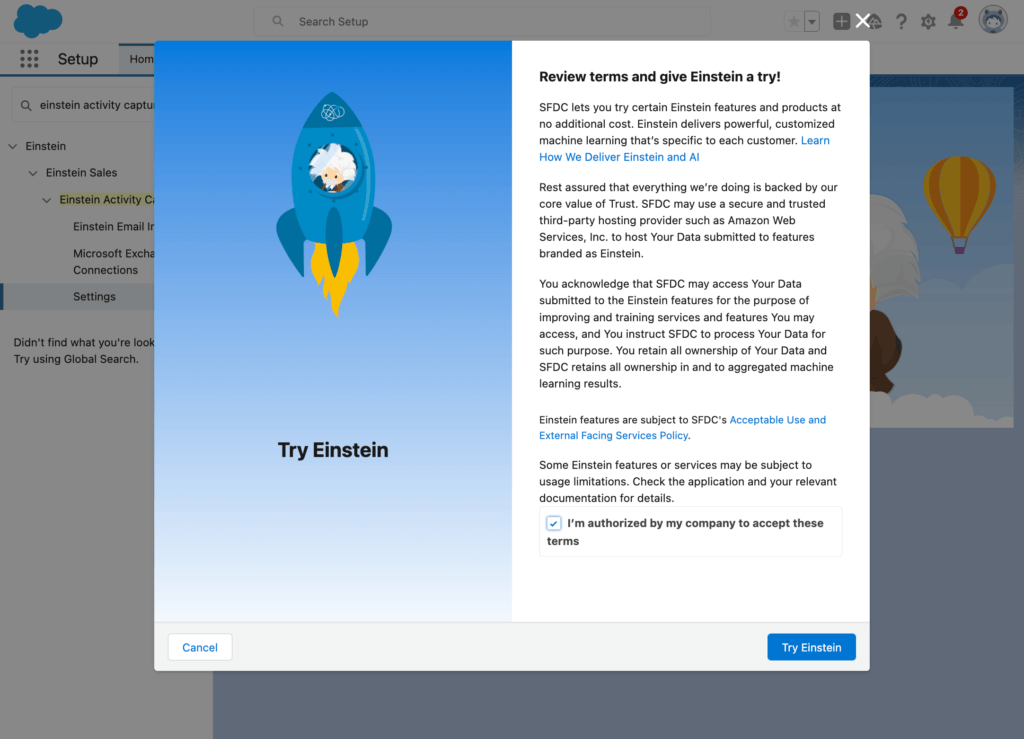
You'll be presented with some very defensive terms and conditions. Give them a read, make sure you're okay with the external data storage, and click Try Einstein.
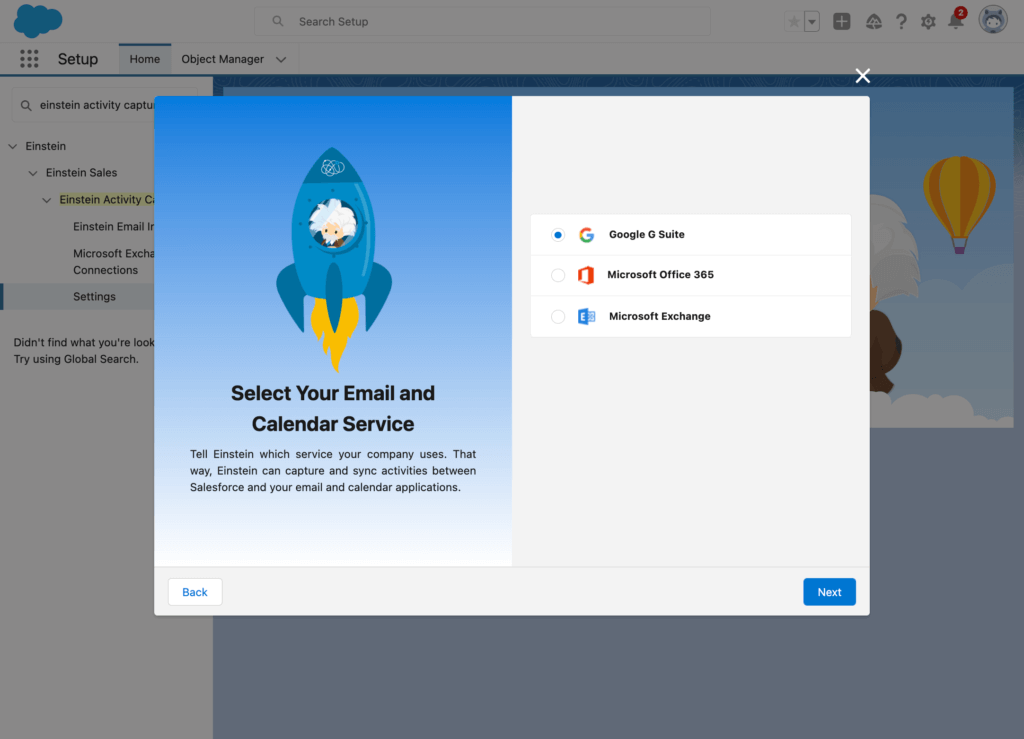
Next, it's time to select the external email and calendar service you'll be using with this EAC configuration. Select Google G Suite and click Next.
Now, it's time to decide how this Einstein Activity Capture configuration will handle authentication into Google.
If you go with User-Level Auth, individual Einstein Activity Capture users in your org will be responsible for connecting their Google accounts to Salesforce.
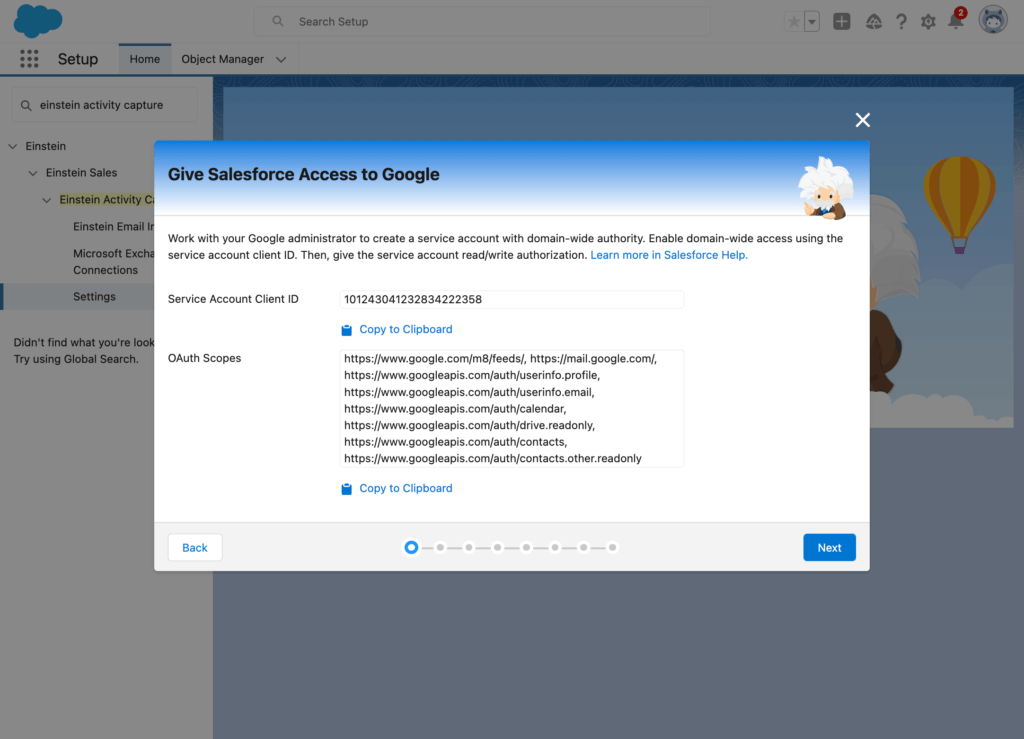
If you choose to handle authentication with a Service Account, you'll need to set up a Google service account with domain-wide authority, allowing you to connect all Einstein Activity Capture users in your org to Google at once.
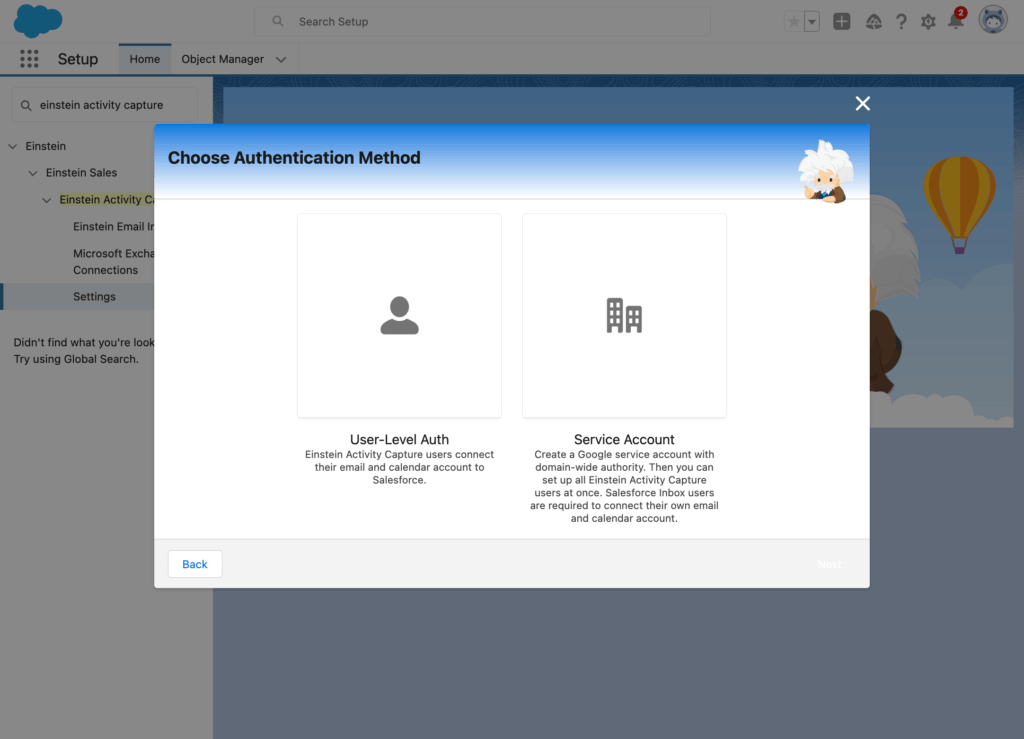
If you choose Service Account, you'll be presented with a Client ID and list of OAuth Scopes to pass along to the Google admin tasked with creating a service account for your domain. For simplicity's sake, though, let's proceed with User-Level Auth.
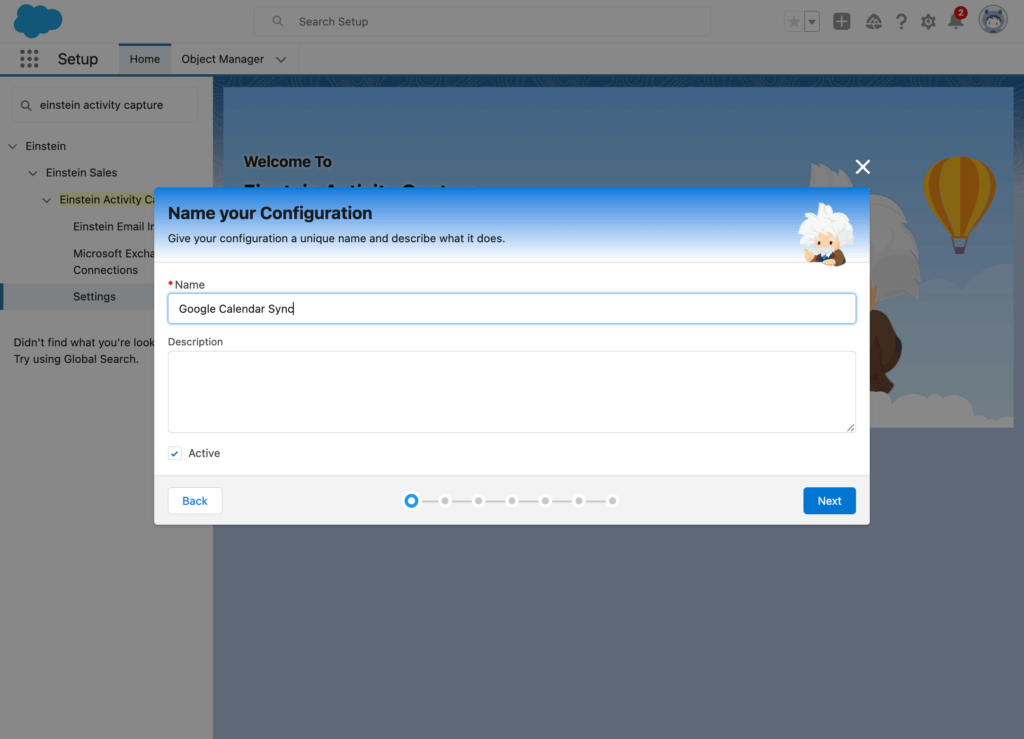
Give your new configuration a unique name and description and click Next.
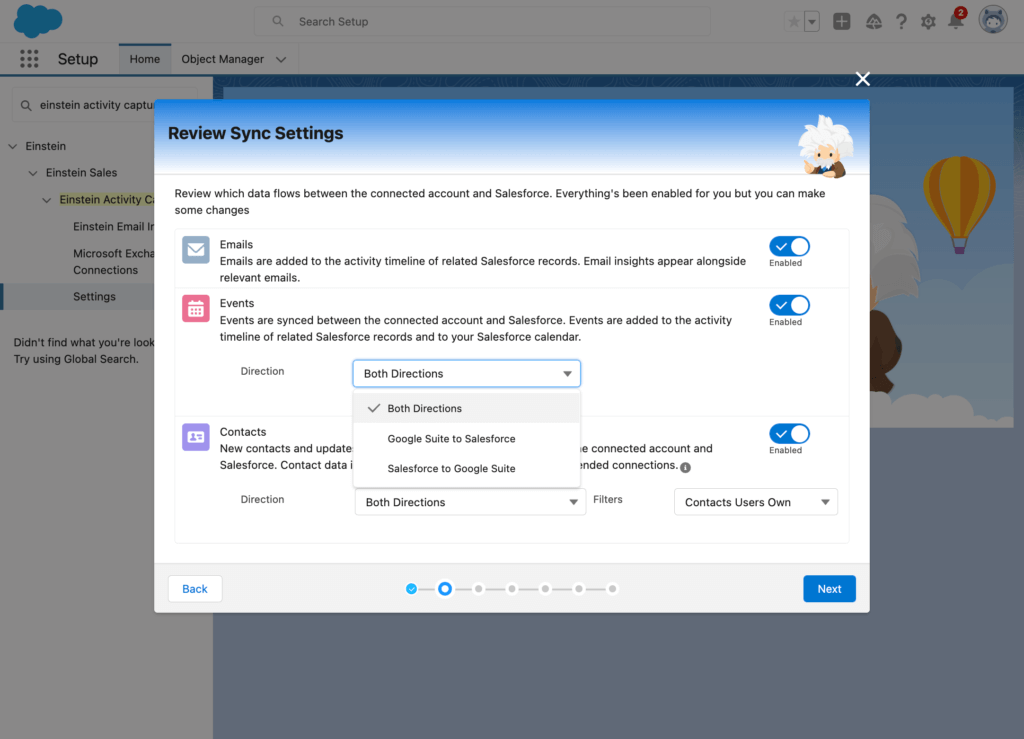
By default, a new EAC configuration syncs Emails, Calendar Events, and Contacts in both directions between Google and Salesforce. You can tweak those settings here, but we'll stick with the default options.
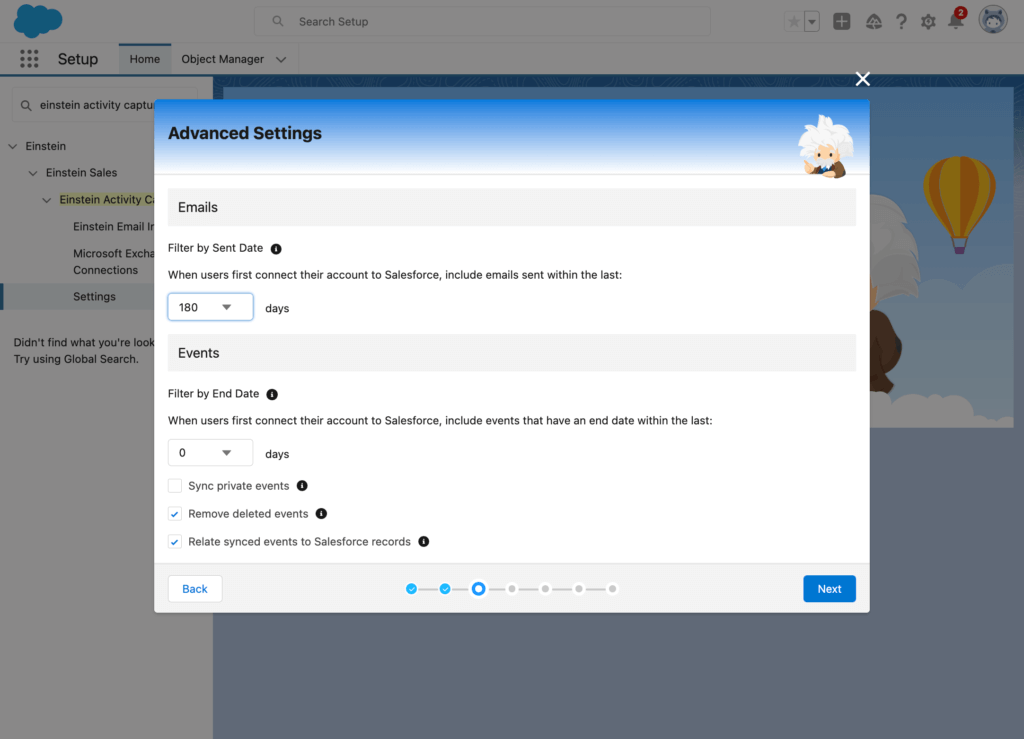
Next, it's time to dig into more advanced settings. Filter by End Date allows you to sync past Google calendar events, Sync Private Events allows you to sync private Google calendar events, Remove Deleted Events tells Salesforce to delete synced events when they are deleted in Google, and Relate Synced Events to Salesforce Records does, well, what it says on the label.
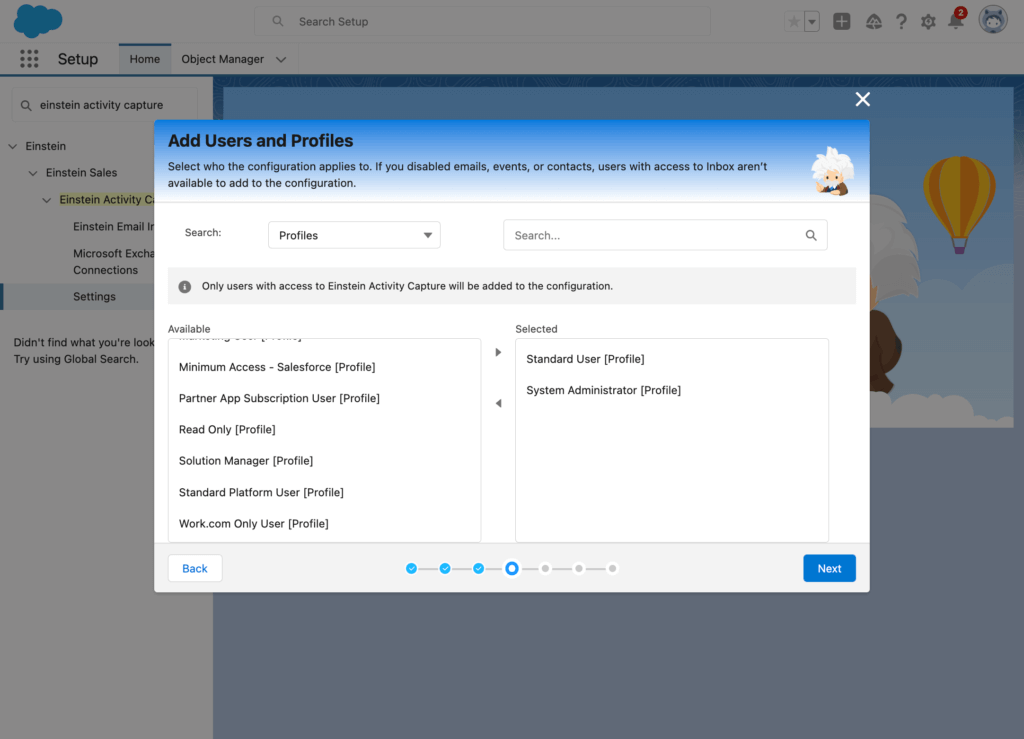
Now it's time to add users to your new EAC configuration. You can add users individually or by assigning profiles to the configuration.
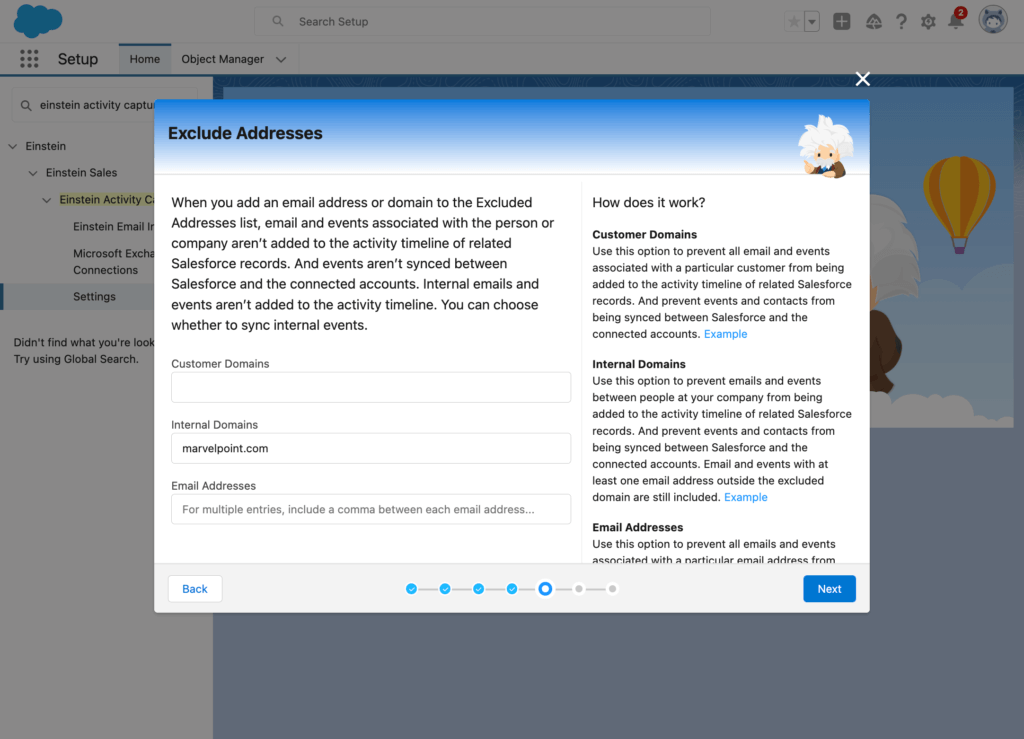
Optionally, you can choose to exclude certain email addresses or domains from event sync. This can be useful if you don't want to see your company's internal events in your Salesforce calendar.
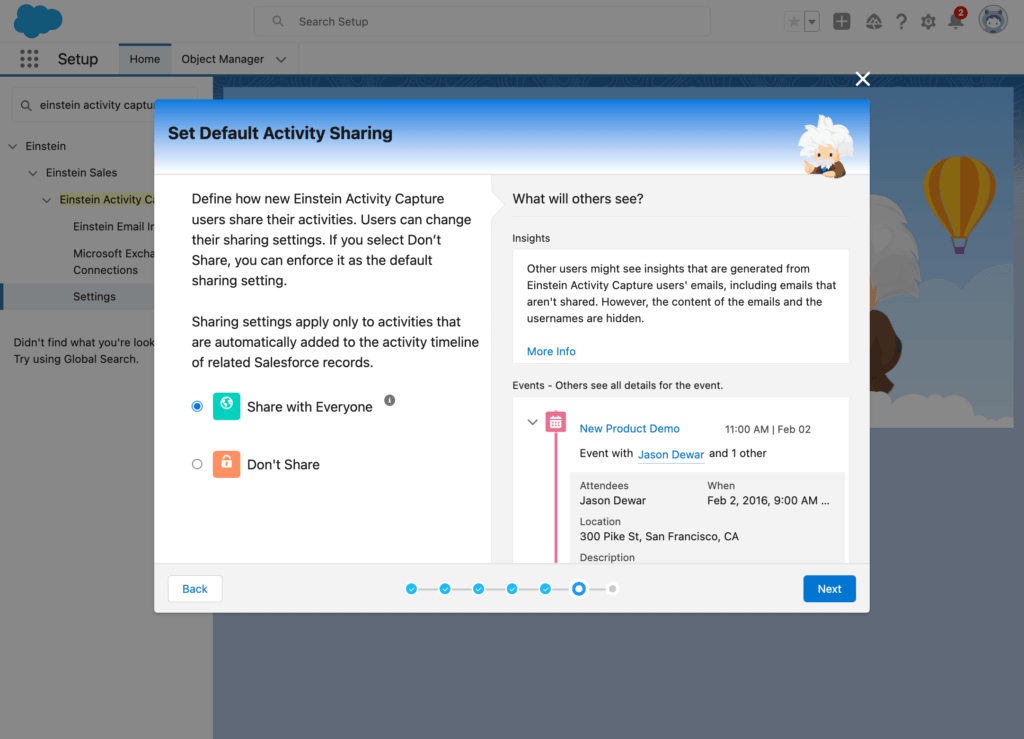
Finally, you'll be prompted to set default activity sharing settings for users of this configuration. Individual users will be able to change this default setting for themselves.
Click Finish, and you're done! Time to blast off with Cartoon Einstein!
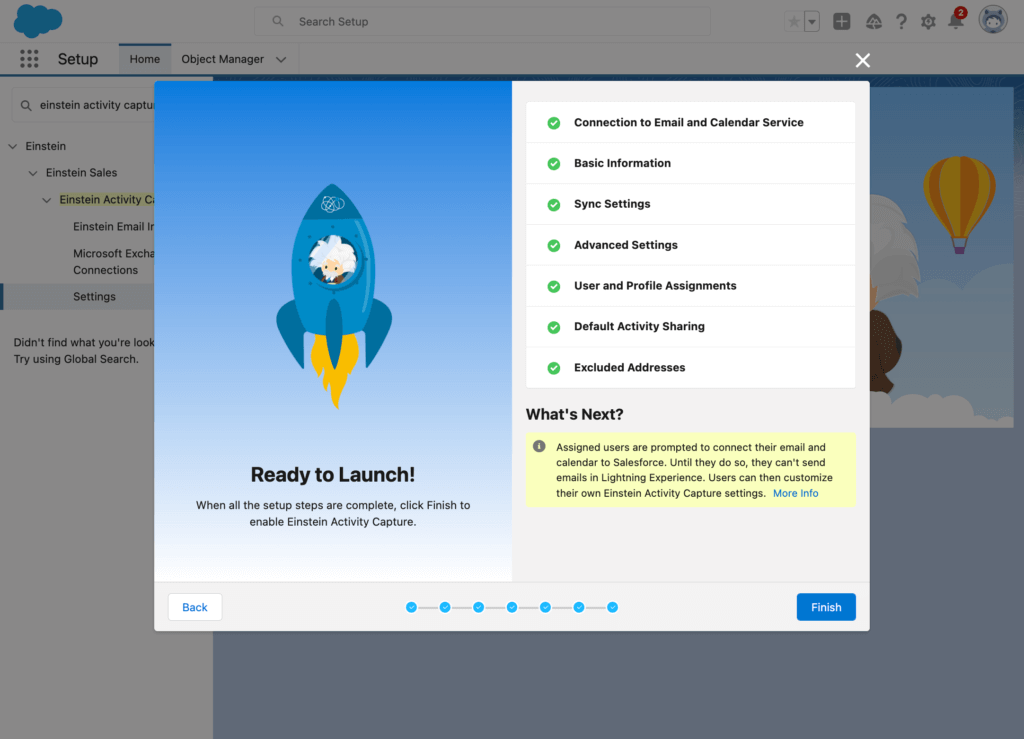
You can return to the Einstein Activity Capture > Settings tab in Setup to tweak these settings or delete this configuration altogether.
Finally, give your selected users the Standard Einstein Activity Capture permission set using the standard permission set assignment tool.

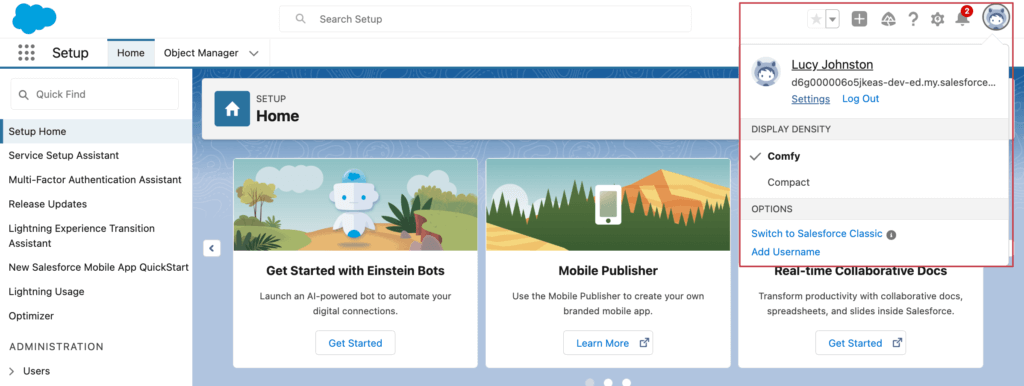
To connect your individual Salesforce & Google accounts and get started with Einstein Activity Capture sync, click on your user profile picture in the upper right-hand corner of your Salesforce environment and select Settings from the dropdown menu that appears.
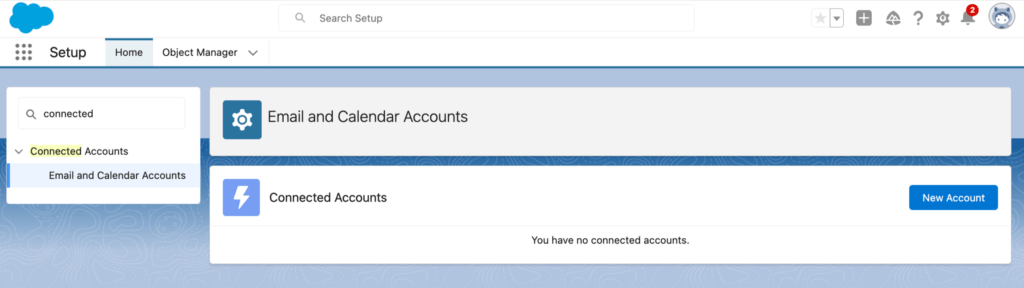
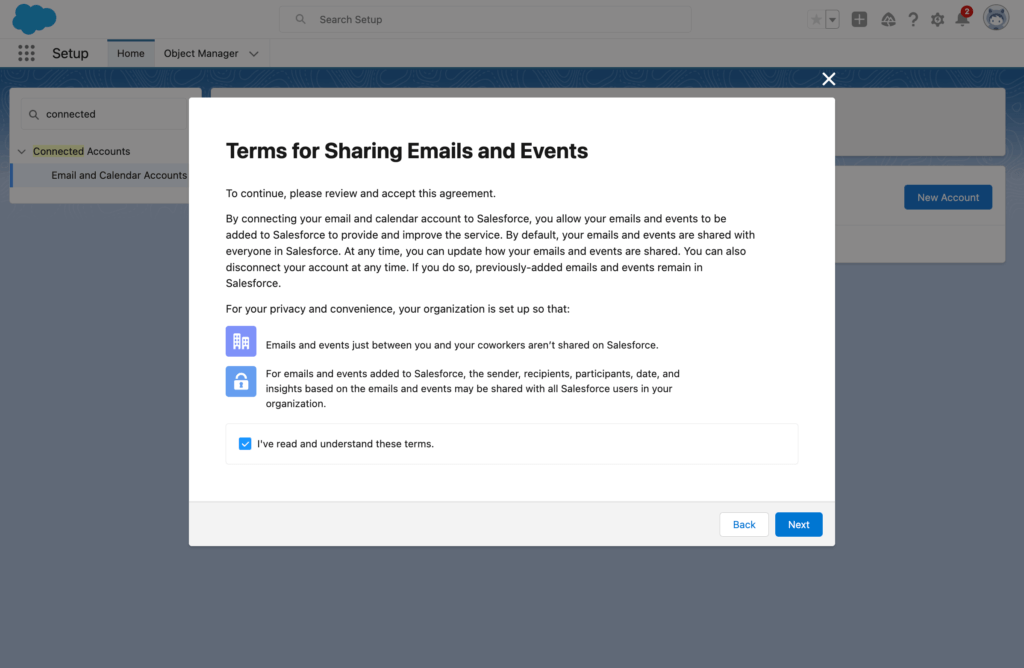
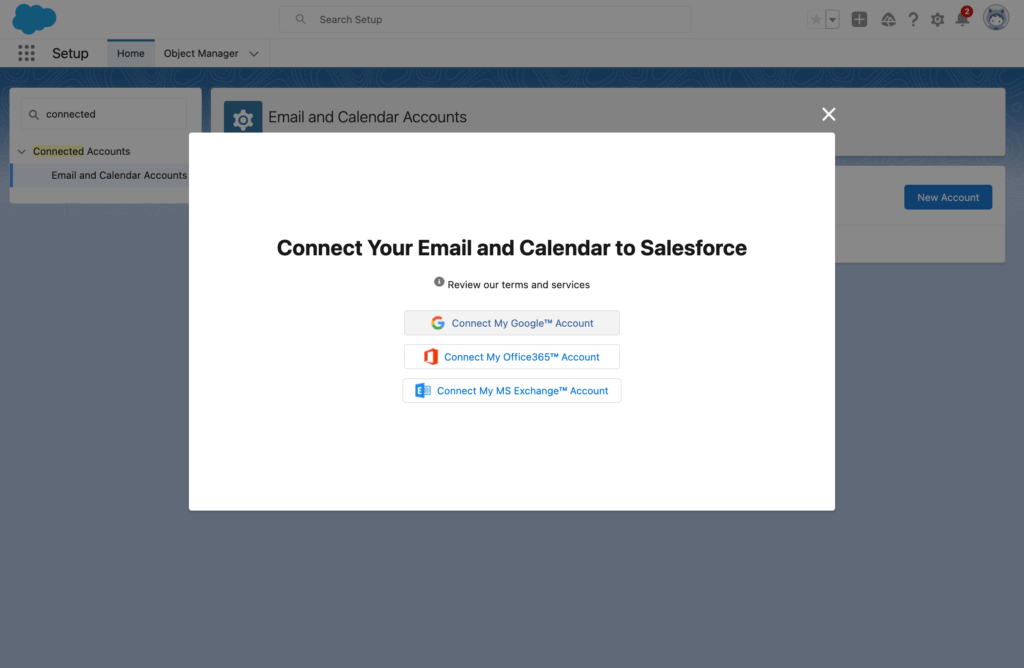
Use the Quick Find search box on the left-hand side of the screen to navigate to Connected Accounts > Email and Calendar Accounts. If your organization's Google administrator has connected your Google account already, you'll see it here; if not, click New Account to complete the process.
You'll be presented with the email and event sharing privacy settings your organization has established. Accept the sharing terms and click Next to continue.
Click Connect My Google Account to proceed.
You'll be prompted to complete the standard Google account authorization process.
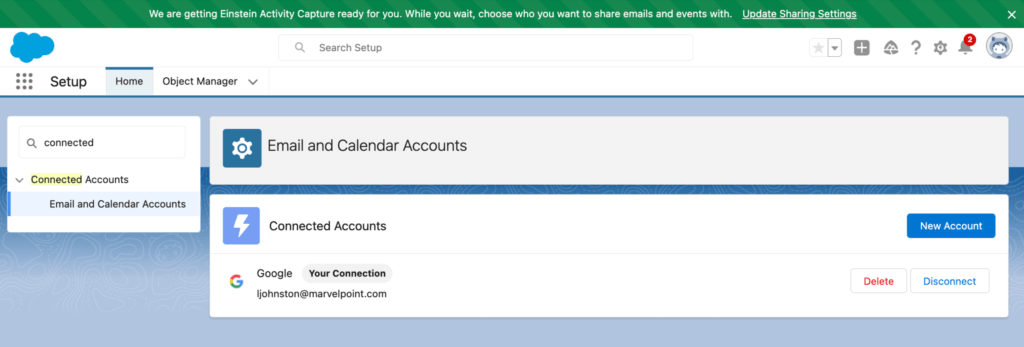
If your connection is successful, your Google account will appear under Connected Accounts. You can always return to this page to delete or disconnect this account from Salesforce.
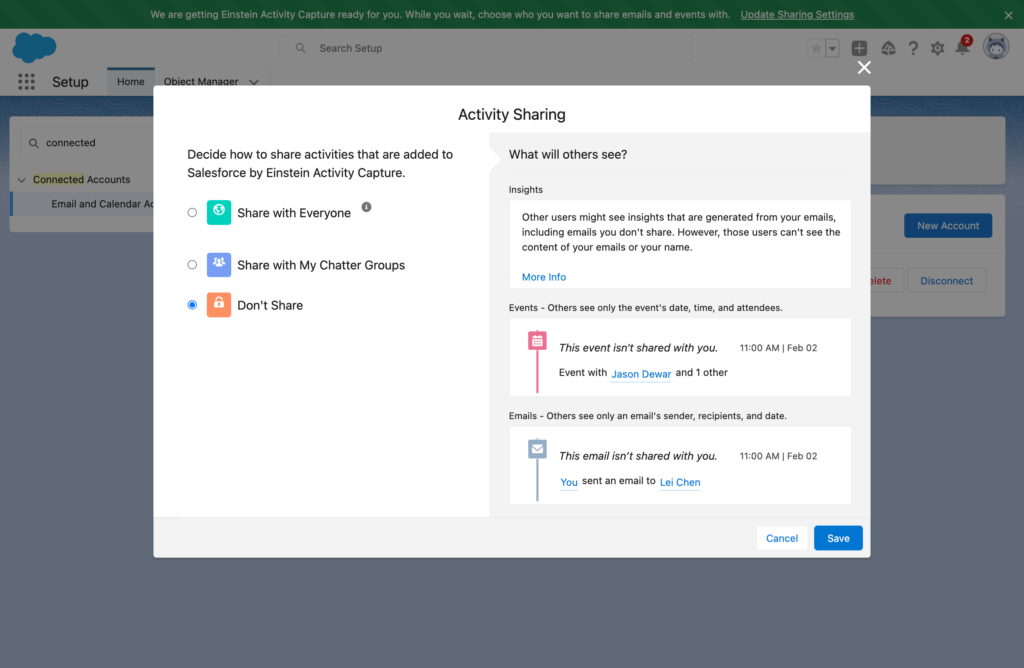
Your initial sync will take a while to set up. In the meantime, you can click on the notification that appears at the top of your screen to modify your default timeline event sharing options.
And that's all there is to it – just 21 short steps later, you're done! Going forward, your new Google Calendar/Salesforce integration will automatically sync events between your Google Workspace environment and your Salesforce org.
If you made it through this entire setup guide, you might also be interested in Drive Connect, our complete solution for integrating Salesforce with Google Drive. It's incredibly powerful, easy to use, and a whole lot faster to set up than Einstein Activity Capture is. Try it for free for 14 days – no credit card required.
Try Drive Connect free for 14 days – no credit card required.