Not sure where to begin with Salesforce email templates? You’re not alone. Salesforce’s email capabilities have evolved along with the platform, and that means that over the course of a quarter-century(!) it’s developed so many different options for email templating that it’s frankly confusing.
Here, we’ll walk you through Salesforce’s latest and greatest tools for email creation: Lightning Email Templates, Lightning Enhanced Letterheads, and Lightning Email Template Builder. If your organization is still running on Salesforce Classic, you’ll be limited to Classic Templates, which you can learn more about here. You’ll be in our thoughts.
When to Use Classic Email Templates in Salesforce
While this guide will focus on email template creation in Lightning Experience, there are some circumstances where you’re better off working with Salesforce Classic email templates. Here are the big ones:
- When you need to pull merge data from multiple objects – Certain complex data needs are better handled with Apex code in a dusty old Visualforce template than with the basic merge field picker built into Lightning Experience’s shiny new email editors.
- When you need to create a plain text email template – If you want to create a plain text template to send to recipients who can’t read HTML email, you’ll need to do it in Salesforce Classic.
- When you’re using Salesforce Classic – You’re welcome. The kind of Salesforce expert tip you’ll only get here.
Otherwise, take it from an experienced Salesforce Classic email designer – save yourself the headache and stick with Lightning Experience tools.
How to Create a Basic Email Template in Salesforce Lightning Experience
Let’s kick things off with a simple sales email enabled with merge fields. These merge fields will pull in the name and company of its recipient and the name of its sender from our Salesforce org for that just-barely-personalized touch.
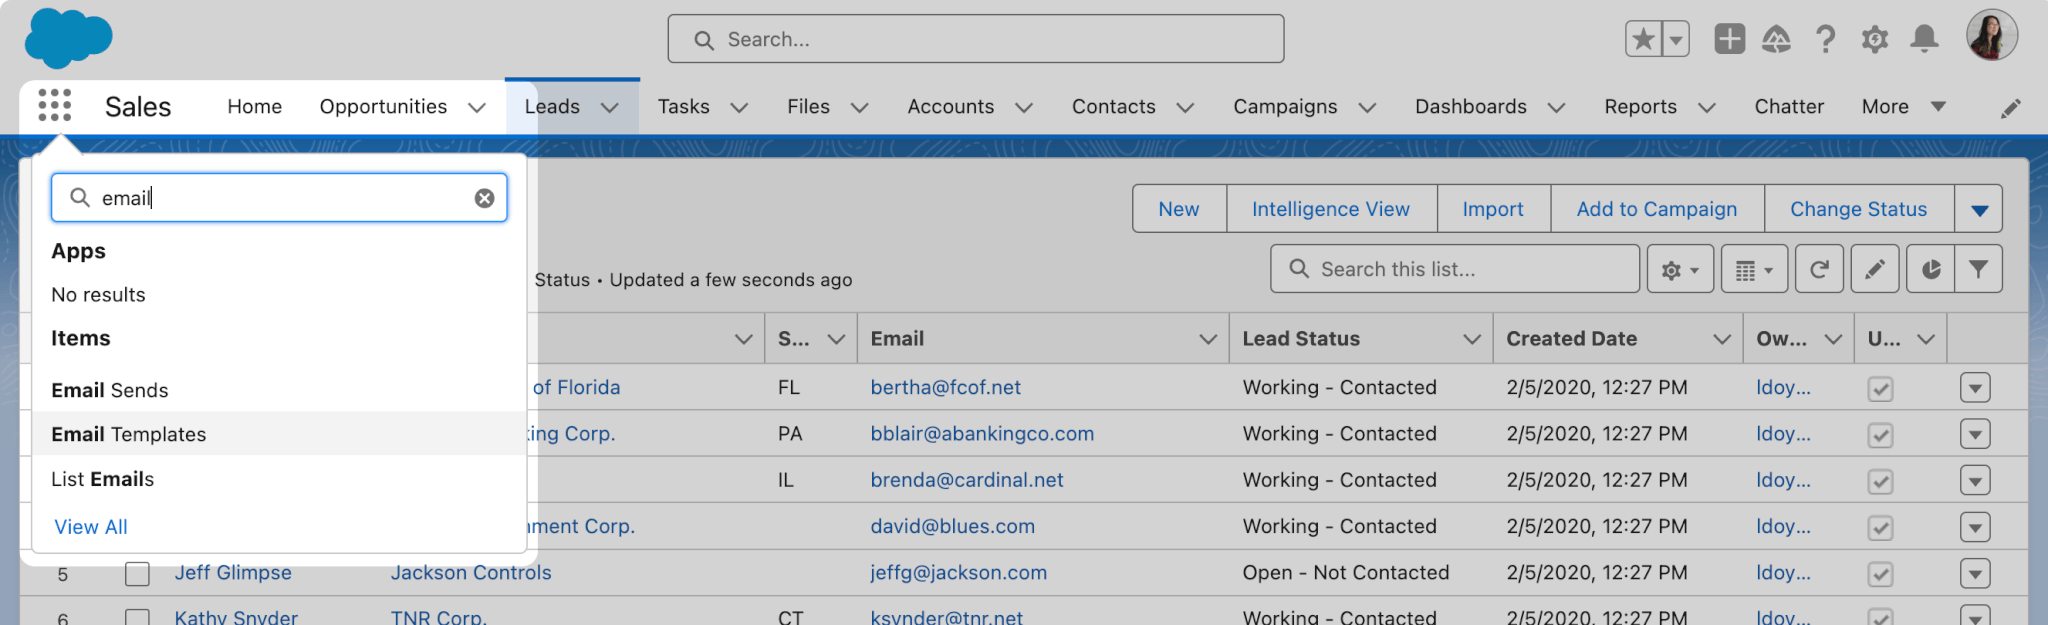
- Go to the App Launcher and navigate to Email Templates.
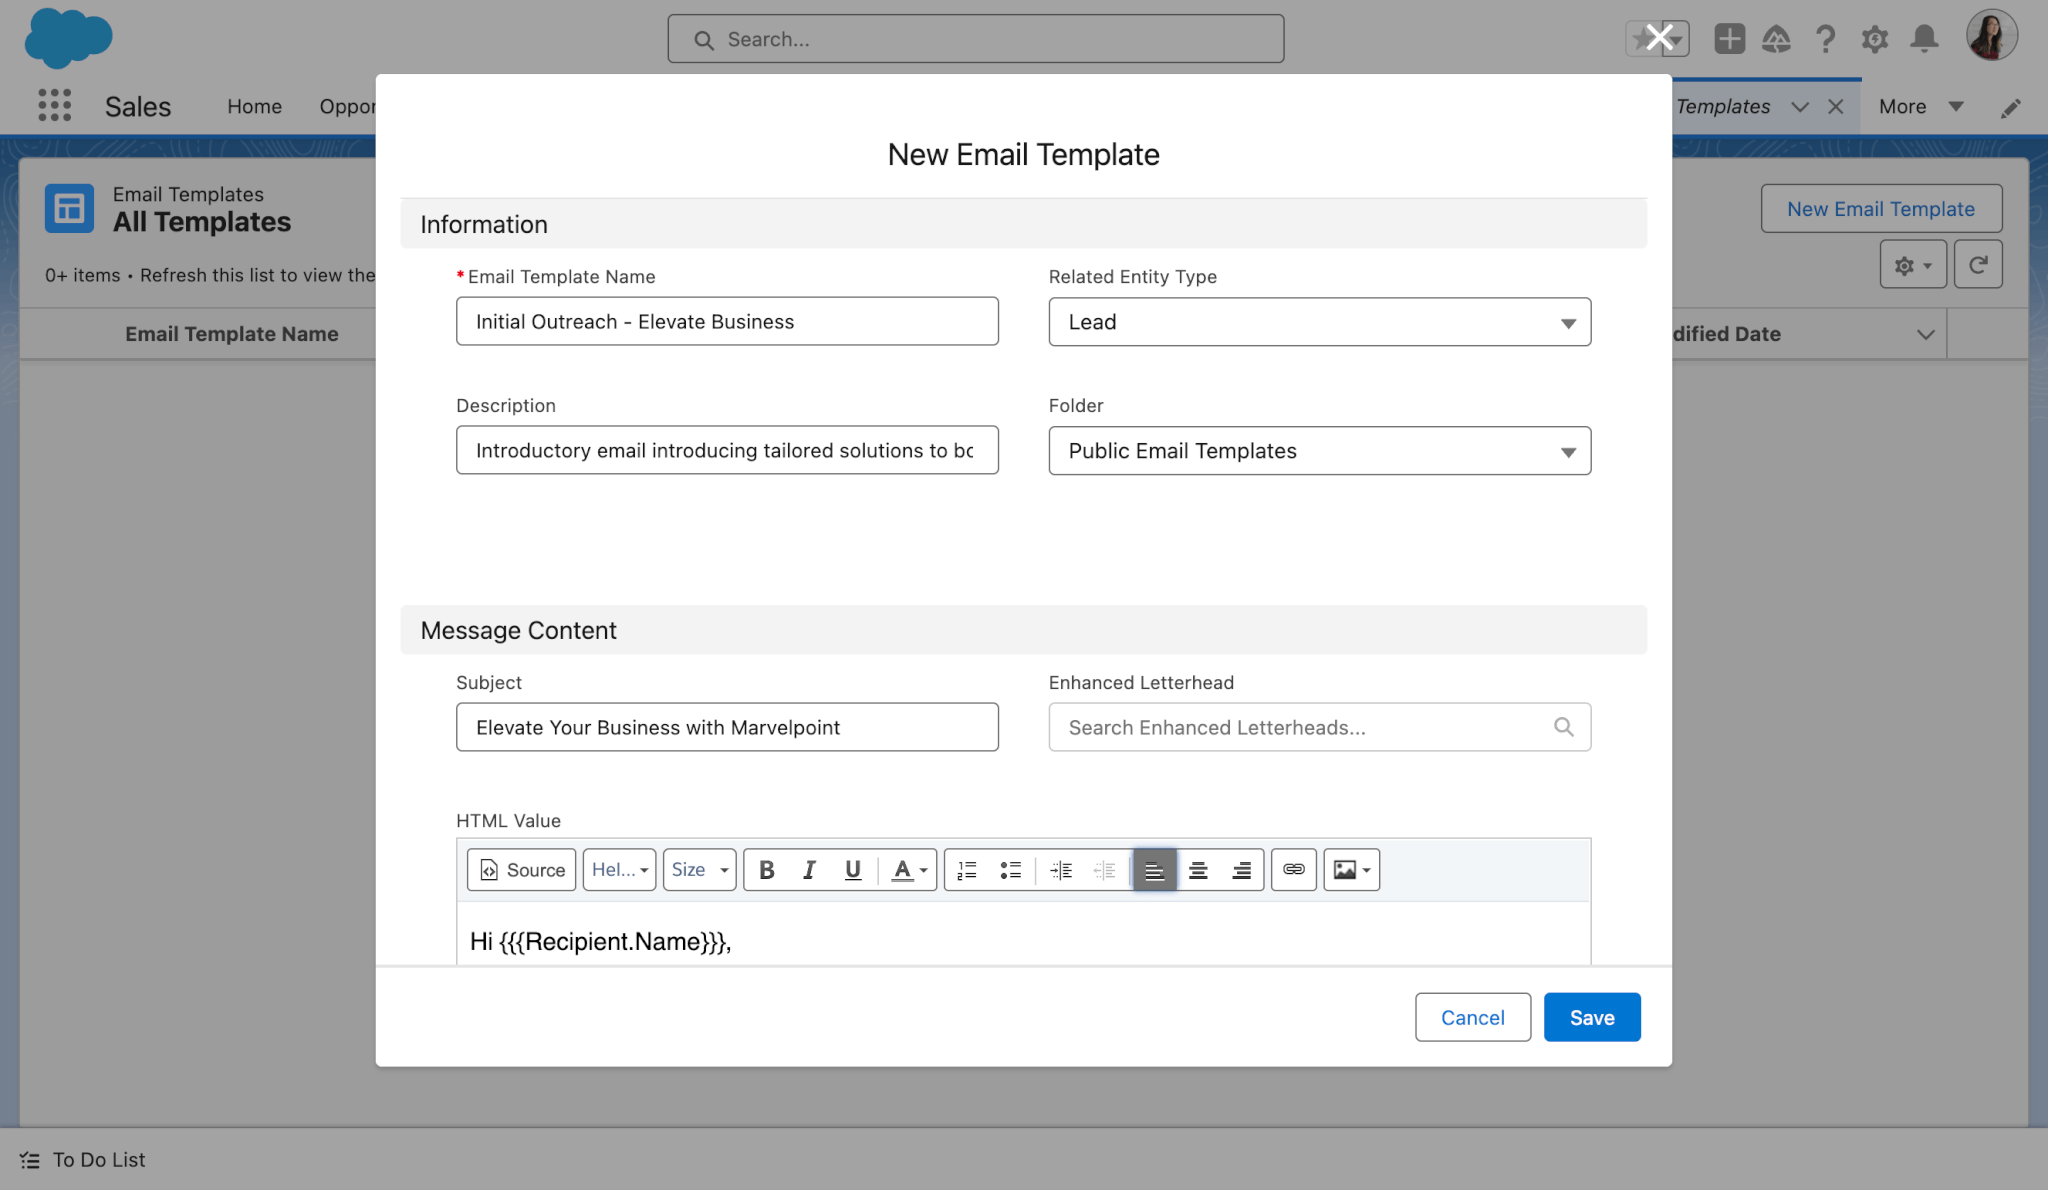
- Select New Email Template.

- Enter a Name and Description for your new template and choose which Folder to store it in. Optionally, you can select a Related Entity Type for merge field generation purposes.
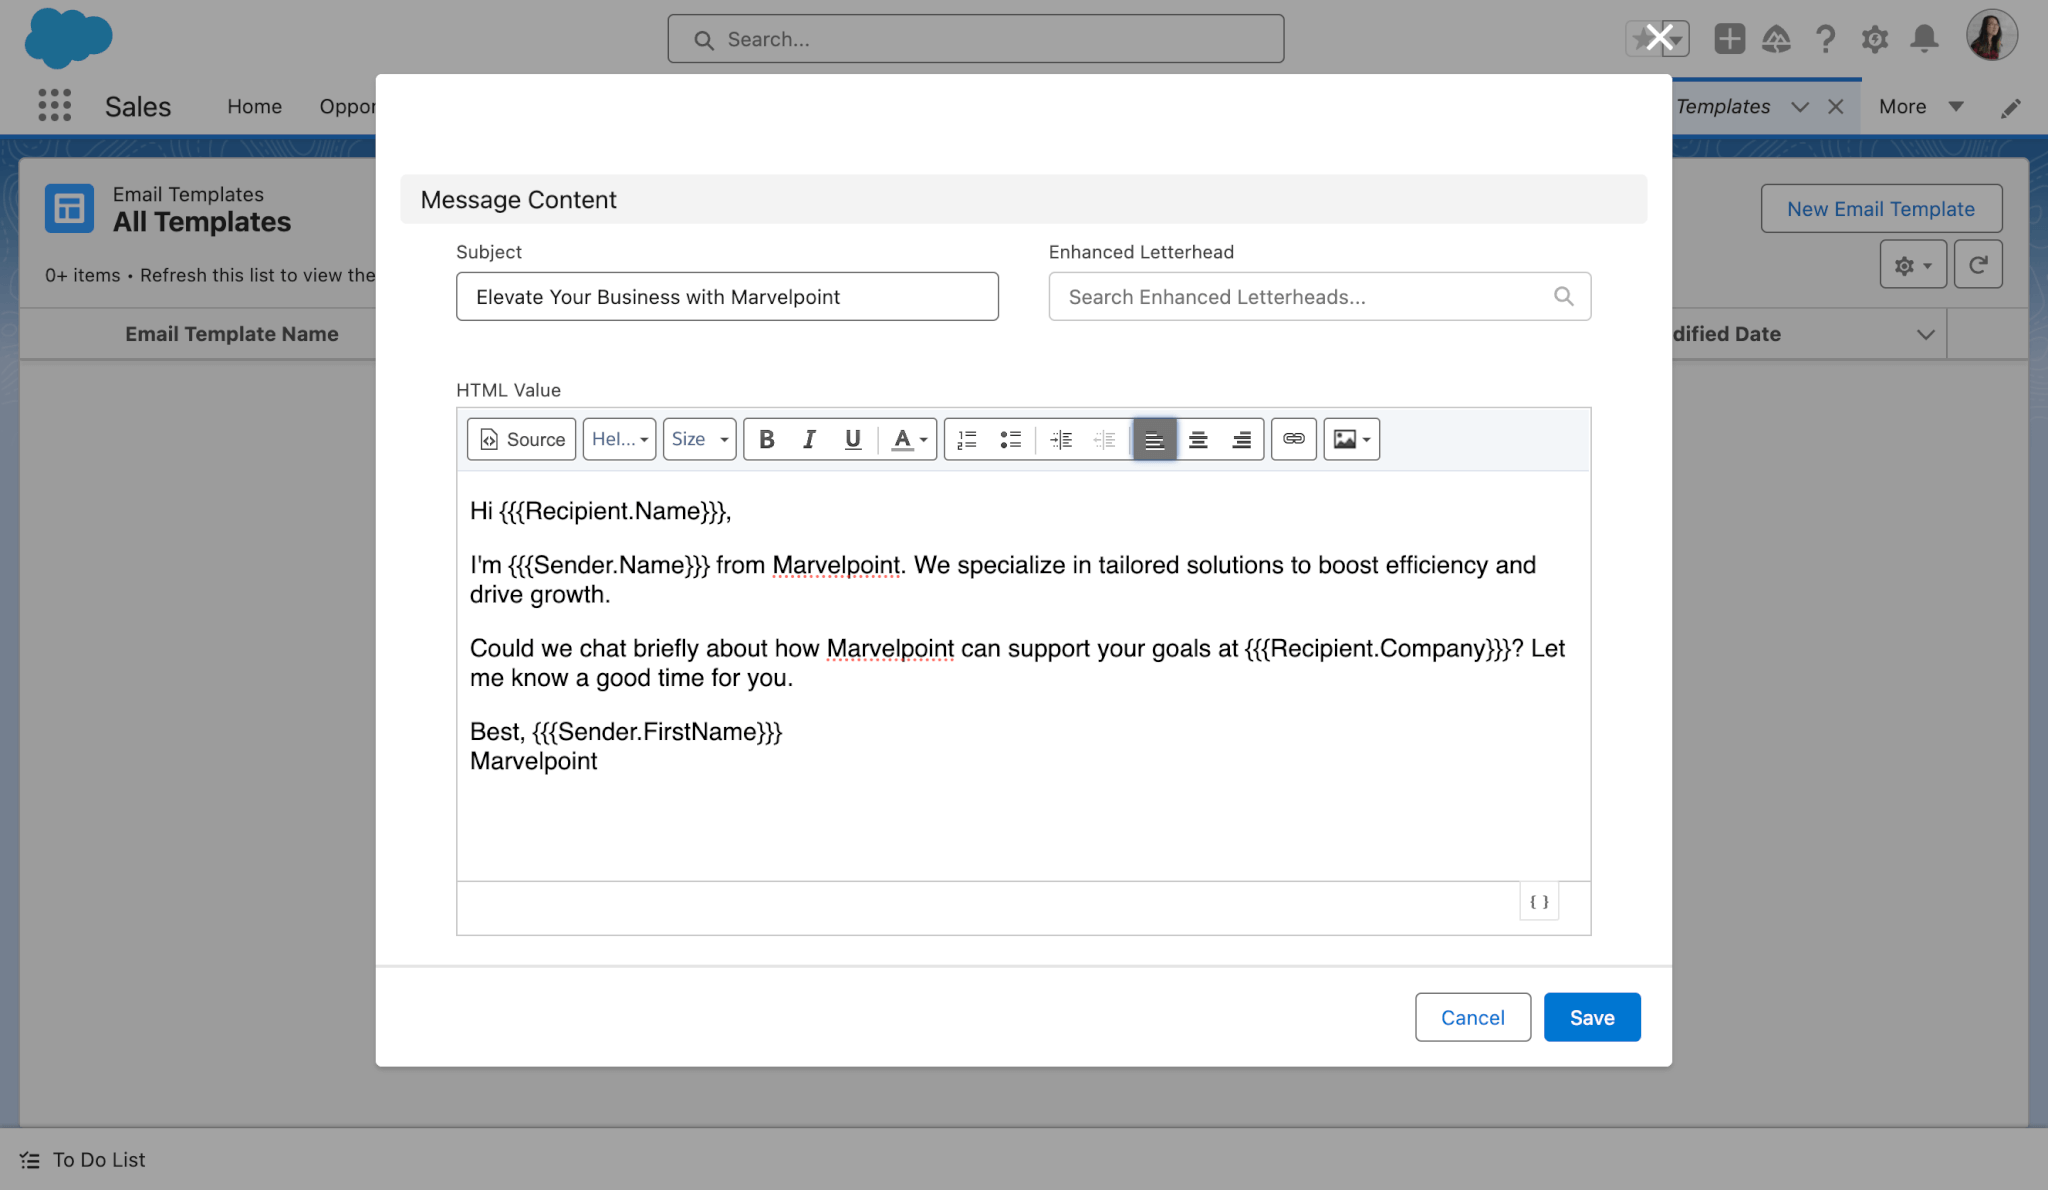
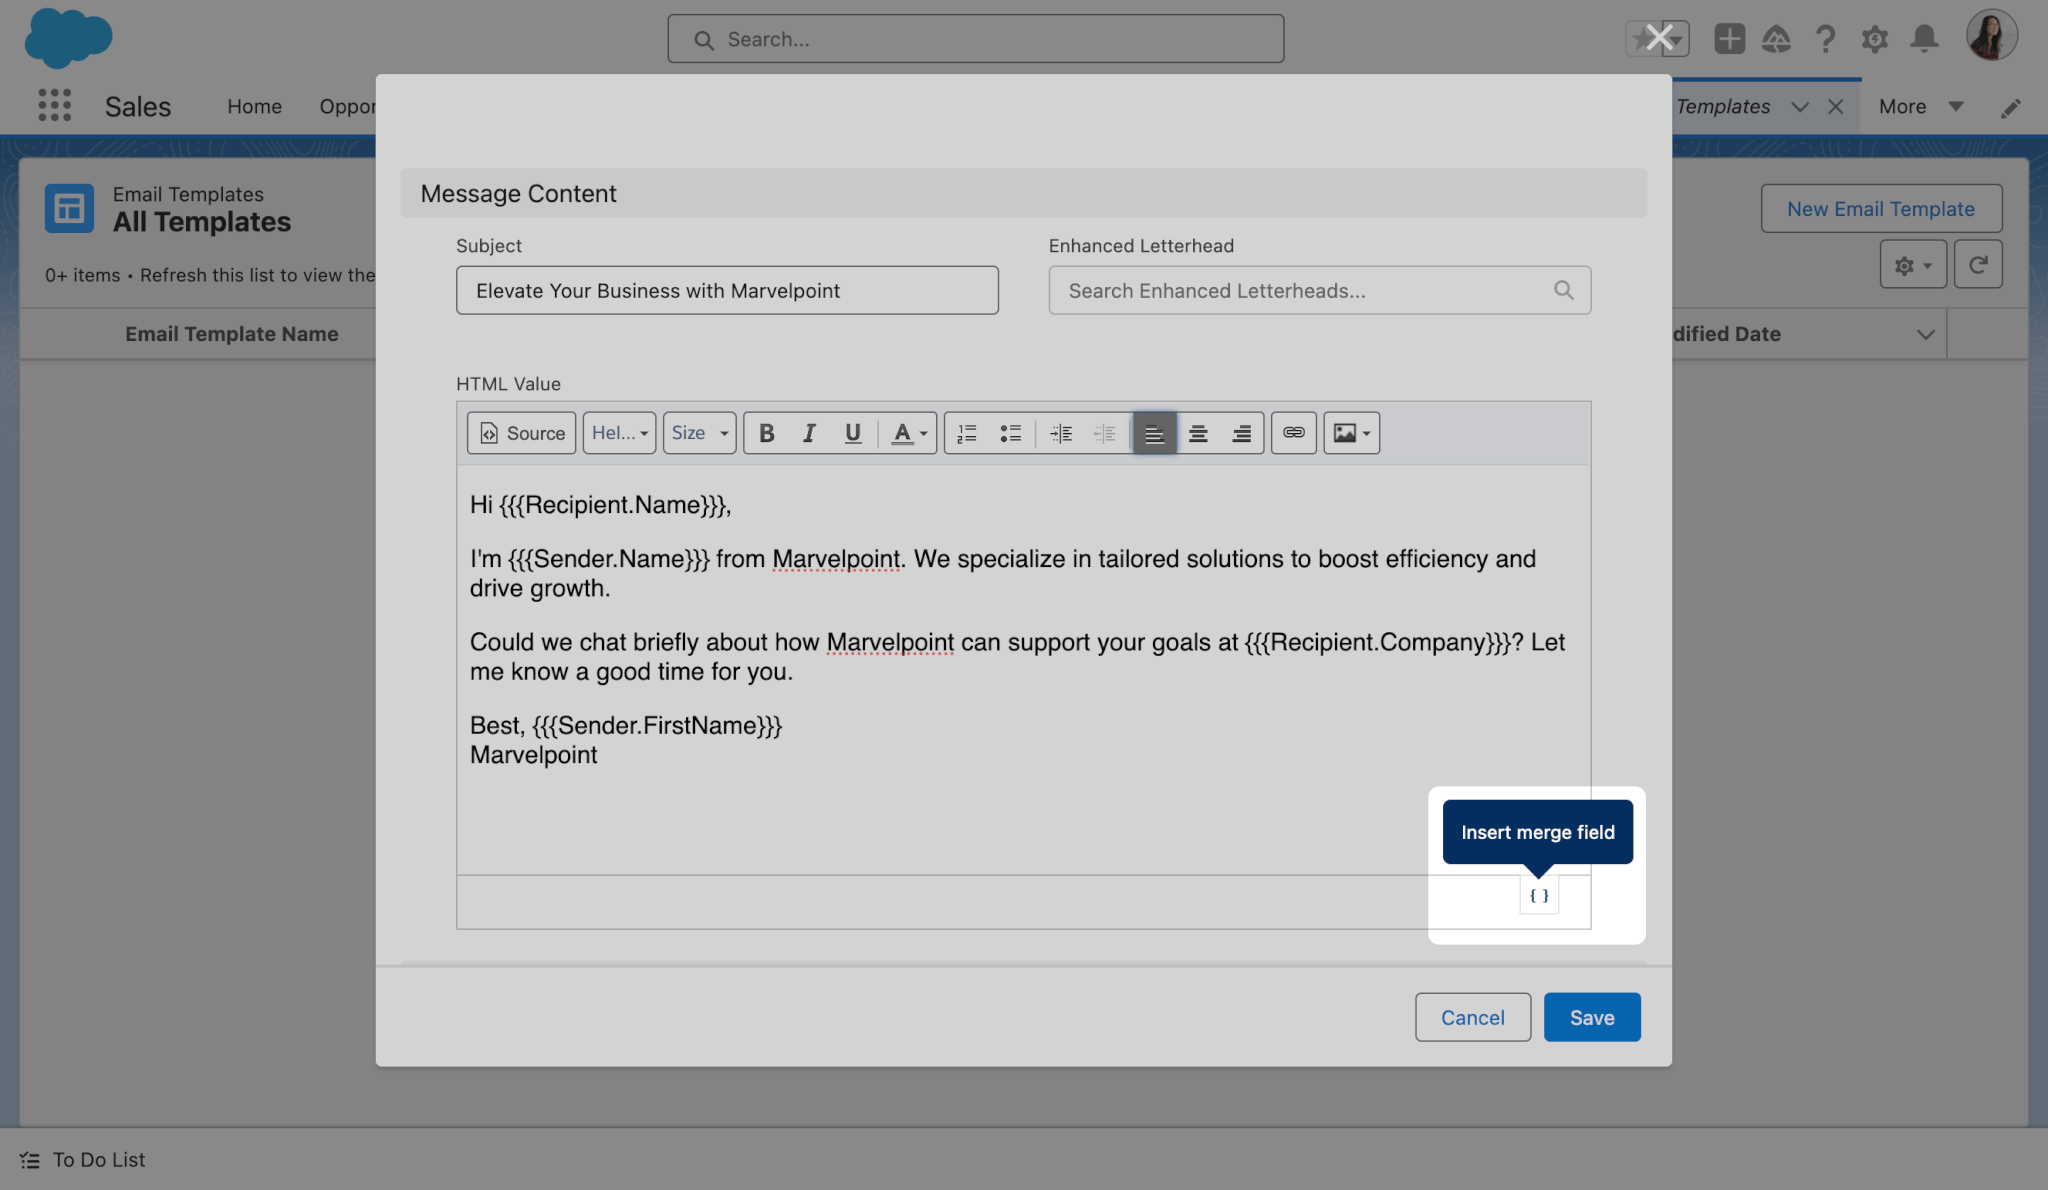
- Enter the subject and body of your email template. This can be as simple or as complex as you like – apply basic rich text styles with the default editor, make direct edits to your template’s HTML with the Source editor, and use merge fields to pull in data from your Salesforce organization.
- To add a merge field to your template, click the Insert Merge Field button in the corner of the HTML Value editor. This will insert your selected merge field at the point where your cursor lies in the HTML Value composer. You can also copy and paste it to the Subject input to use it there.
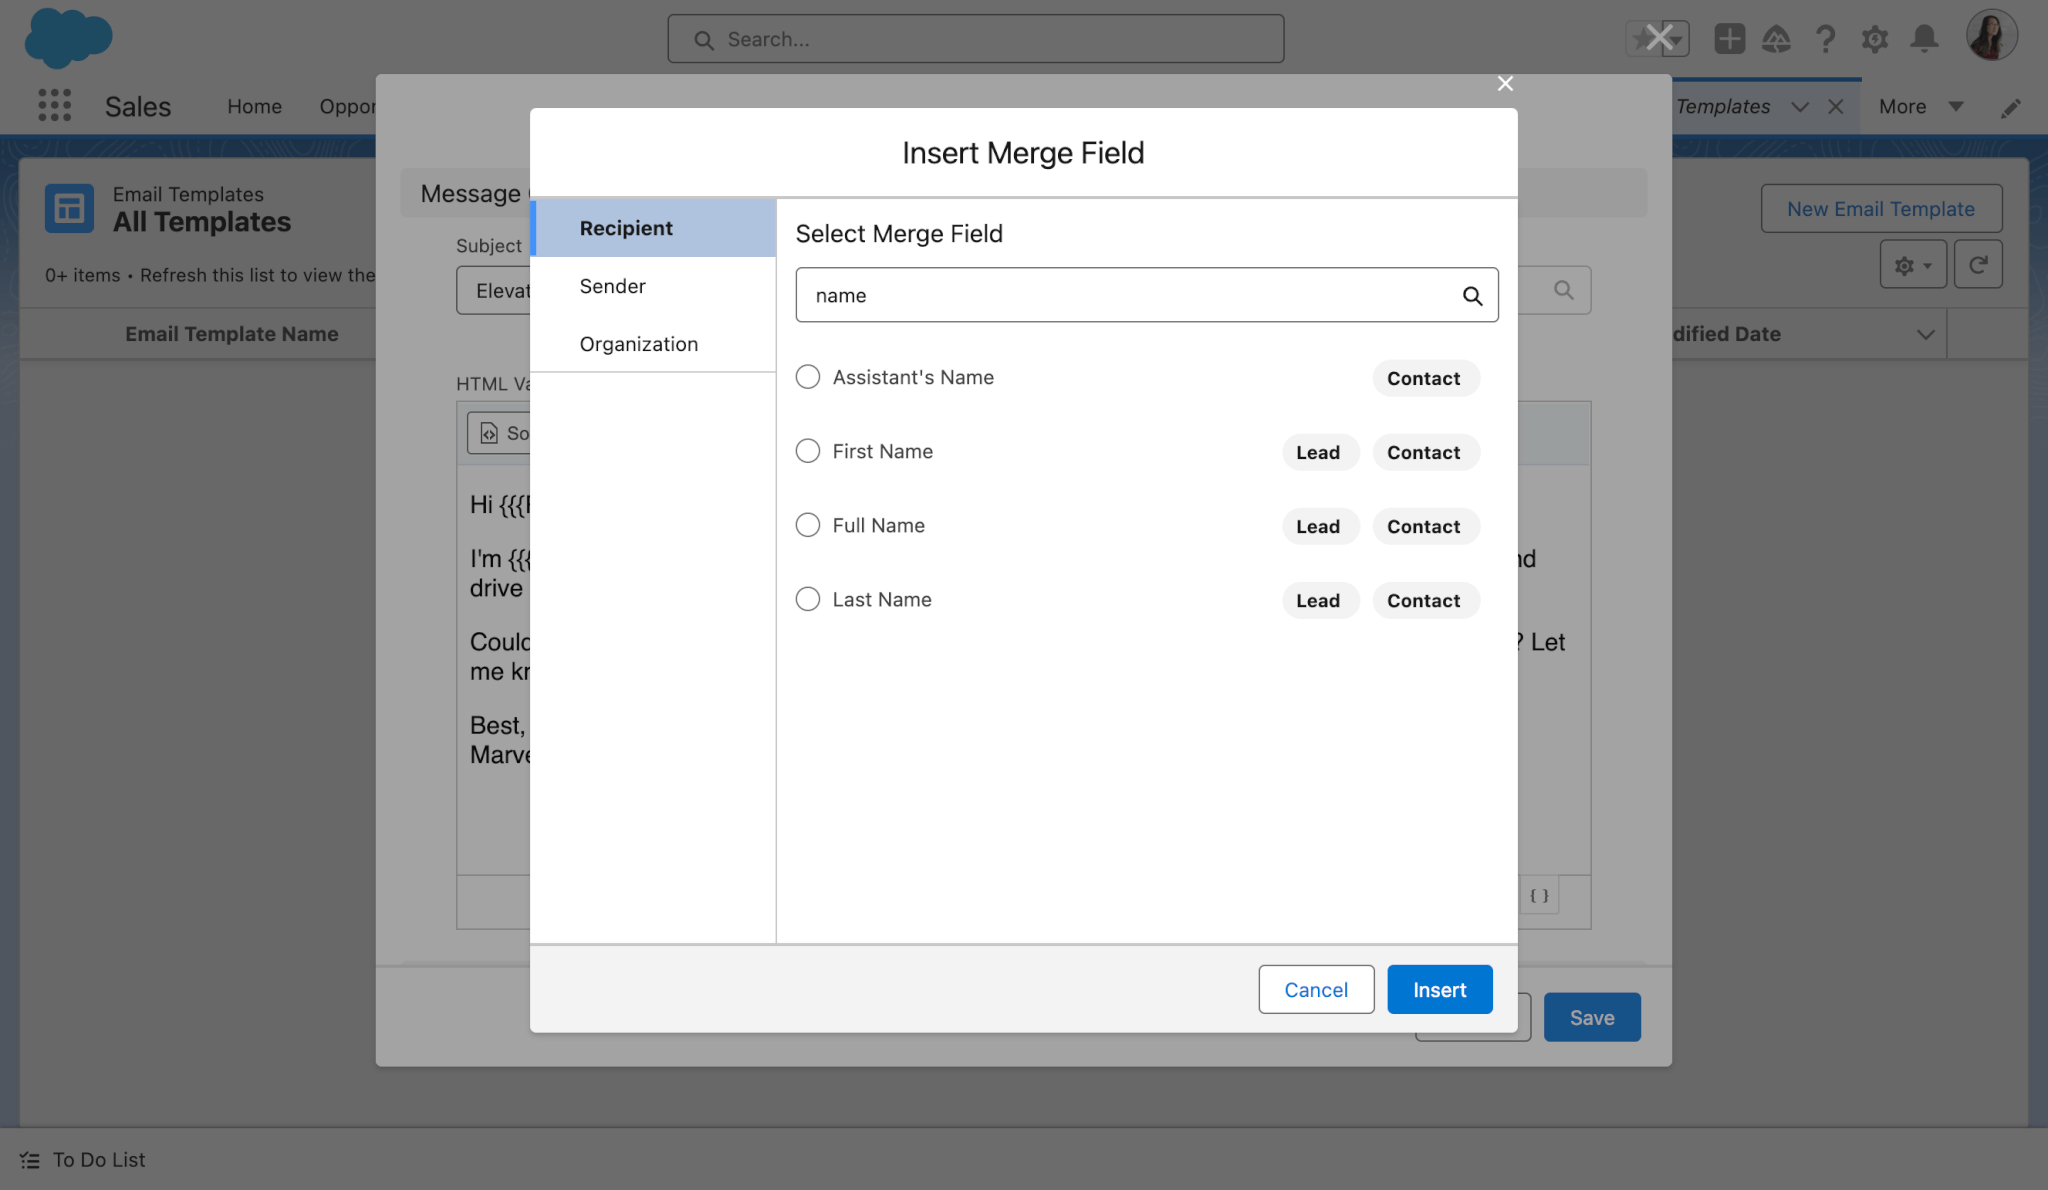
- In the Insert Merge Field modal, you’ll be able to search for and select merge fields that relate to your email’s Recipient and Sender, as well as organization-wide attributes. Take note of the objects that each merge field is compatible with.
- Once you’re done, click Save to view your completed template.
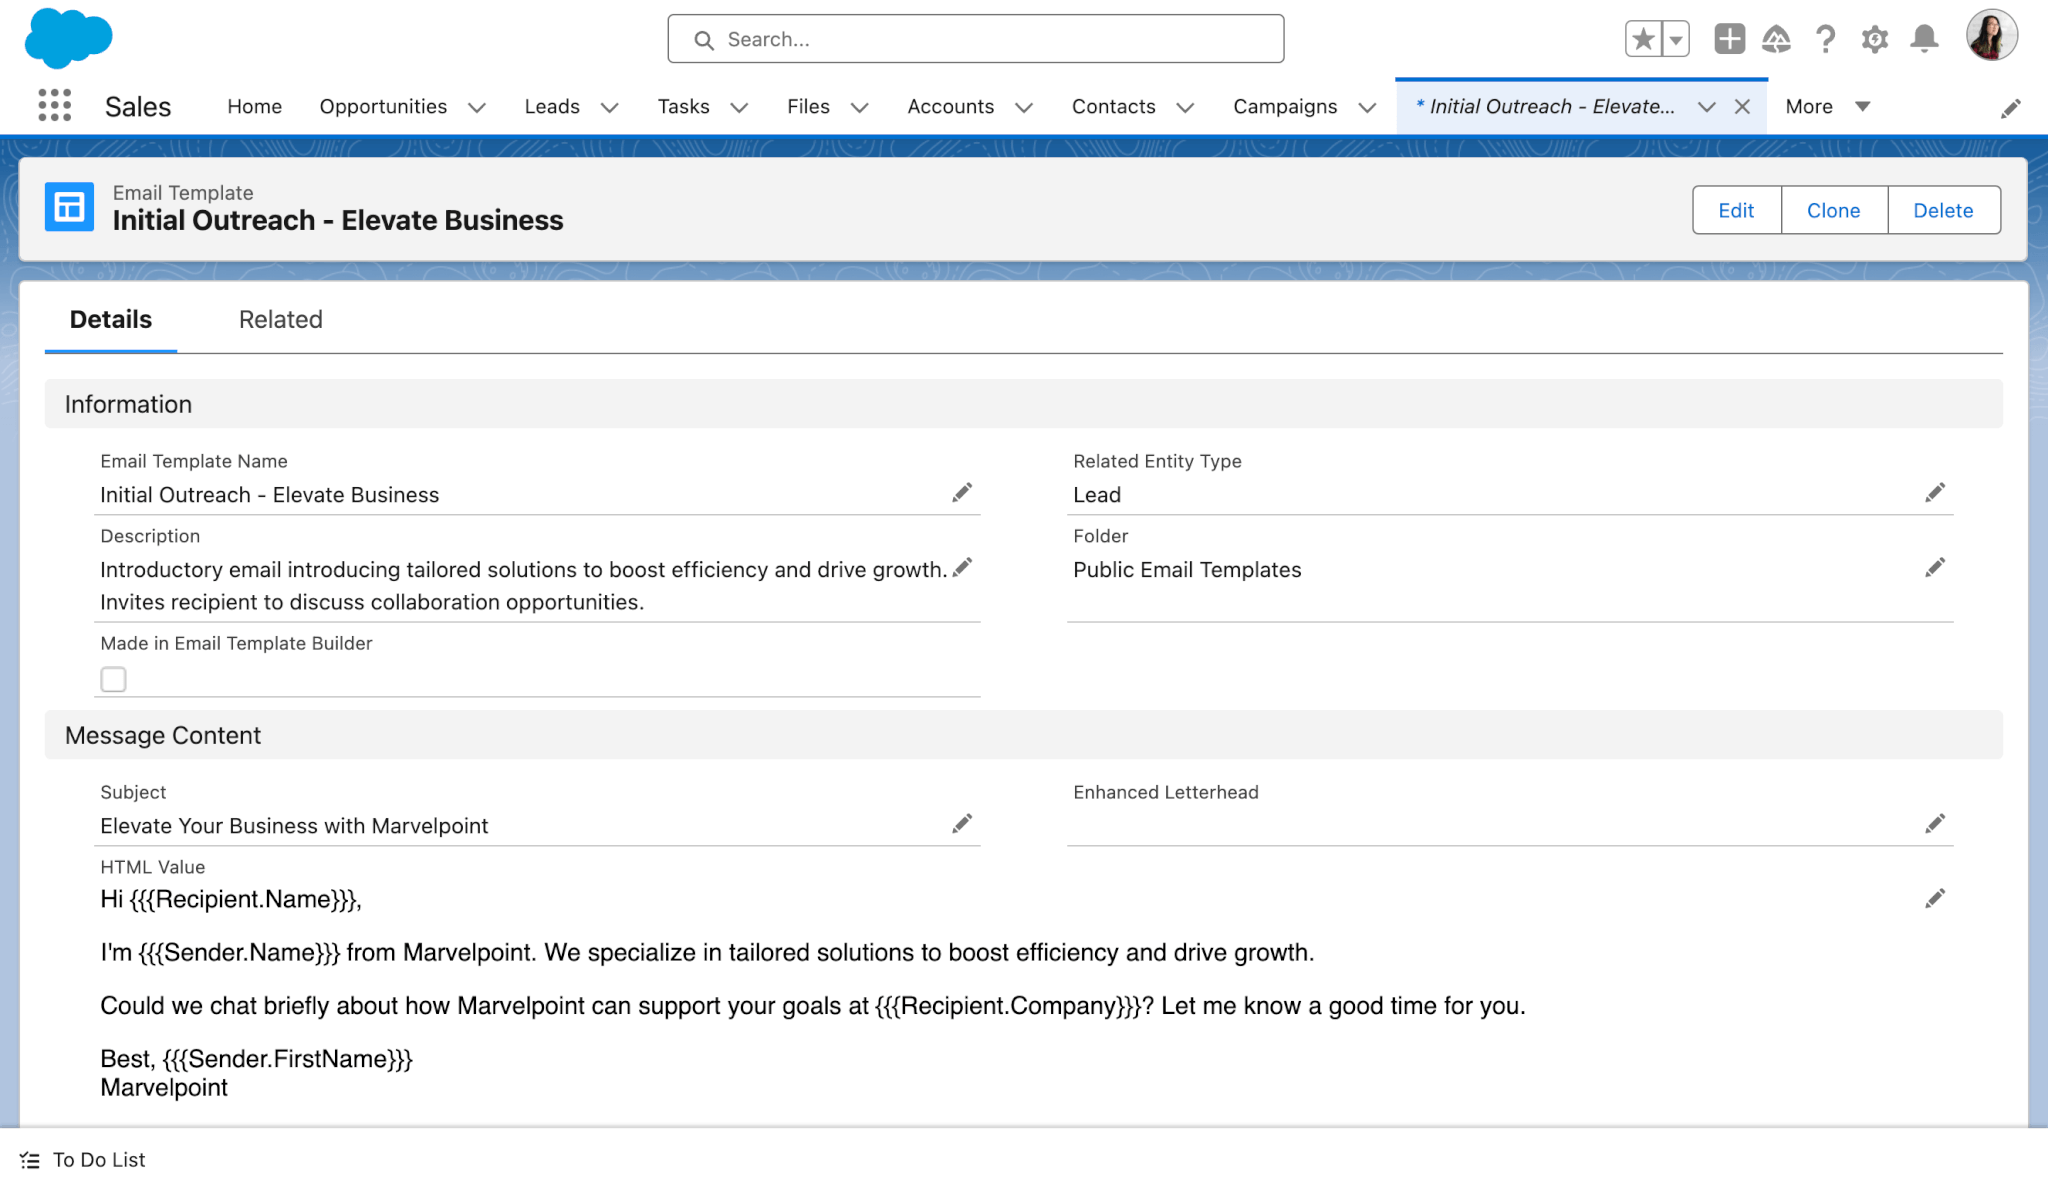
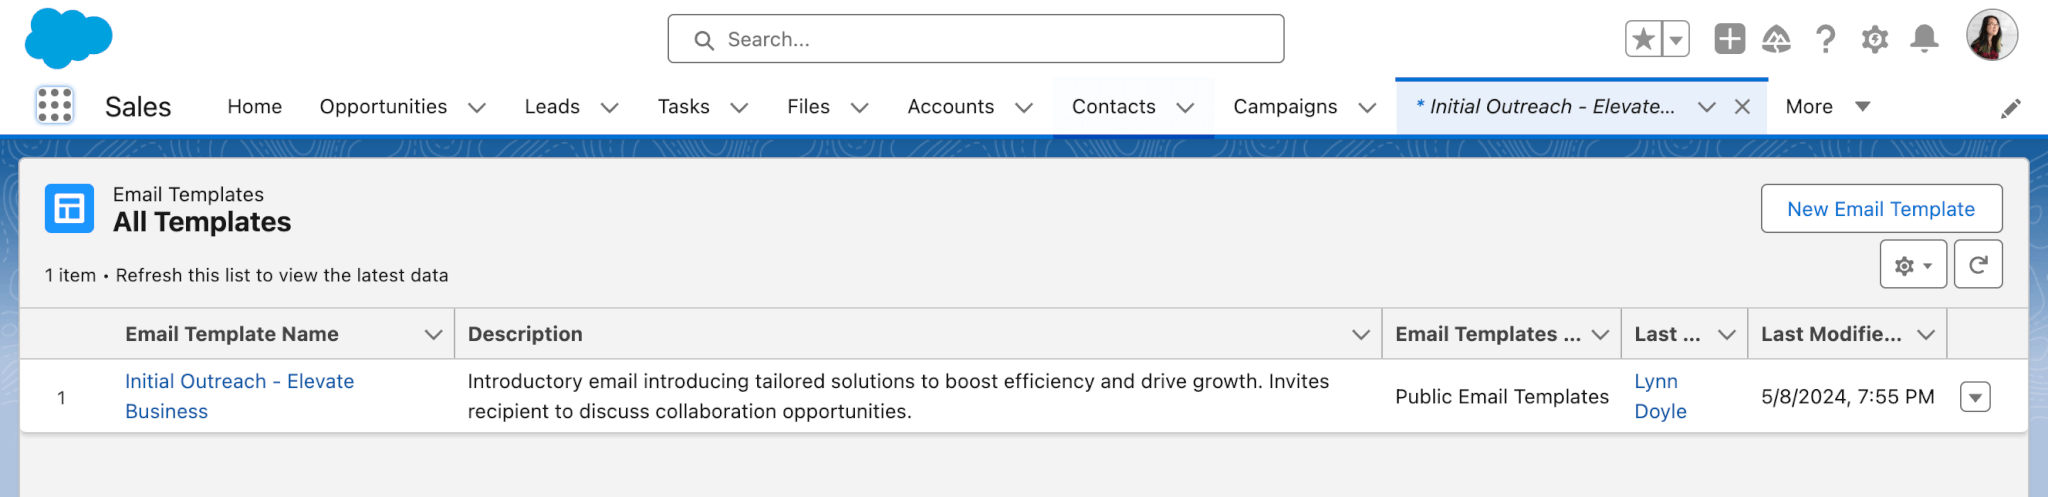
- Your template will now be available to view, edit, clone, or delete from the Email Templates list view.
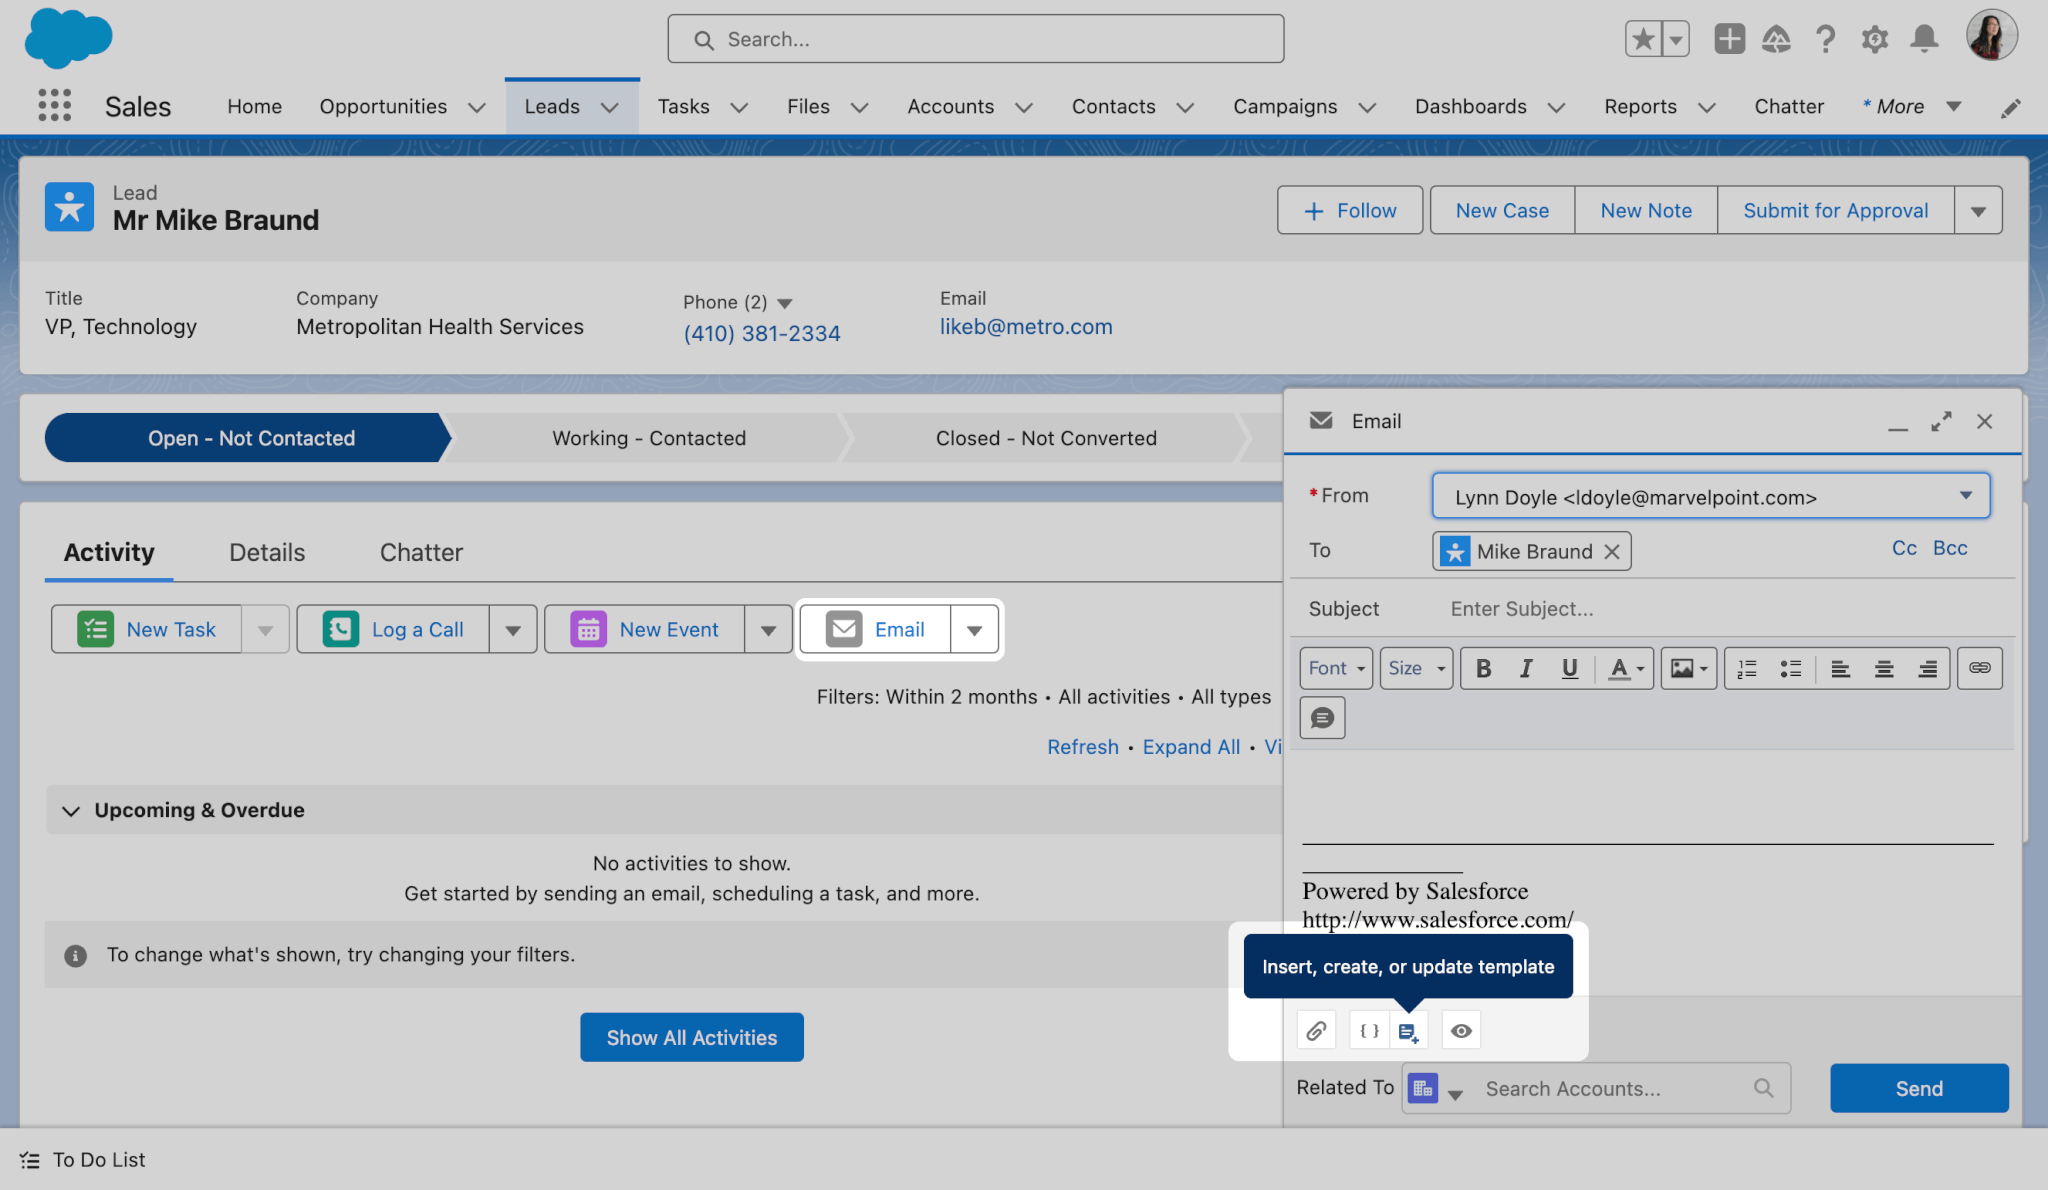
- Let’s give your new template a test run. Go to the record you’d like to send it from and create a new Email. In the footer of the email composer tab, click the Insert, create, or update template button.
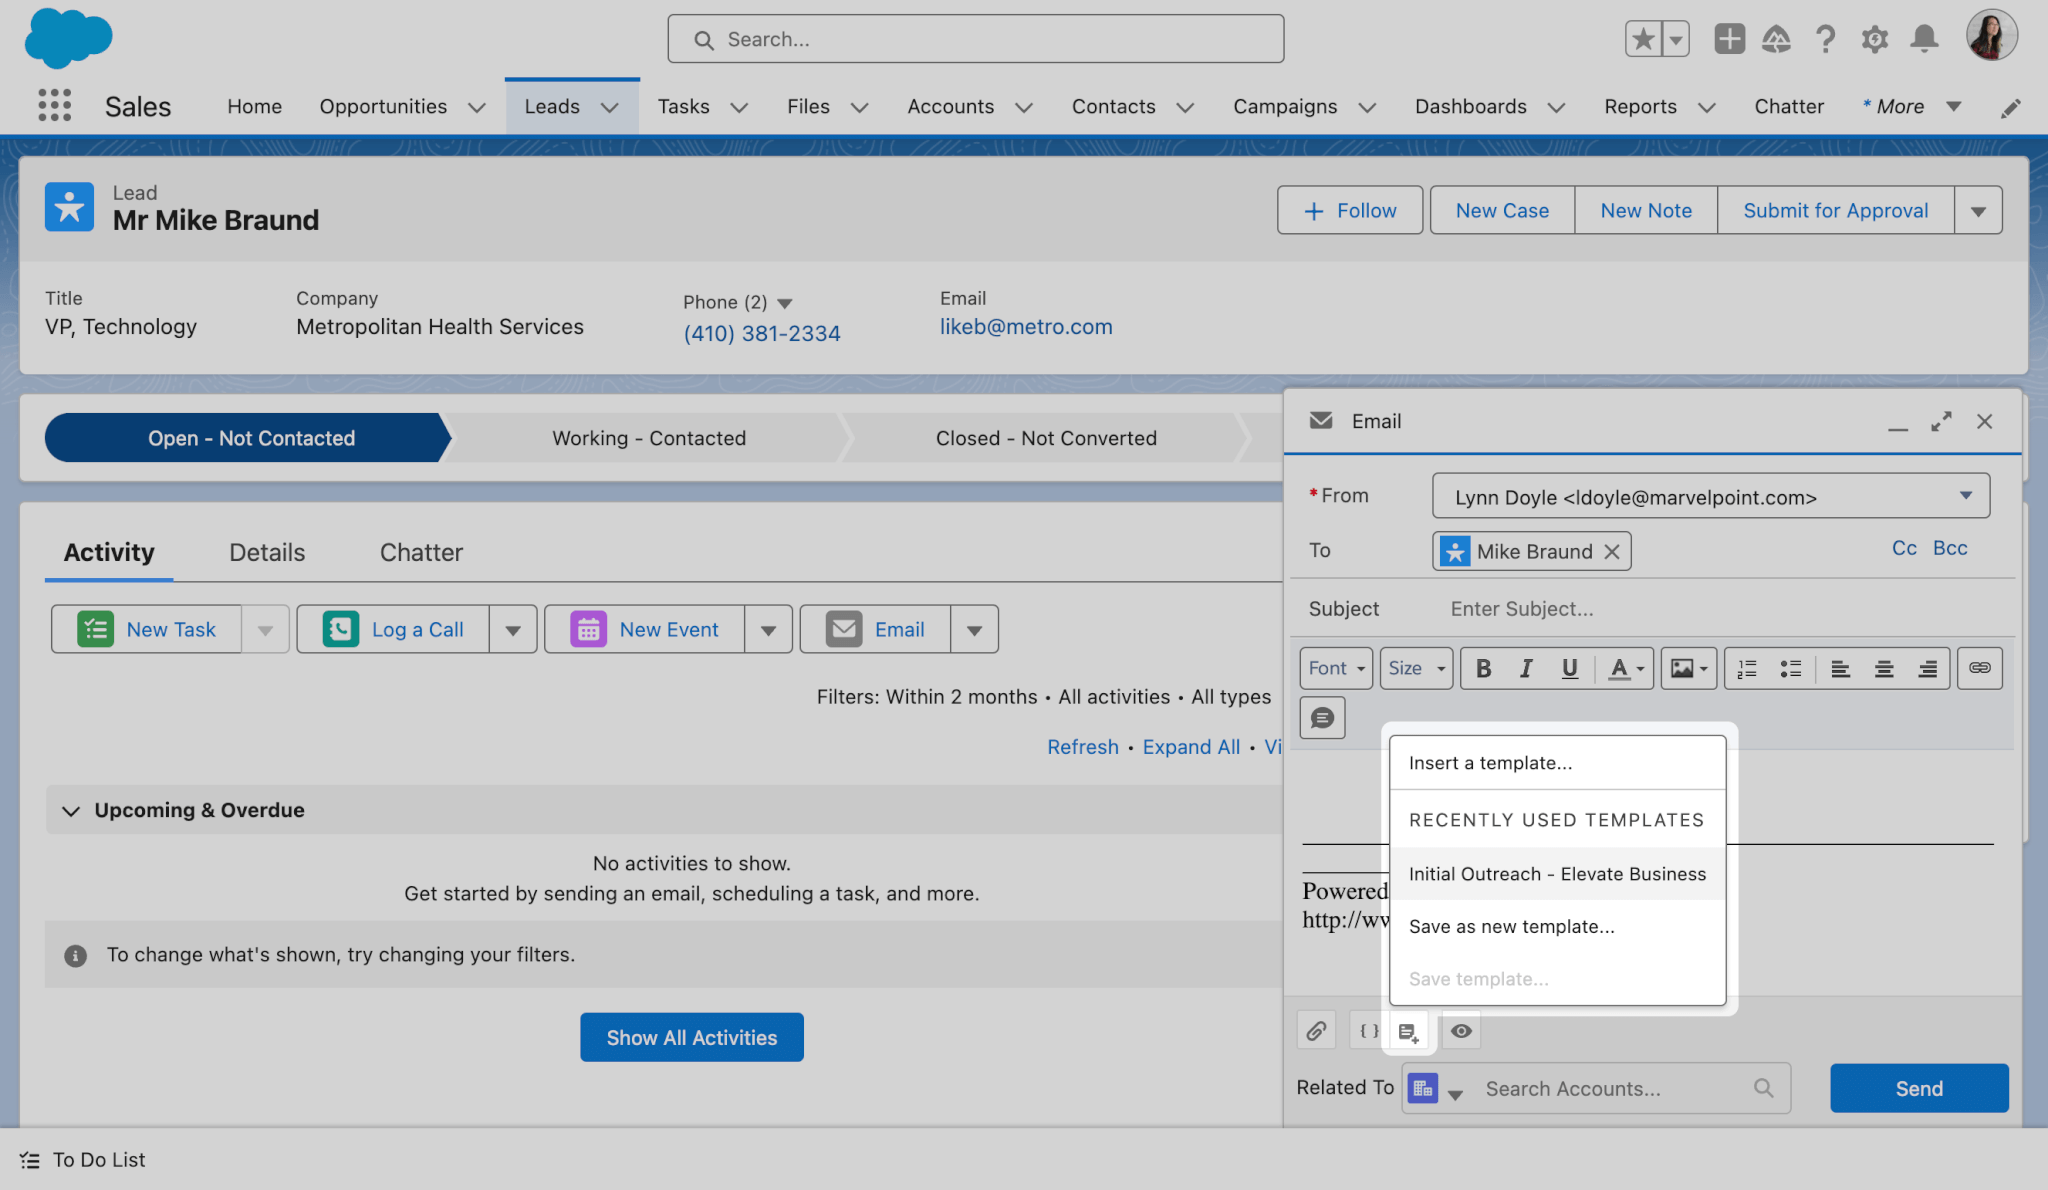
- Select your new template from the menu that appears.
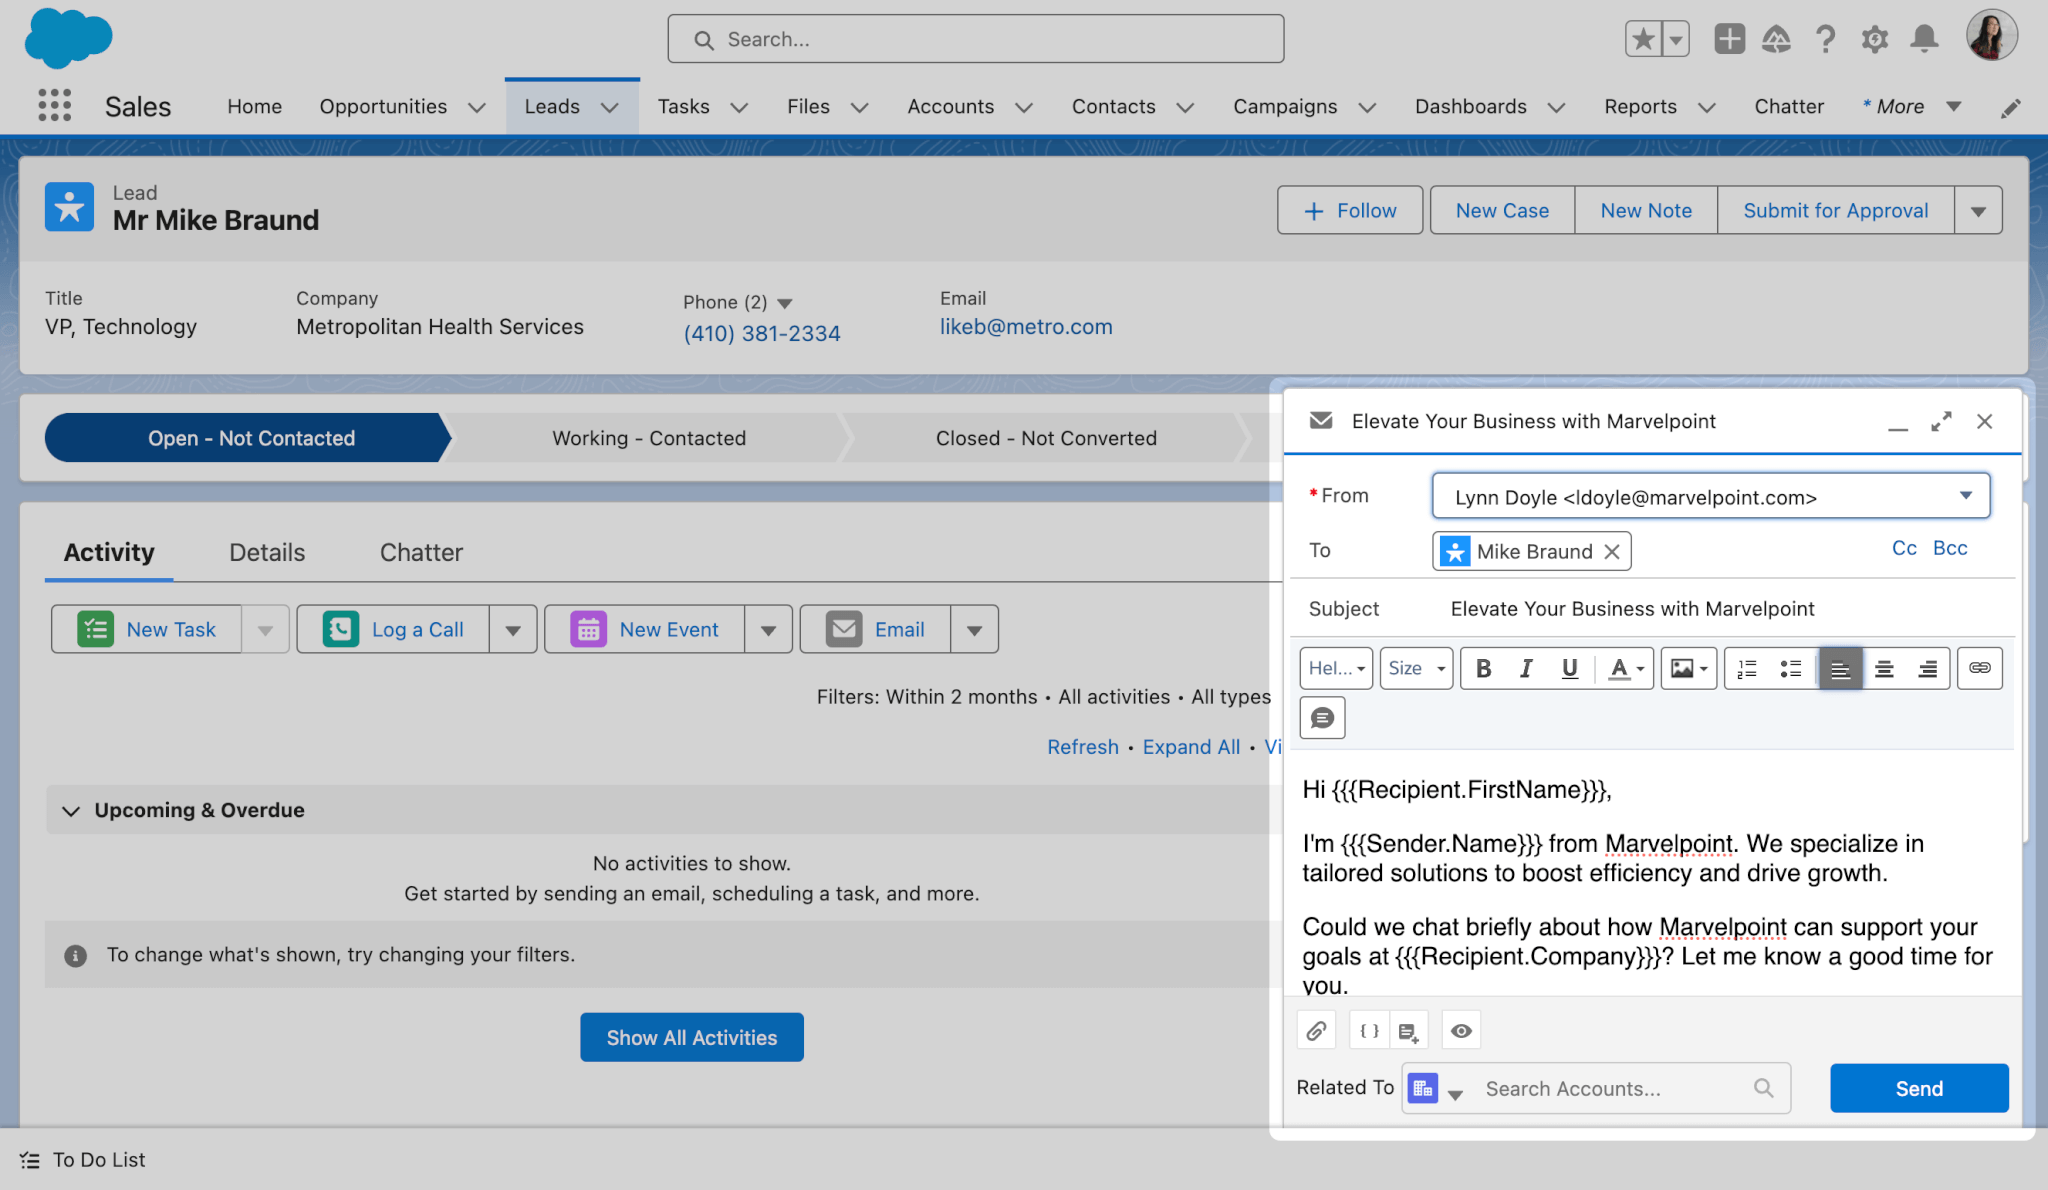
- The subject line and body of your draft email will be replaced with your email template. From here, you can make last-minute edits to the content of the template before clicking Send.
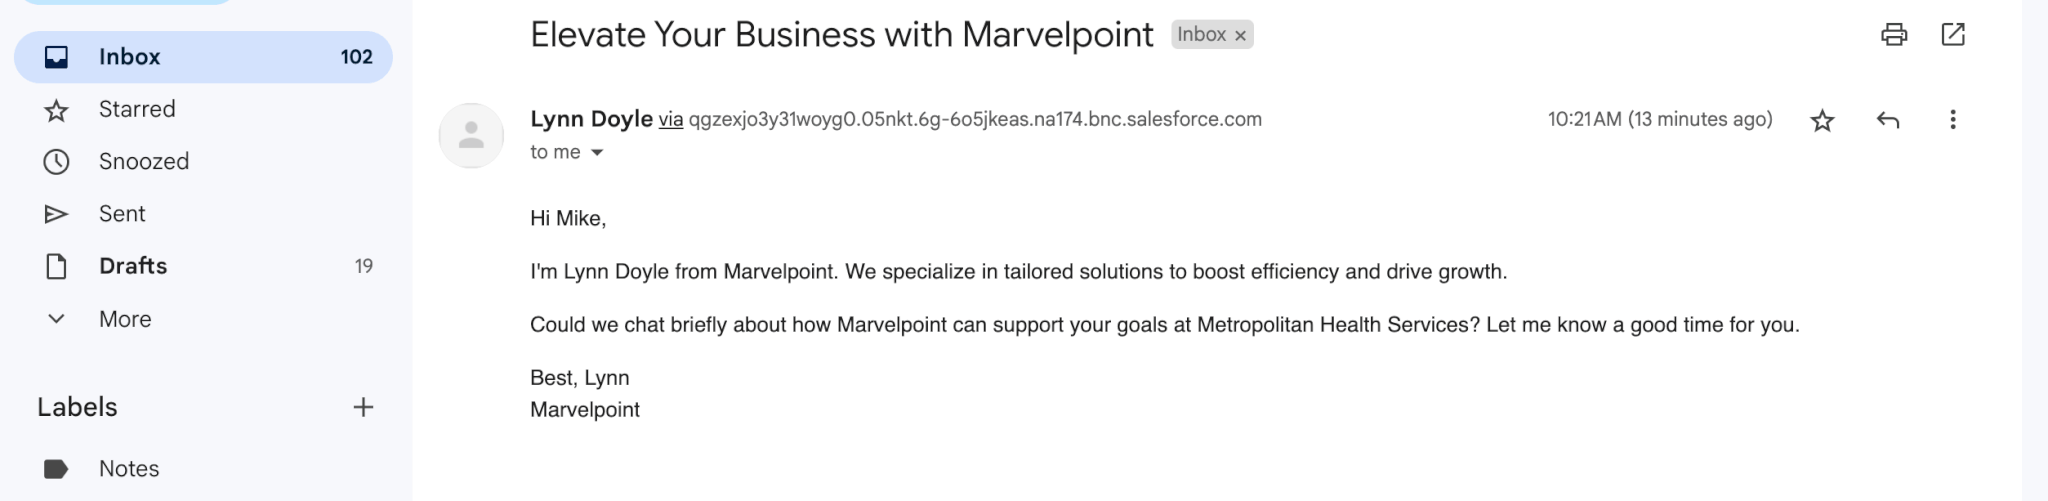
- Here’s what that looks like on the recipient’s end. The merge fields in the template have pulled in the appropriate data from your Salesforce organization.
Not bad! You’re all set to blast this out to every email address on every crumpled business card in your Dreamforce backpack!
How to Create an Enhanced Letterhead in Salesforce Lightning Experience
Our basic template gets the job done, but it's fair to say that it lacks a little razzle-dazzle. The Salesforce Lightning email composer is fully capable of adding images and styling on a per-template basis, but if you want to apply some consistent visual hallmarks across your email template library, you’ll probably want to set up an Enhanced Letterhead.
An Enhanced Letterhead is simply a standardized header and footer that can be applied to any basic Lightning email template in your organization, using the same rich text editor as the Lightning email composer. Like email templates themselves, an Enhanced Letterhead can be as simple as a plain text email signature or as complex as an image-rich header banner underpinned by a tricky HTML table.
Here, we’ll use Enhanced Letterheads to create a simple branded header and footer for our organization, using images, merge fields, and just a touch of the Source HTML editor.
Creating Enhanced Letterheads
- From the App Launcher, navigate to Enhanced Letterheads.
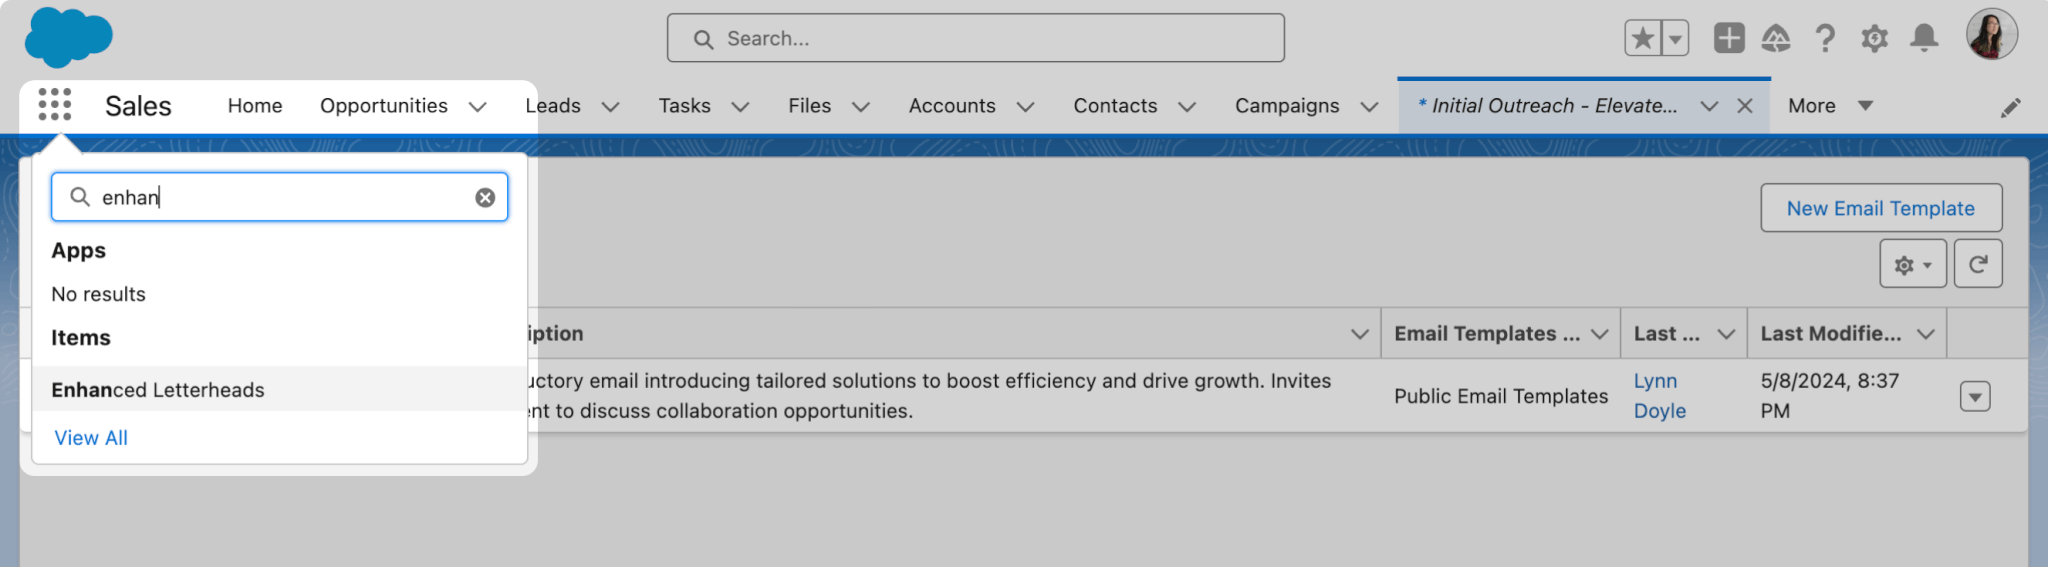
- Create a New Enhanced Letterhead.

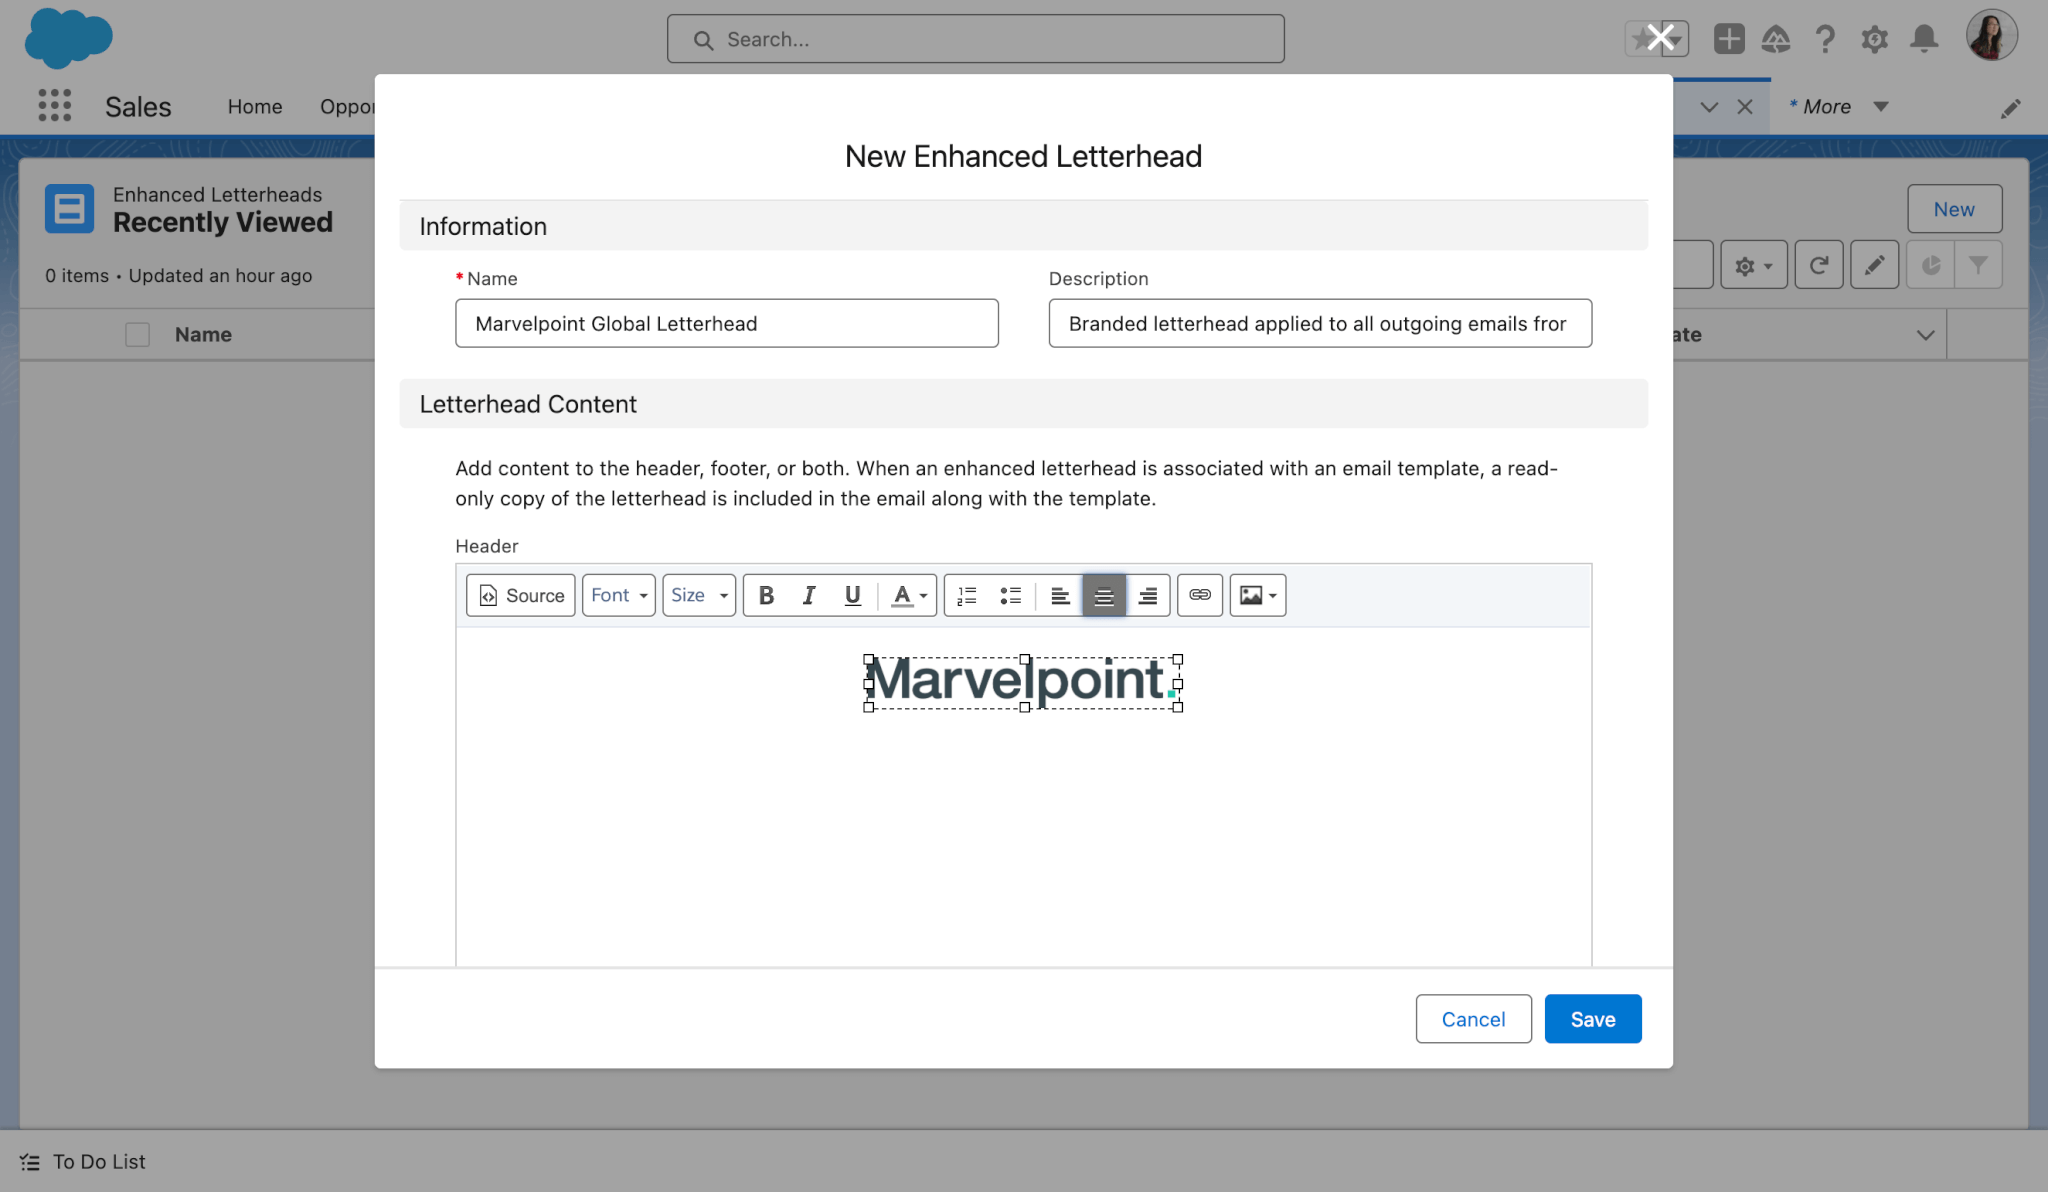
- The Enhanced Letterhead Content editor should look familiar – it’s identical to the one that we used to create our basic Salesforce Lightning email template, including an HTML Source editor, rich text styles, and a Merge Field picker. Here, we’ll add a subject line, insert our company logo, adjust it to a tasteful size, and center it in the header.
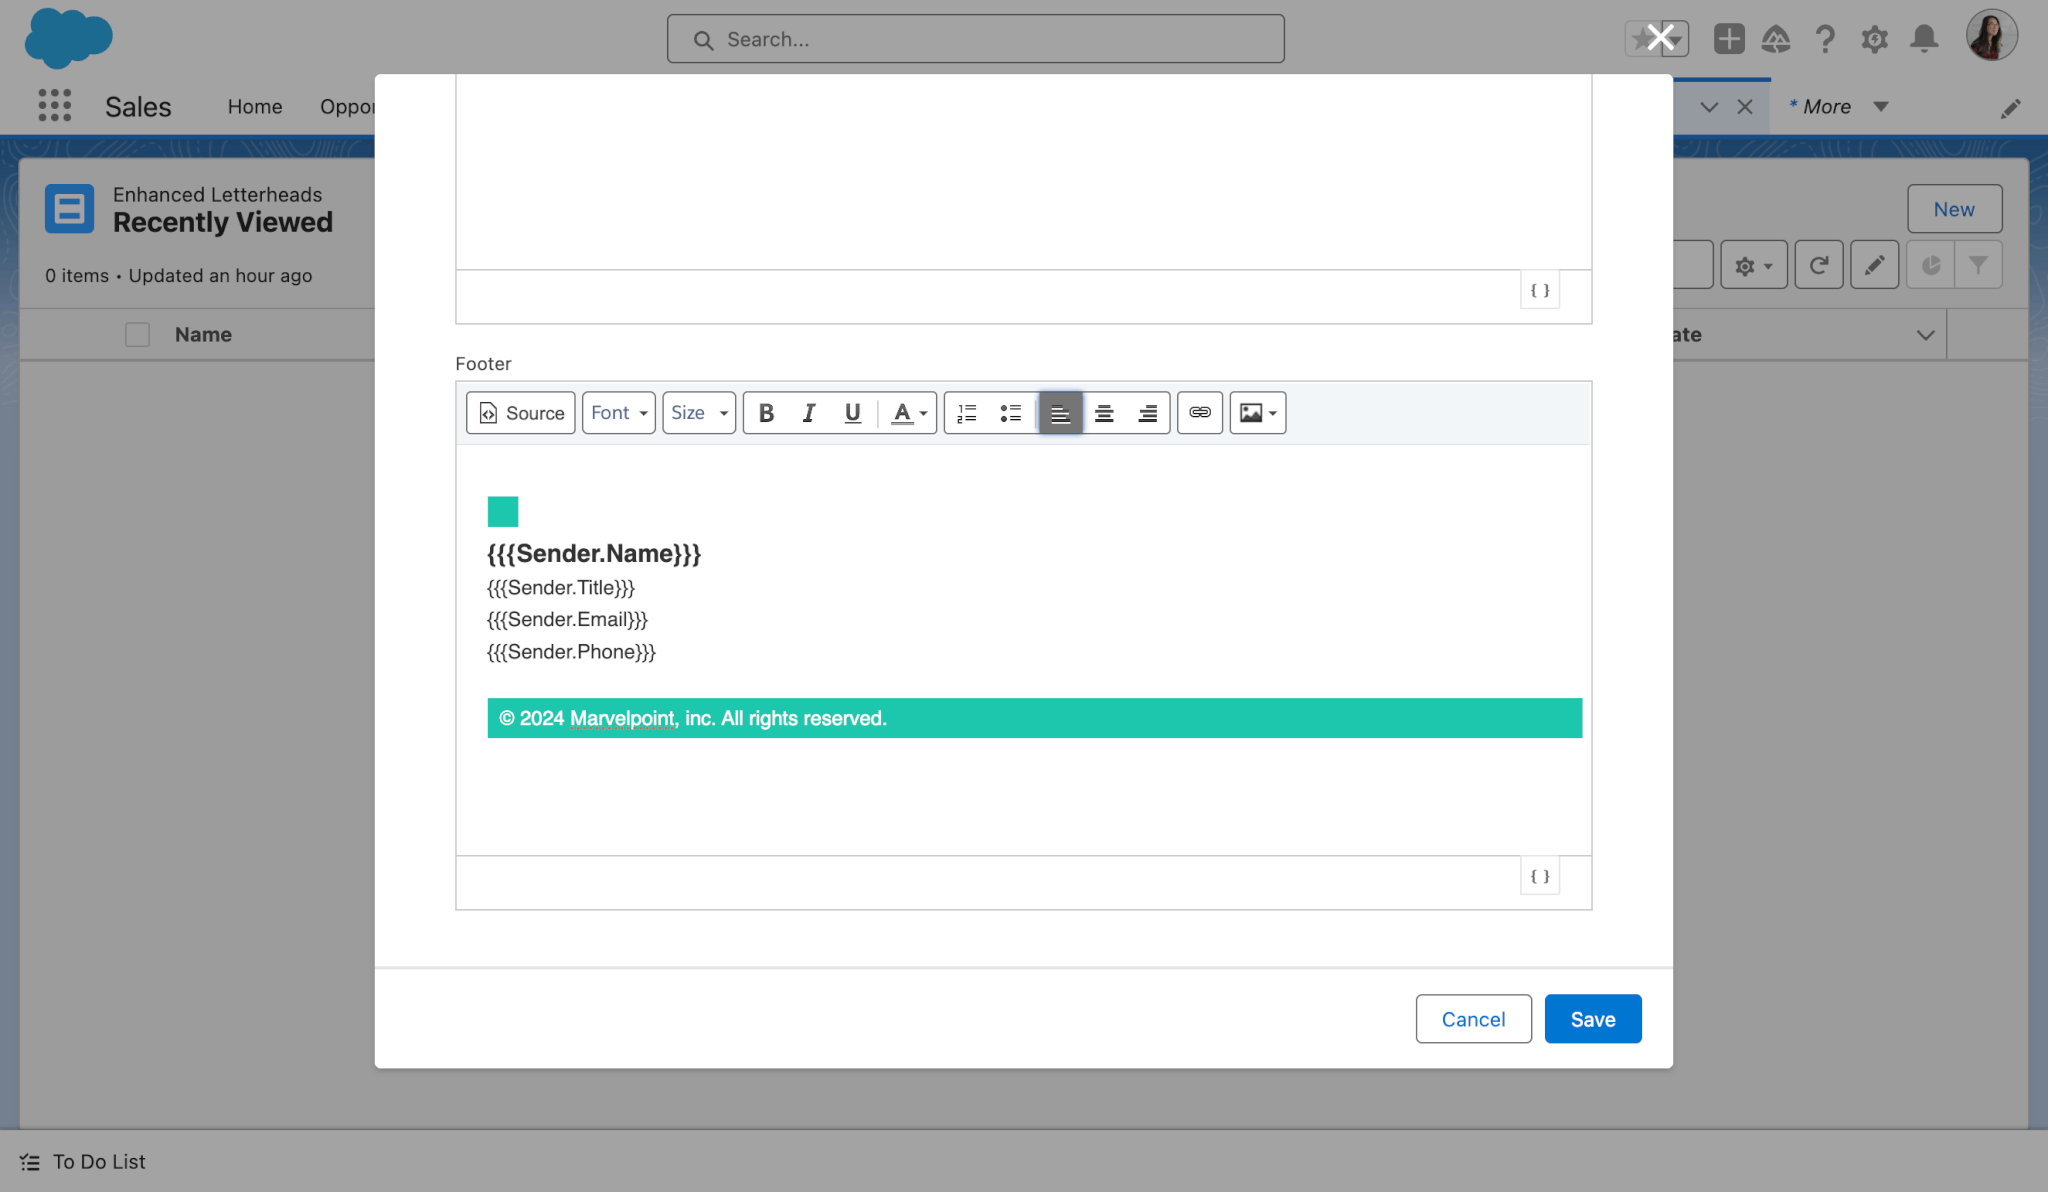
- Then, we’ll create an email signature in the footer with another image, some merge fields, and an HTML div with a colorful background.
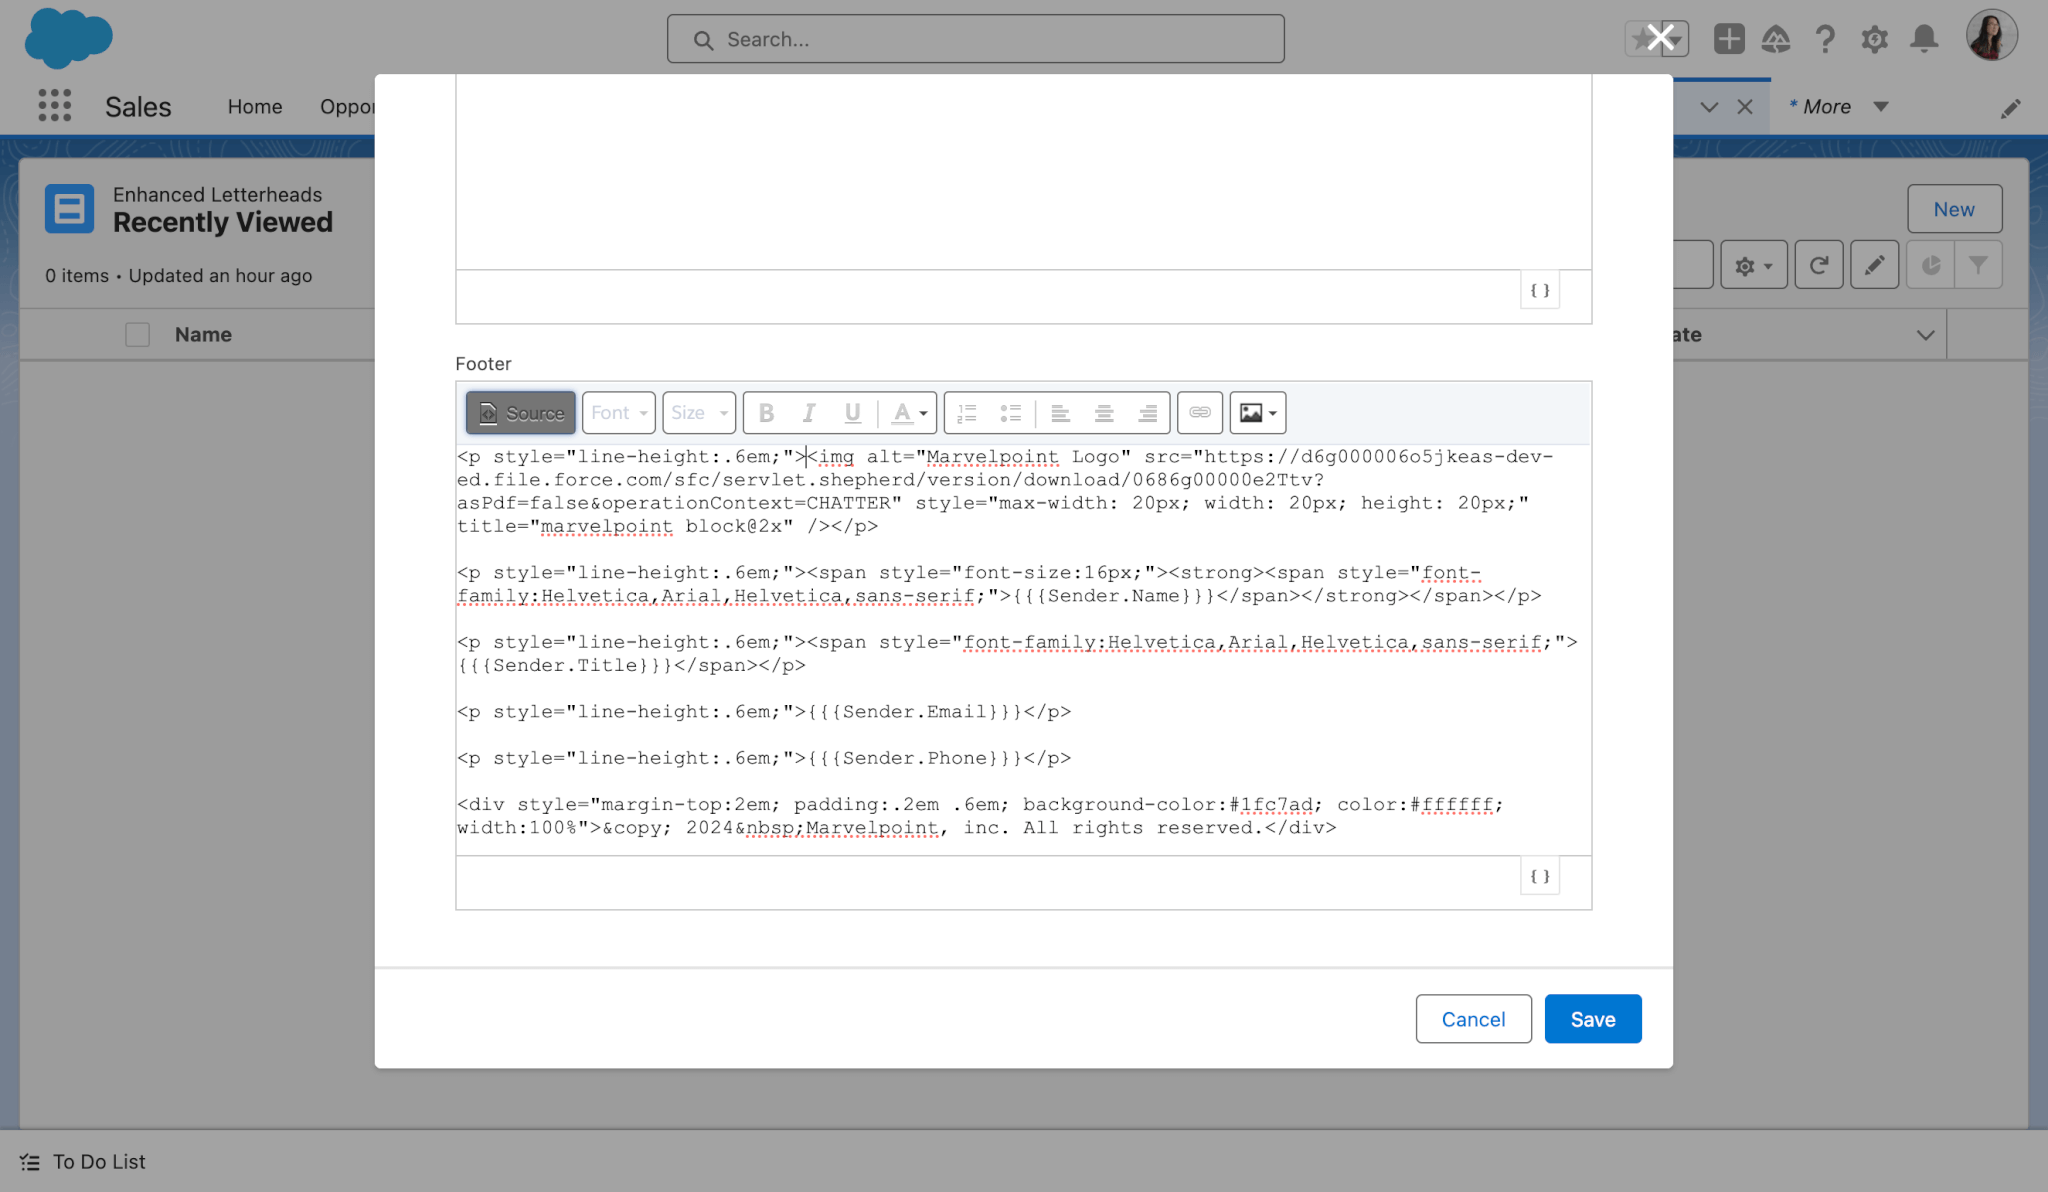
- Here’s what that looks like in the Source HTML editor. Scared yet? If you know your way around HTML styles, you can make bespoke edits to your Enhanced Letterhead here. Note that all your styles need to be inline; you can’t import a CSS stylesheet.
- Click Save, and you’re ready to add your Enhanced Letterhead to any Lightning email template created with the basic Lightning email template editor.
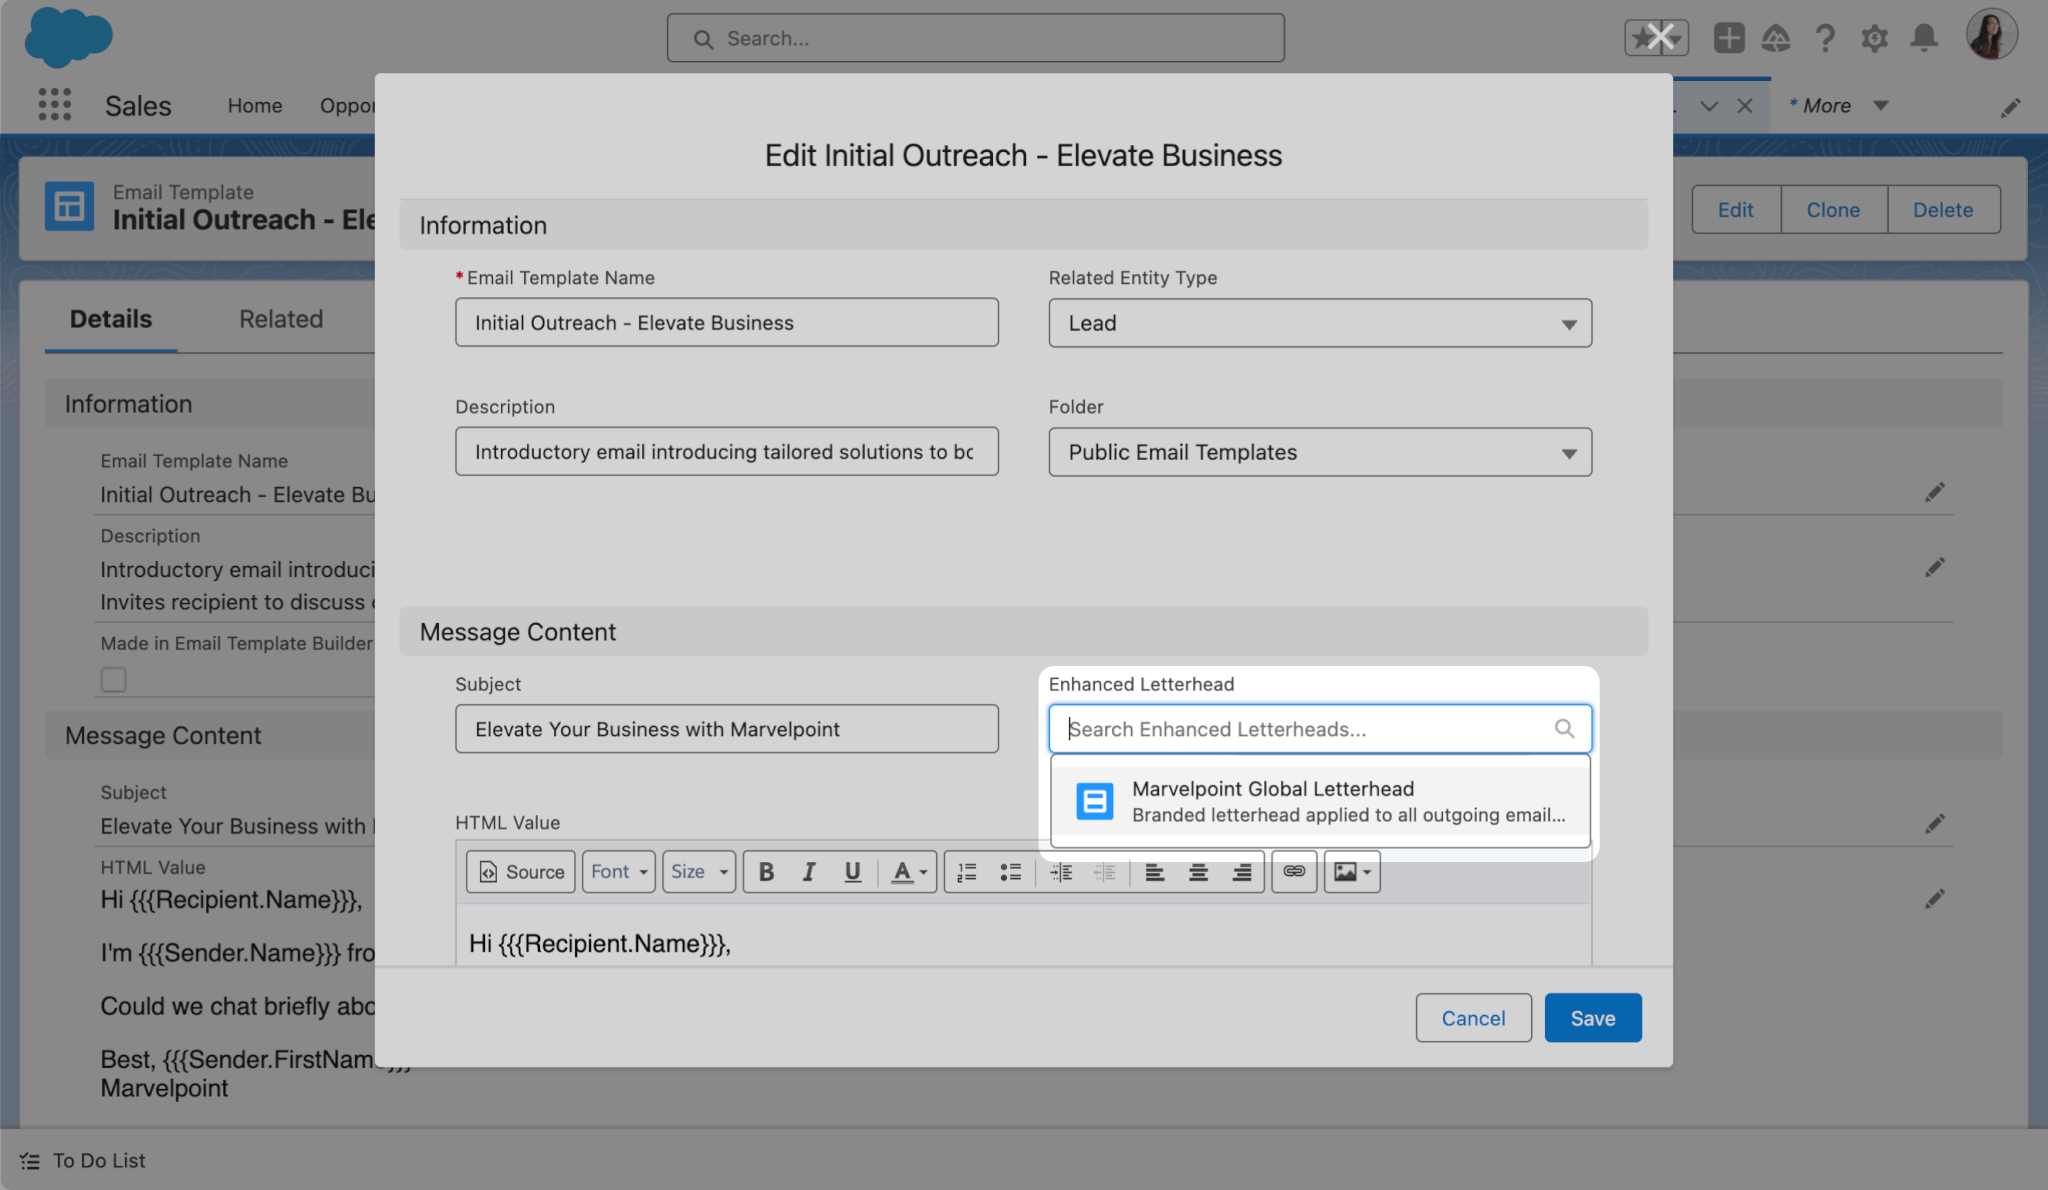
- Here’s what that looks like in your recipient’s inbox.

Considerations for Working with Enhanced Letterheads
You can’t get yourself into too much trouble with Enhanced Letterheads, but as with all things Salesforce, there are a few gotchas to keep in mind here:
- Only global merge fields can be used with Enhanced Letterheads – That means fields related to the sender of the email and your organization as a whole. You can’t reference fields from specific objects.
- Enhanced Letterheads don’t work with Salesforce Classic Email Templates – Lightning Enhanced Letterheads and Classic email templates use different markup languages that simply don’t mix. It’d be like trying to use a Game Genie on a PS5.
- Enhanced Letterheads don’t work with Email Template Builder – What’s Email Template Builder? Funny you should ask…
How to Use Salesforce Lightning Email Template Builder
Finally, we’ve arrived at the shiniest new toy in Salesforce’s array of email design tools: Lightning Email Template Builder. This is a fairly intuitive drag-and-drop editor that allows you to create complex layouts with a few standard component blocks:
- Buttons
- HTML
- Images
- Rich Text
Here, we’ll use all four to create a snazzy event invitation template. But first, we need to do a little housekeeping to set things up.
How to Access Salesforce Email Template Builder
The trickiest thing about Email Template Builder might be the setup process. You’ll need to create and assign a one-trick permission set in order for users to access it.
- To get started, go to Setup > Permission Sets > New.
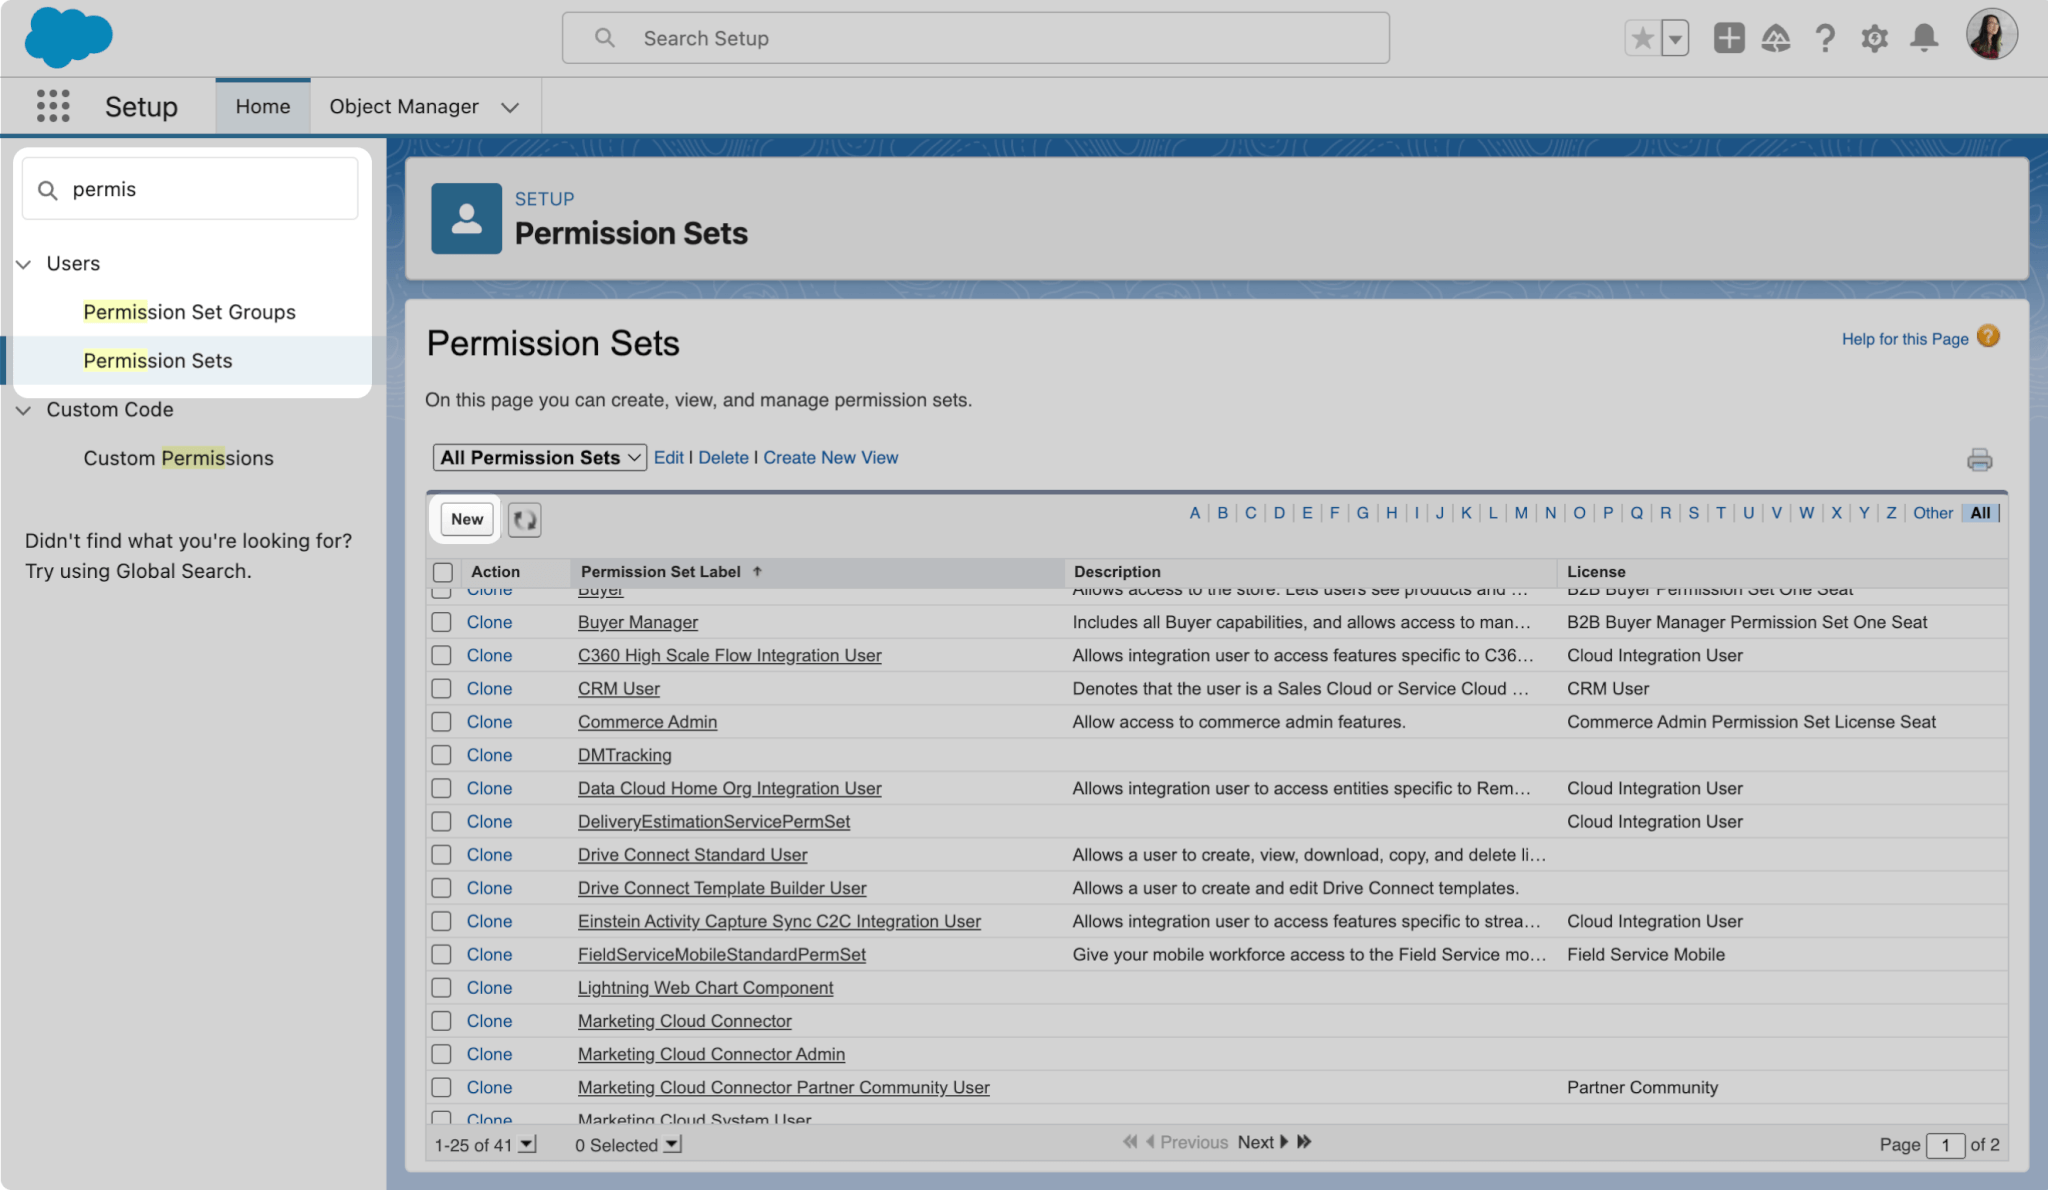
- Create a new permission set. You’ll assign this to all users that need access to Email Template Builder.
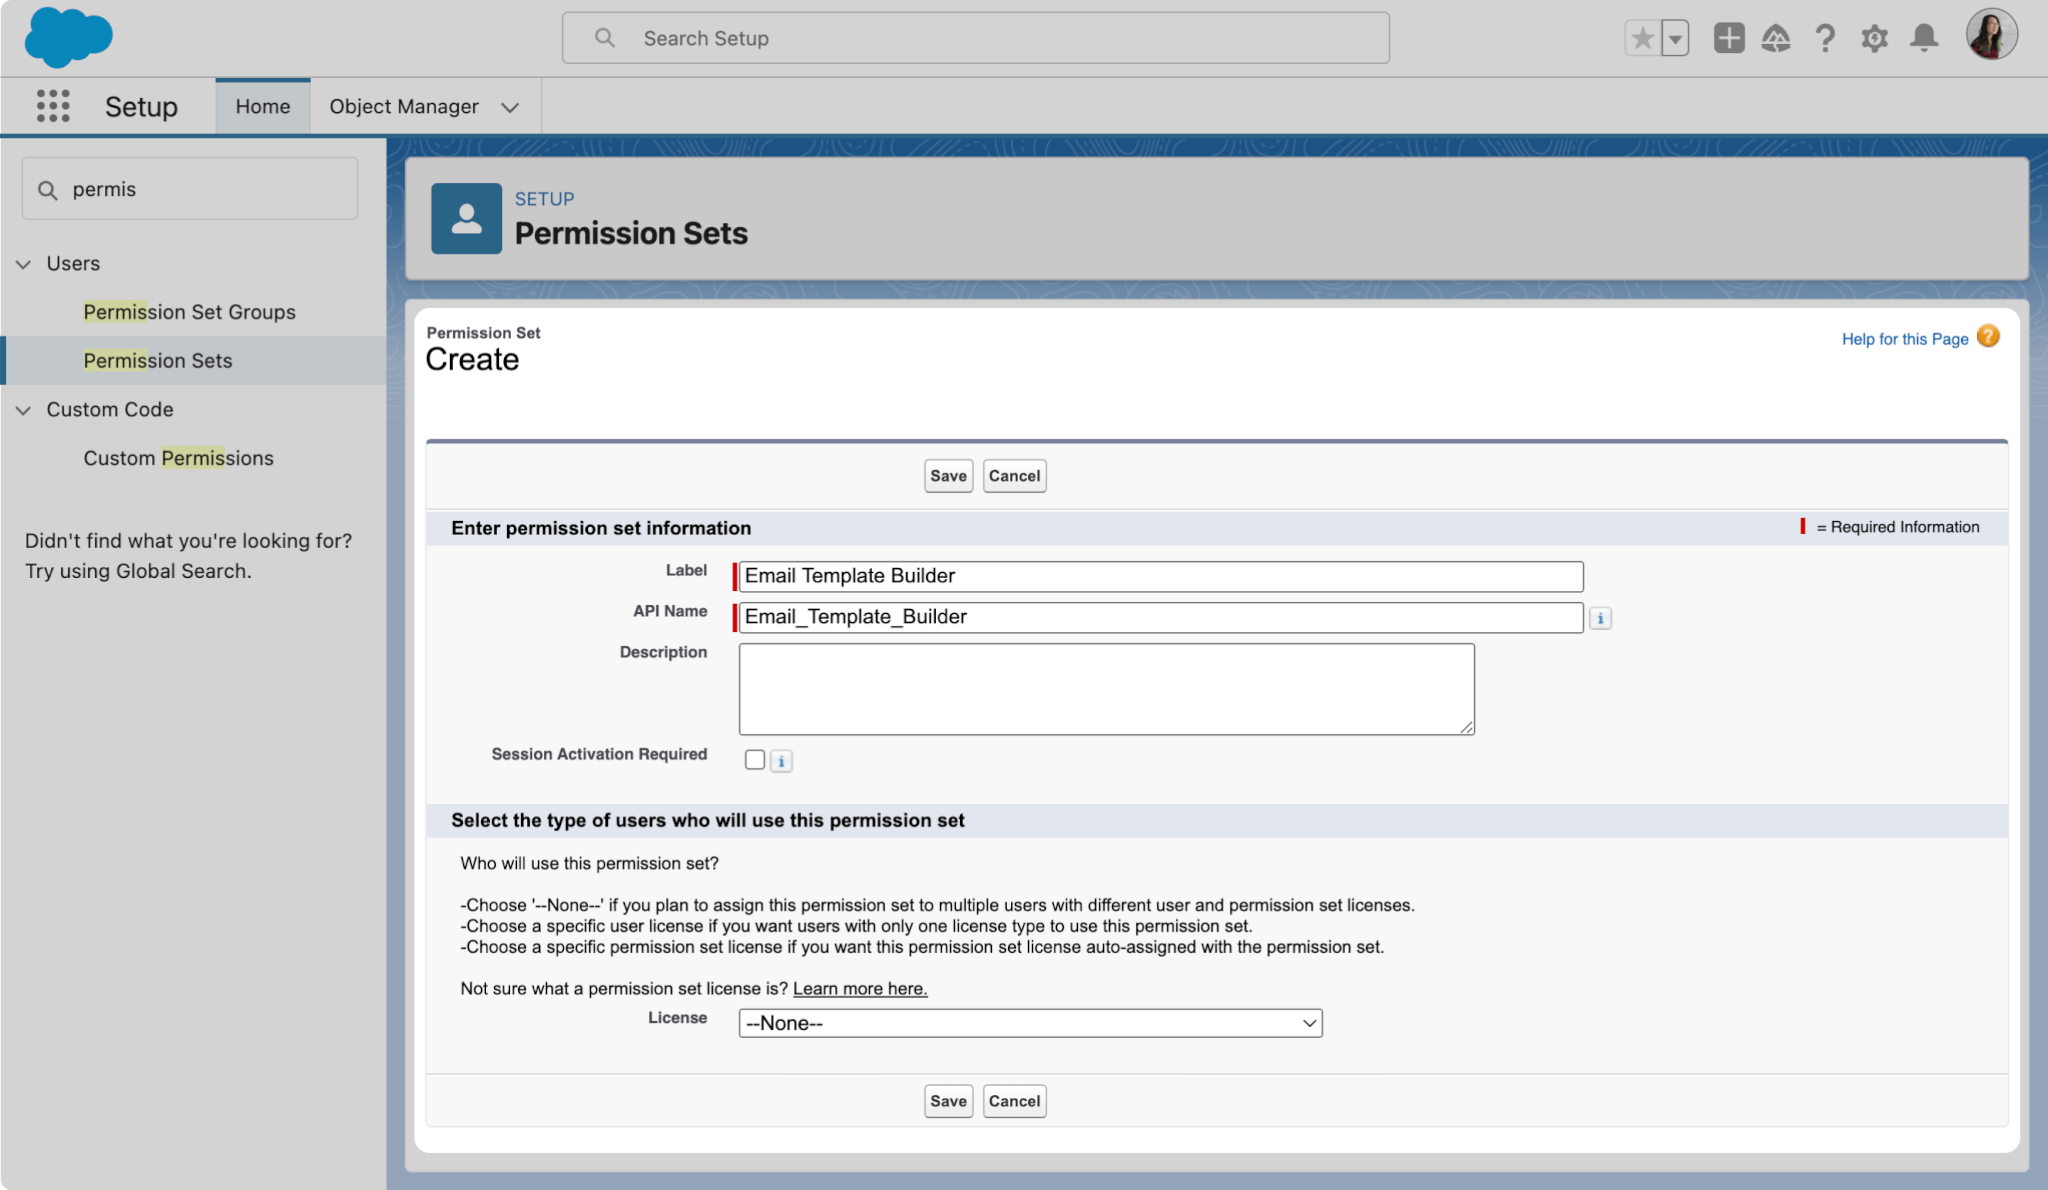
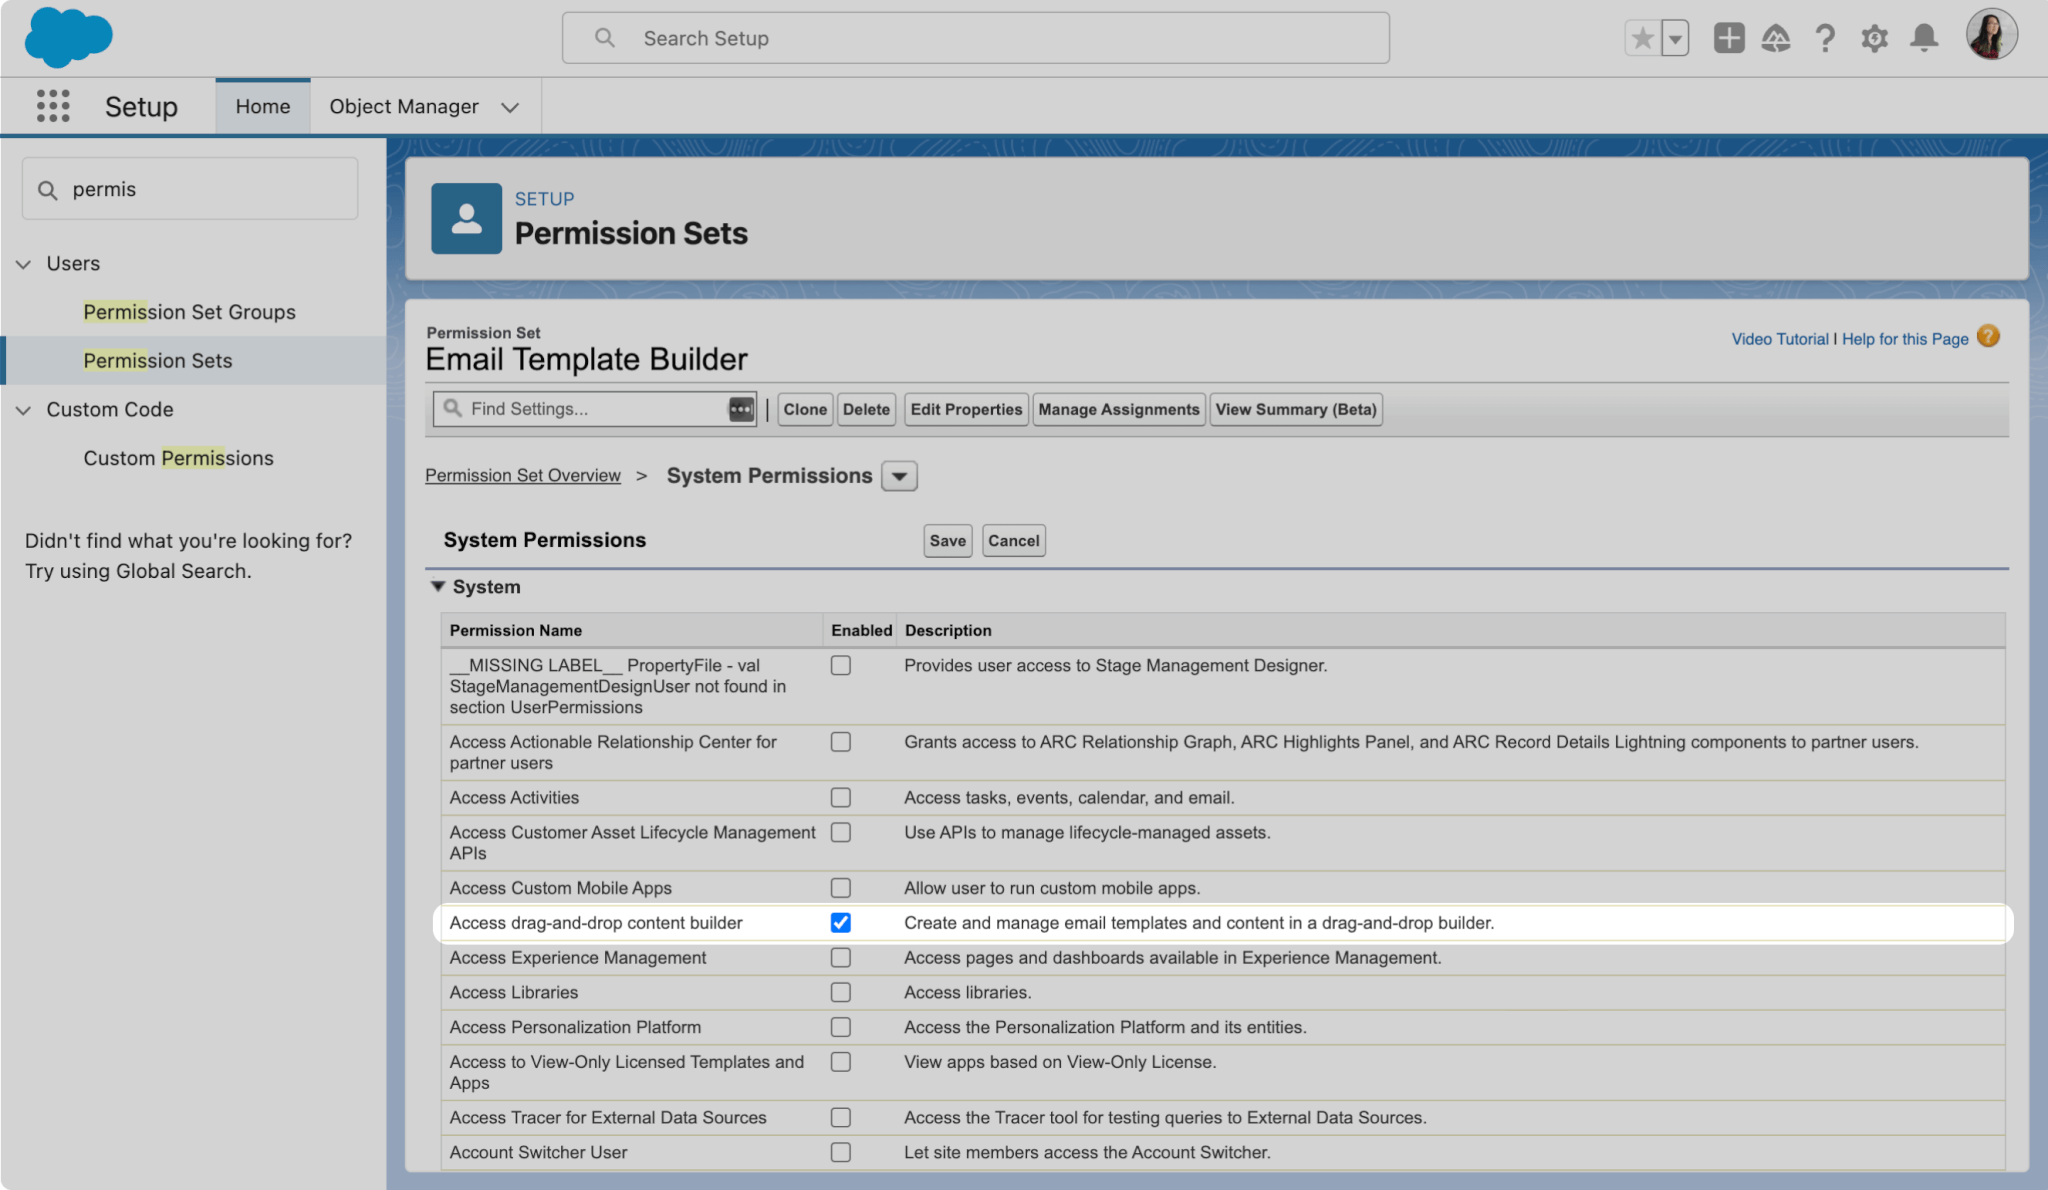
- Click Save and Edit your new permission set. Scroll down to System settings and click System Permissions.
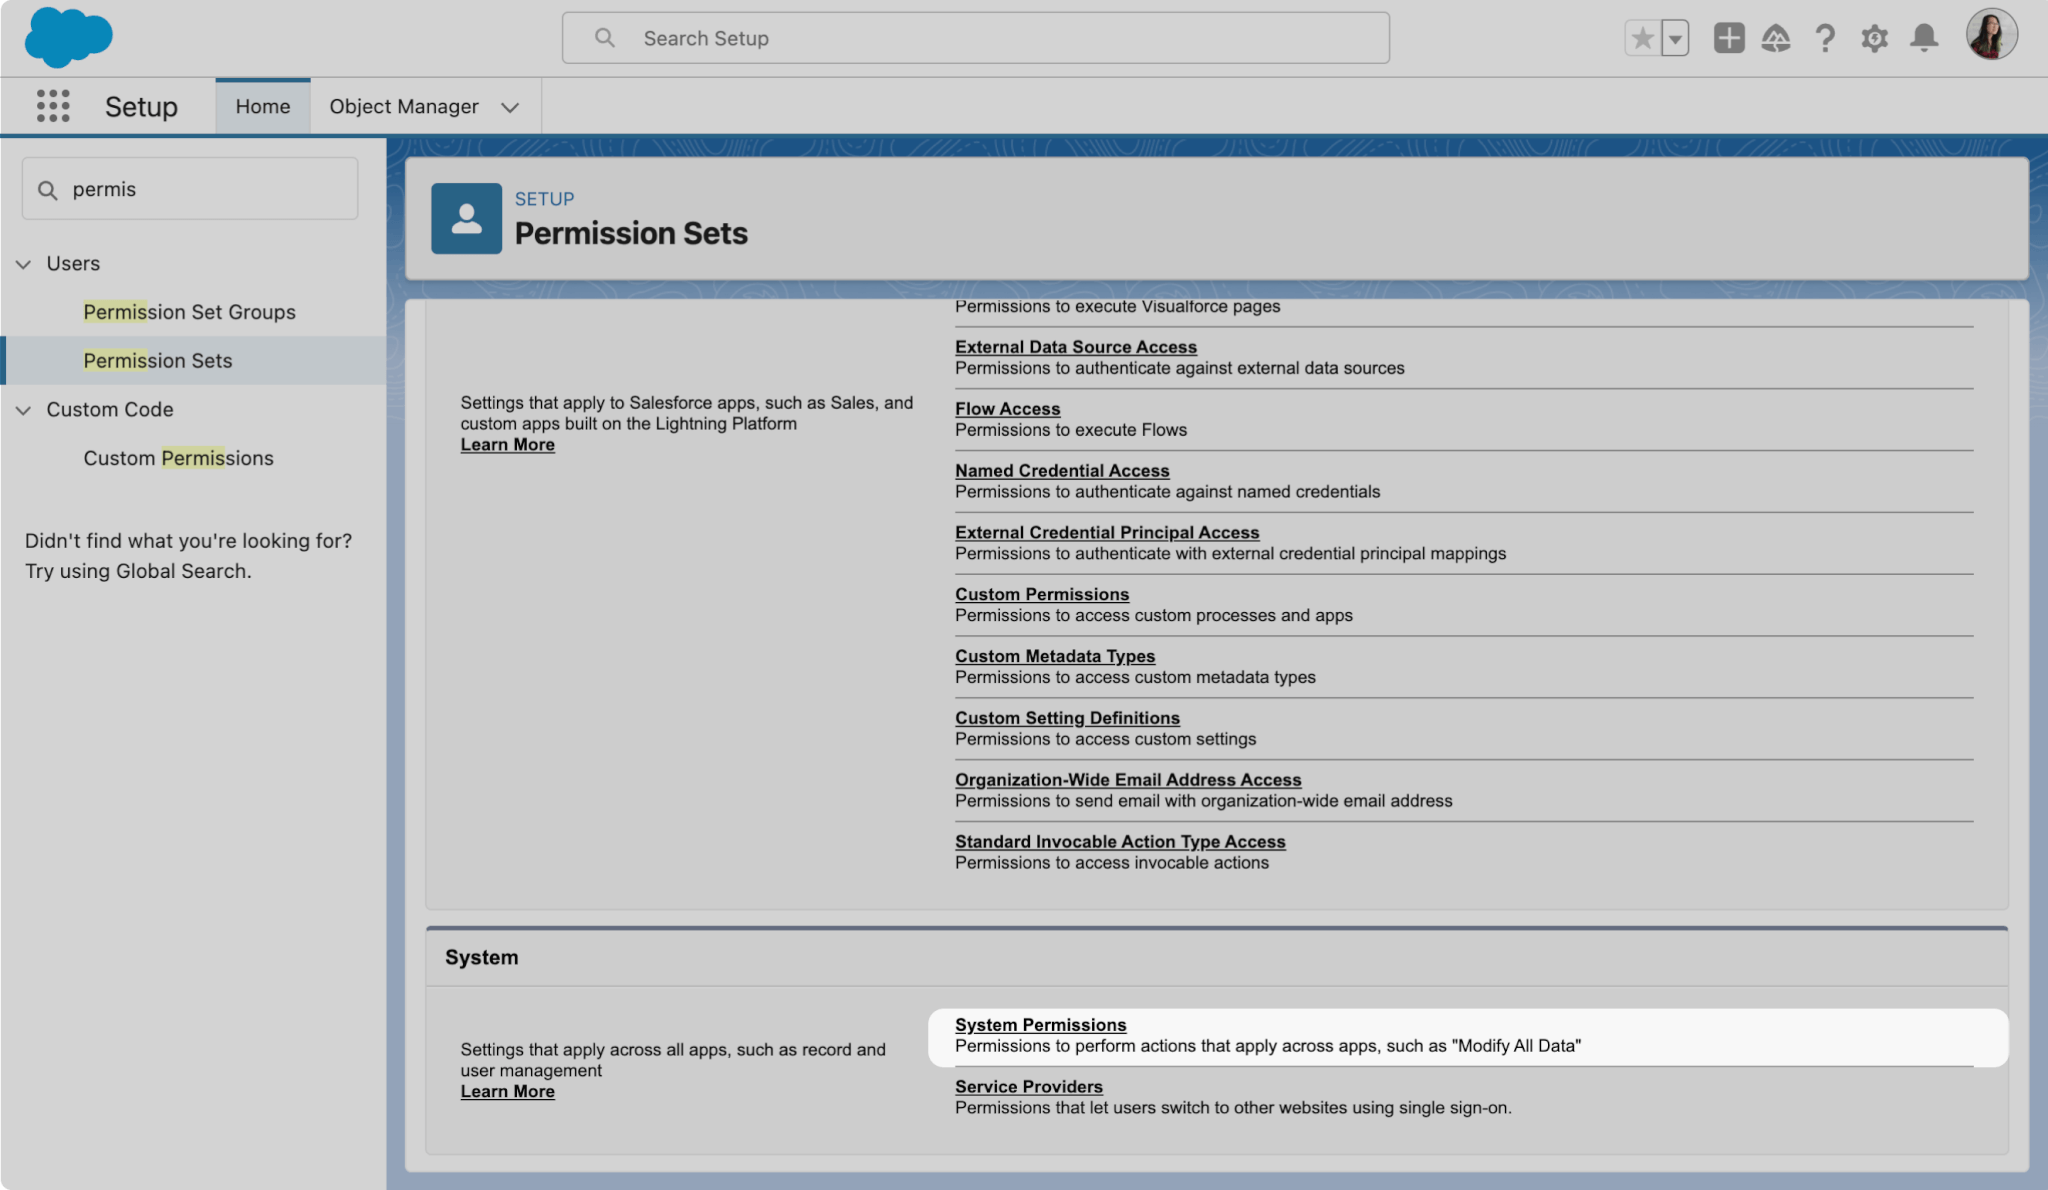
- Click Edit and enable Access drag-and-drop content builder; then, click Save.
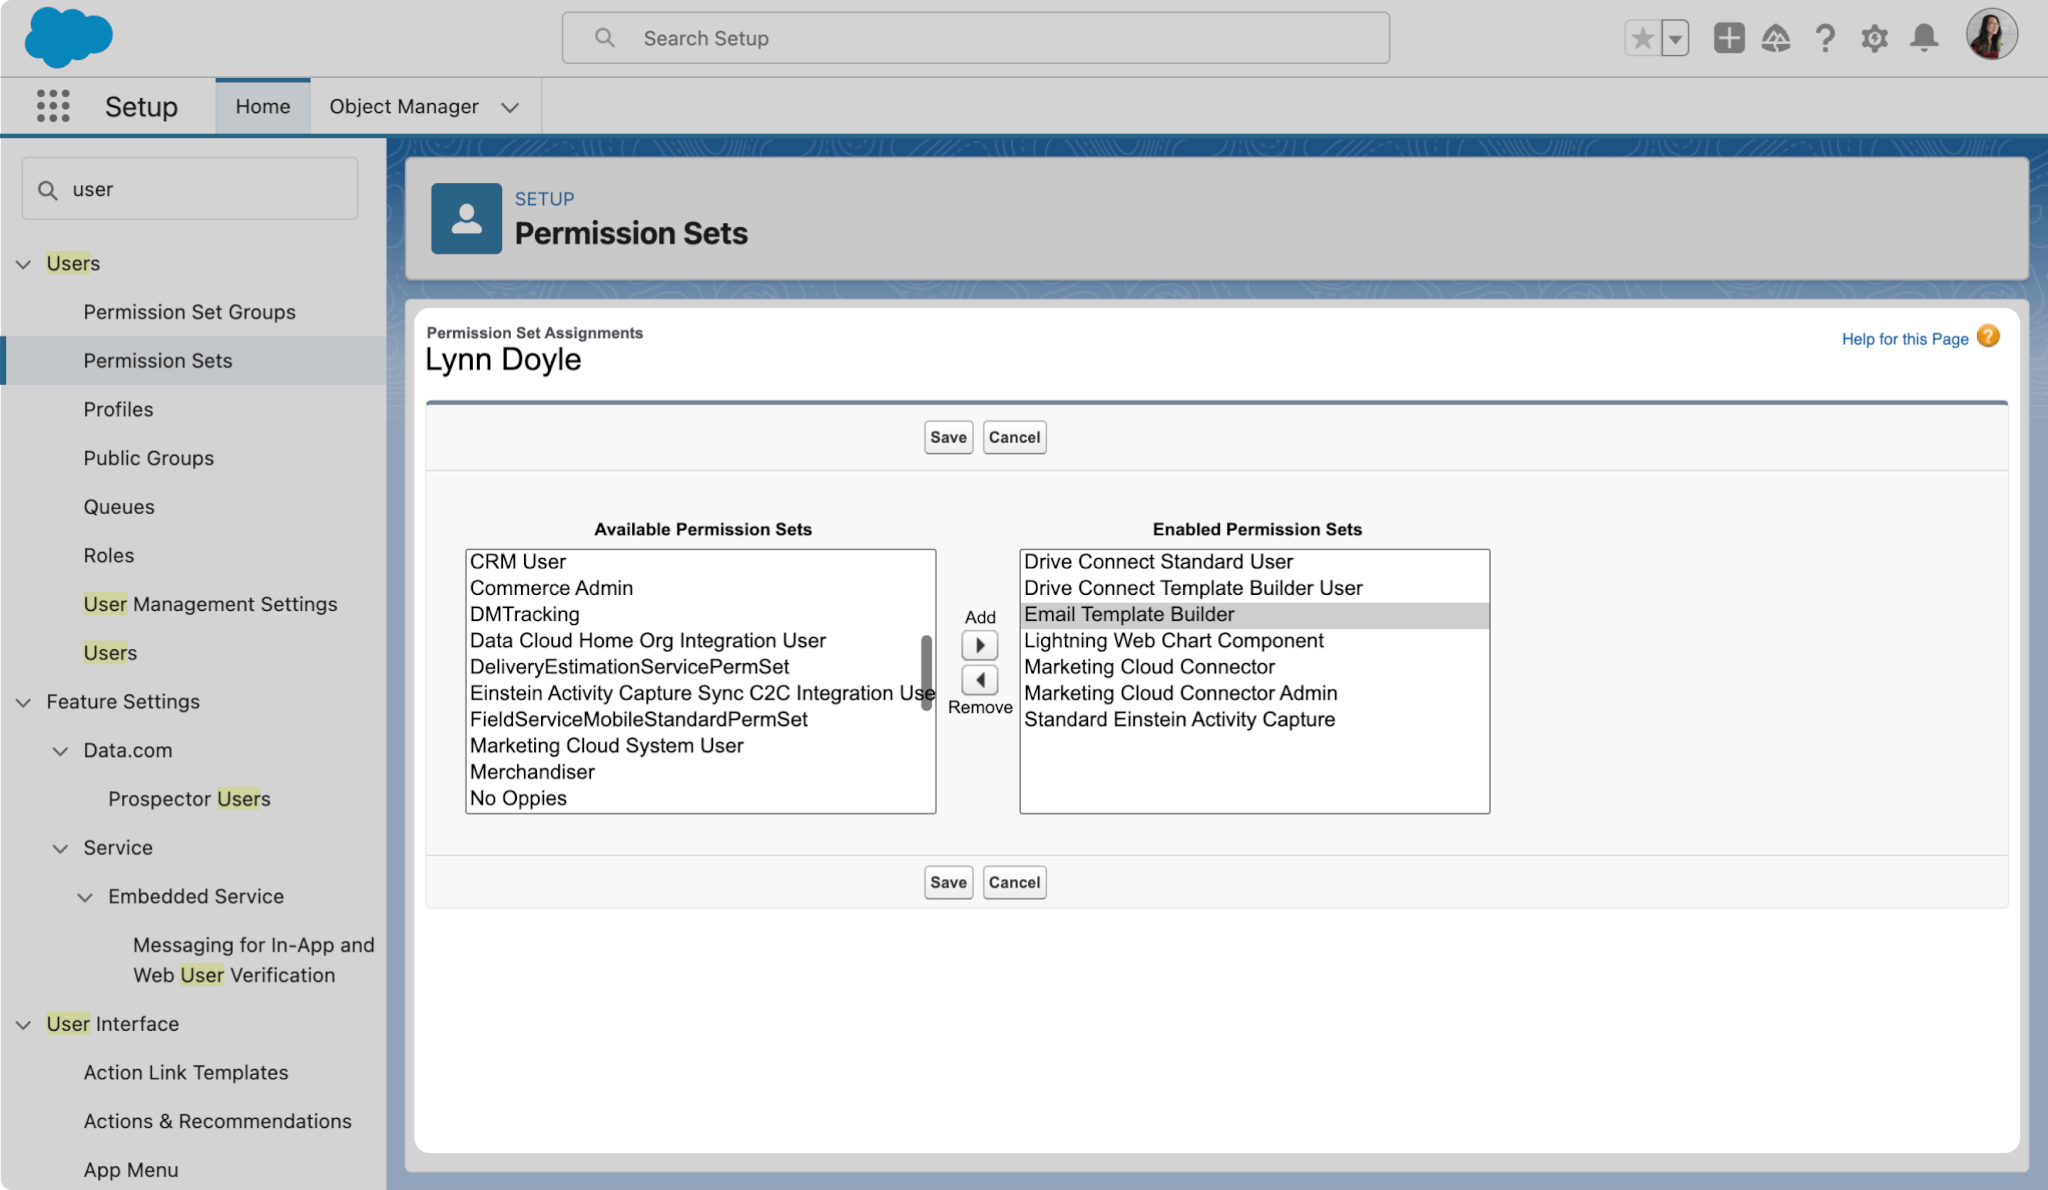
- Assign your new permission set to all users who will need to access Email Template Builder.
How to Use Salesforce Email Template Builder
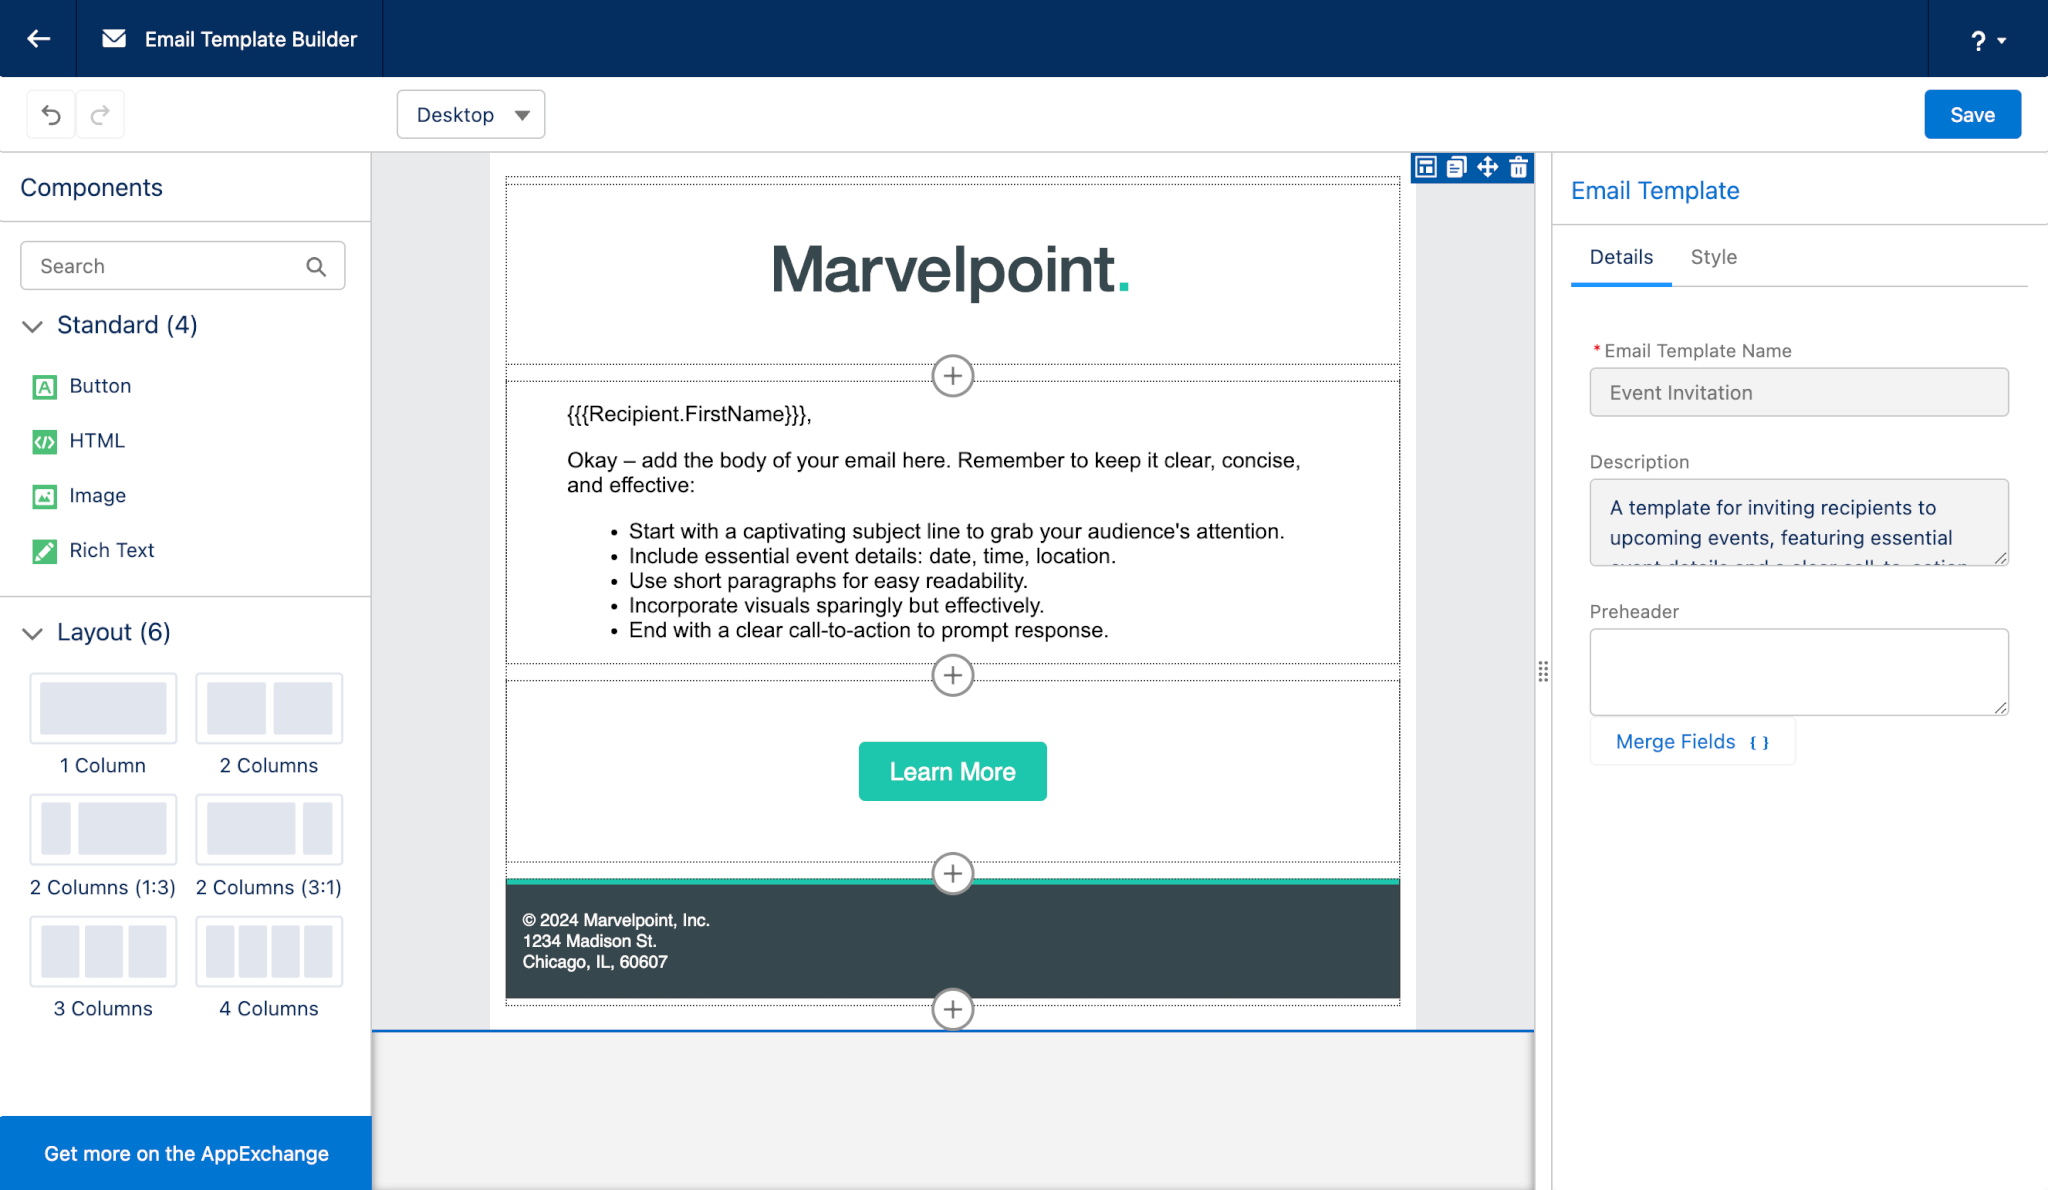
Now we're ready to get to work on our event invite template. If you know your way around Lightning App Builder, this should look pretty familiar. You can choose a layout of up to four columns and drag components from the sidebar to create your template.
- Head over to Email Templates and create a New Email Template.
- With your new permission set enabled, you’ll be able to edit your new template in Email Template Builder. Here, we’ve used an Image to create a simple branded header, a Rich Text Field with some basic merge fields to create the body of the email, a Button component in our brand colors for our call to action, and a little bit of styled HTML to create a tasteful footer.
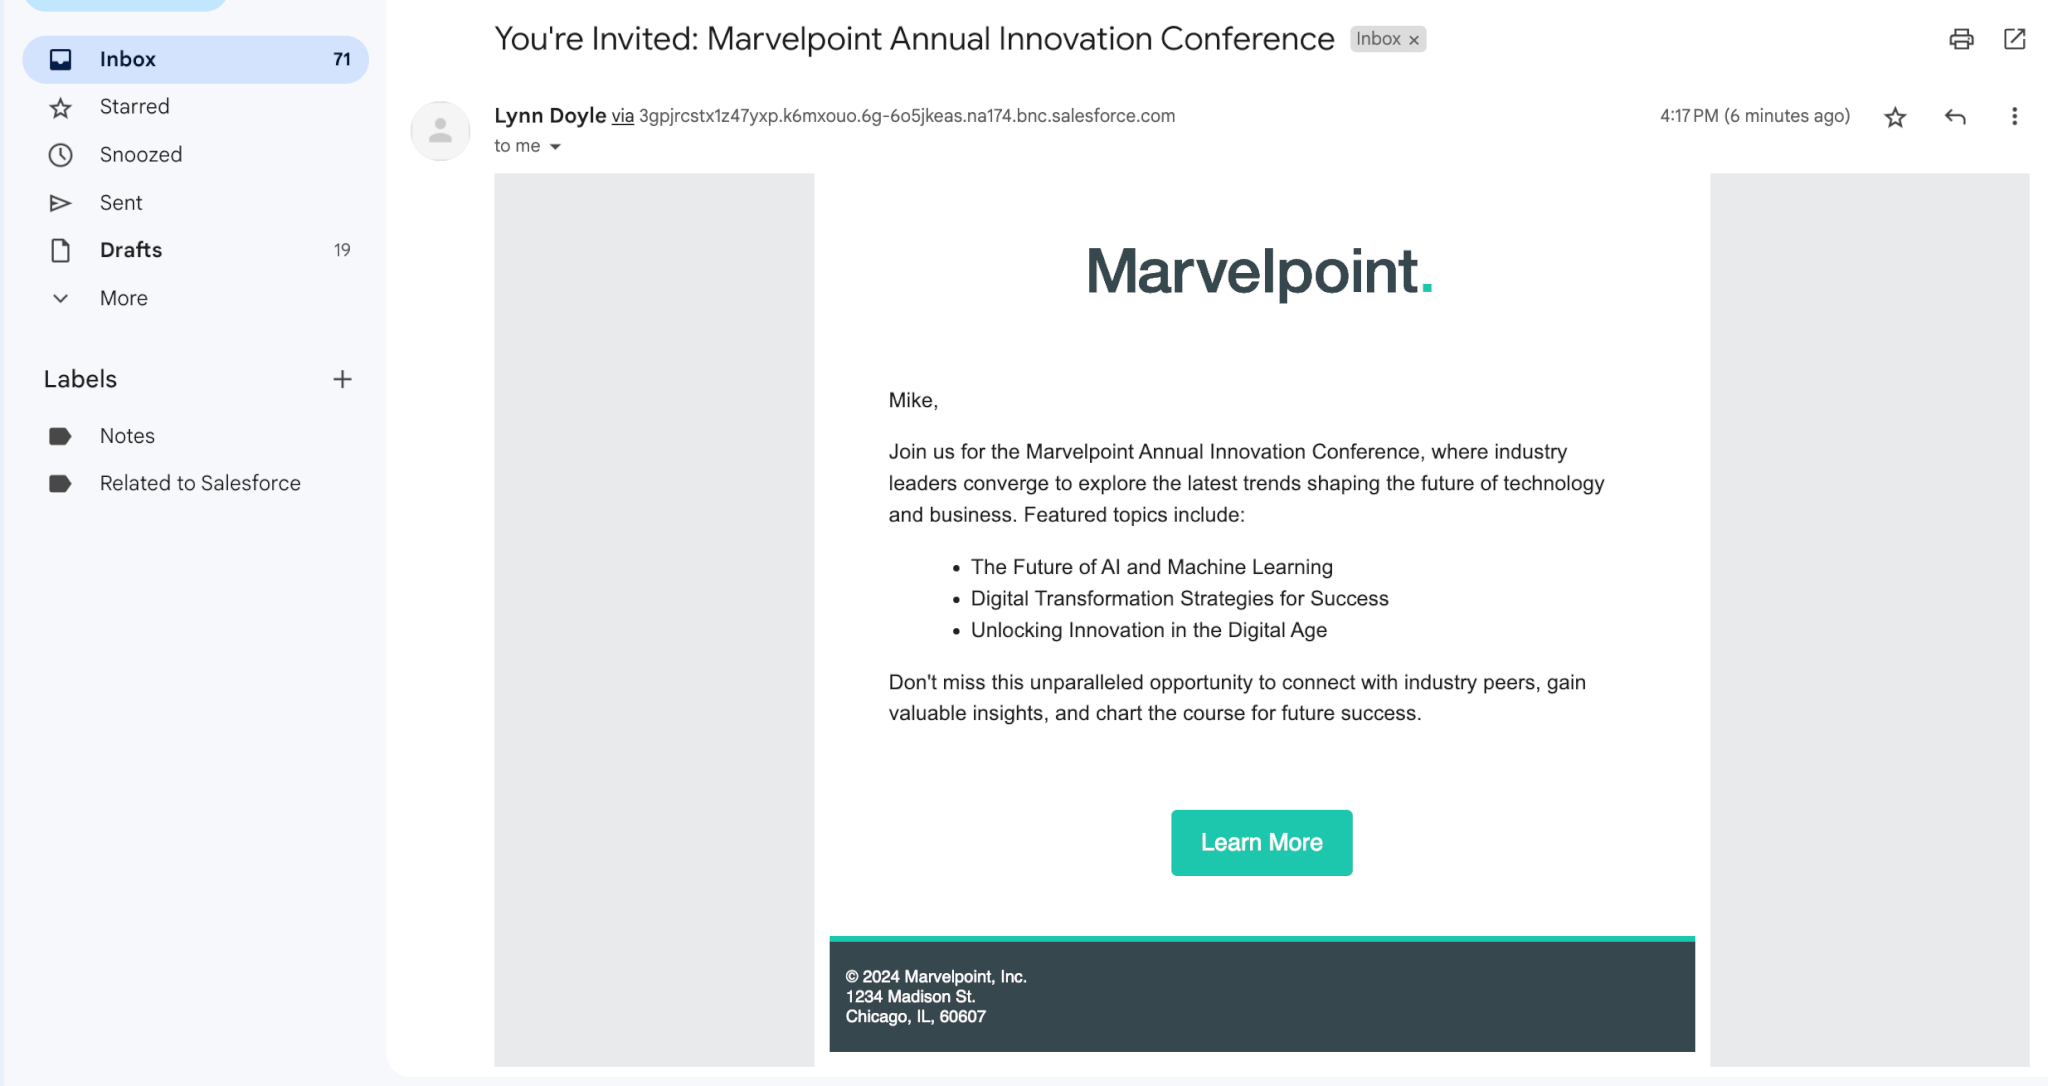
- Here’s what that looks like in your recipient’s inbox – pretty slick, huh? See you at the Marvelpoint Annual Innovation Conference – we’re doing free pigs in a blanket and Sunny D seltzers!
Considerations for Working with Salesforce Lightning Email Template Builder
This is a much more complex tool than the basic Lightning email template editor, so it’s got quite a few more gotchas to keep in mind. Salesforce has written up two different sets of guidelines and considerations for your consideration, both of which are so detailed that they read like the disclaimer at the end of a pharmaceutical ad, but here are the big ones to know:
- You can’t use active content – For security reasons, Email Template Builder won’t work with active content. This includes streaming video, Javascript, animated images, and even HTML comments.
- SVG images aren’t supported – Stick with a nice, high quality PNG – they’ll never break your heart.
- Be aware of responsive breakpoints – Columns in the same row of an email layout will begin to stack for small-screen rendering at 320 px, which you’ll see on mobile devices and in a docked email composer.
- After a template is edited in Email Template Builder, it can only be edited in Email Template Builder – You can’t go home again! Make sure to make a clone of your basic template before editing it in Email Template Builder!
- Be aware of content limits:
- 250 components per email template
- 100 components per region/component container
- 10K characters for each component’s property value
This concludes our Salesforce Lightning email template master class. If you’re enough of a fiend for Salesforce automation that you made it to the end of this post, you're going to want to check out Drive Connect, our easy-to-use Google Drive/Salesforce integration that allows you to build powerful document generation templates powered by Salesforce merge fields with just a few clicks – no code required. Start your free trial today and try it for yourself!
Integrate Salesforce with Google Drive in Minutes
Create powerful Google Workspace doc gen templates powered by Salesforce data.