Using Drive Connect Automation with Salesforce flows
The Drive Connect app comes packaged with the Automate Drive flow action, which can be added to Record-Triggered flows to perform operations when records are created or updated. Schedule-Triggered flows with object conditions configured can also use this flow action to perform operations on a batch of records.
In order to enable Drive Connect Automation, ensure the Marketplace App is installed and the Automated Process User is configured. For detailed steps, see the Setup and configure Drive Connect Automation article.
Create Automate Drive actions using Salesforce Flows
Note: For information on how Salesforce Flows work, we suggest first reading Salesforce documentation on Automating Your Business Processes.
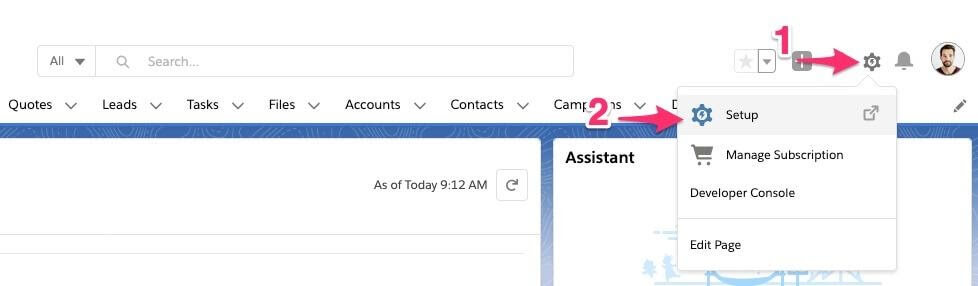
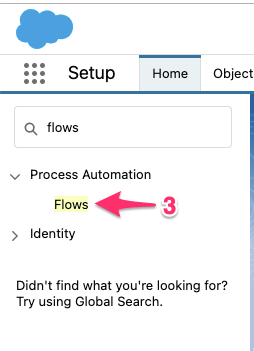
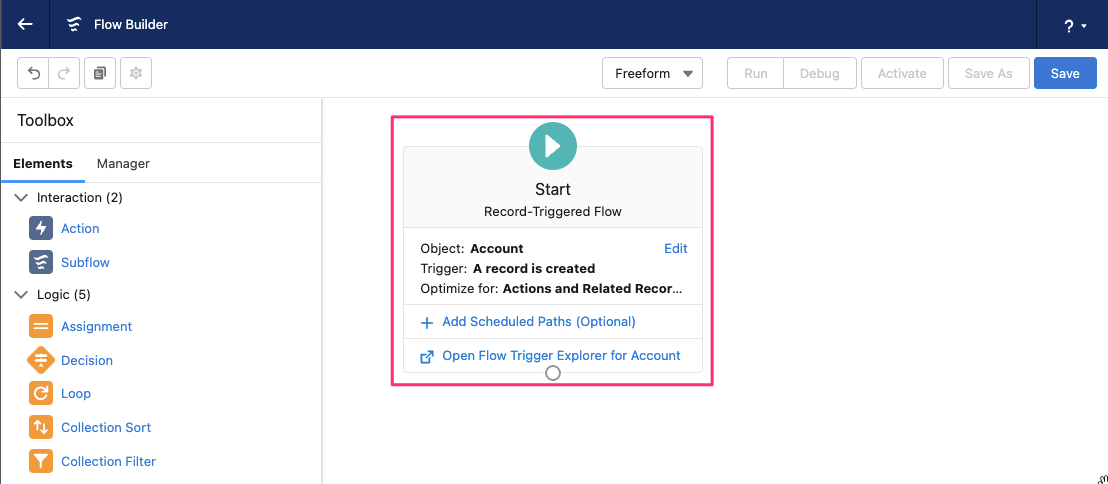
- Navigate to Setup > Process Automation > Flows.
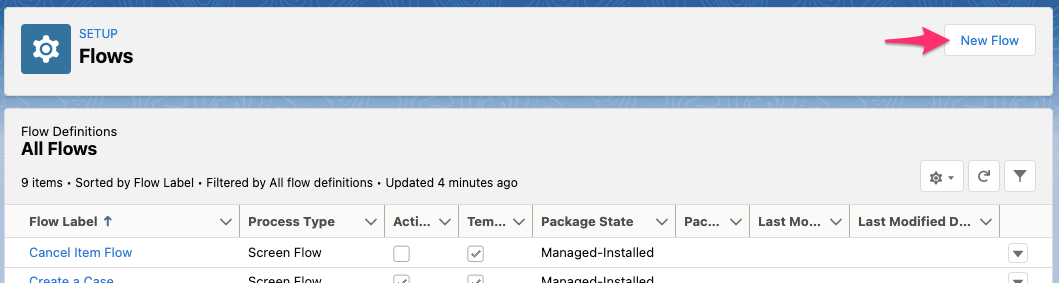
- From the Flows page, click New Flow.
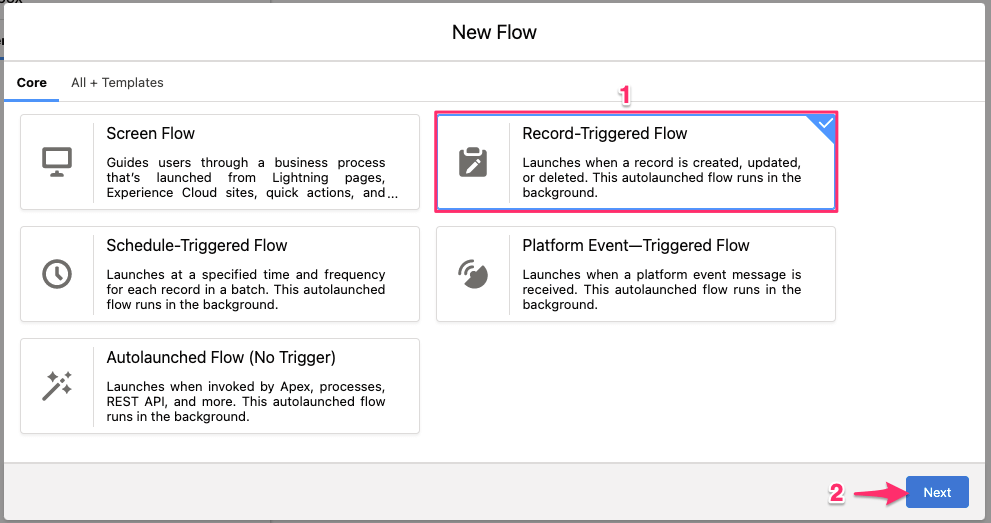
- Select Record-Triggered Flow (or Schedule-Triggered Flow) and click Next.
- You will be prompted to set up your starting node's criteria on how the flow will be initiated as well as configure the Salesforce object the action will take place on. You can go back to this screen by editing the Start node of the flow.
- For more information on building out your flow, please see the Salesforce documentation on Defining Conditions in a Flow.
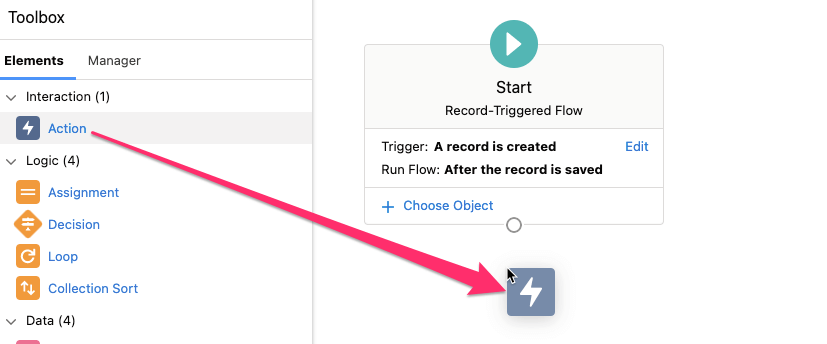
- From the Elements list from the left pane, drag and drop Action onto the canvas builder area to the right. This will auto-display the New Action modal.
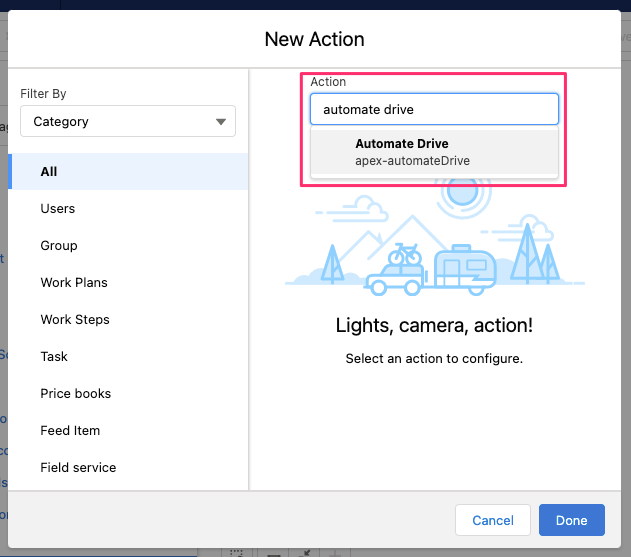
- In the Action field, search and select Automate Drive (apex-driveconnect__automateDrive).
- If you are not logged into your Google Workspace, you will see a prompt to sign in. Click Sign In and walk-through the Google authentication flow to continue.
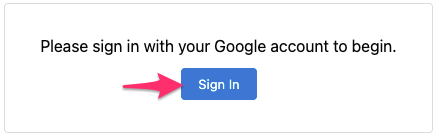
- If you are not logged into your Google Workspace, you will see a prompt to sign in. Click Sign In and walk-through the Google authentication flow to continue.
- Fill out the required fields for Label and API Name, then select the Operation picklist.
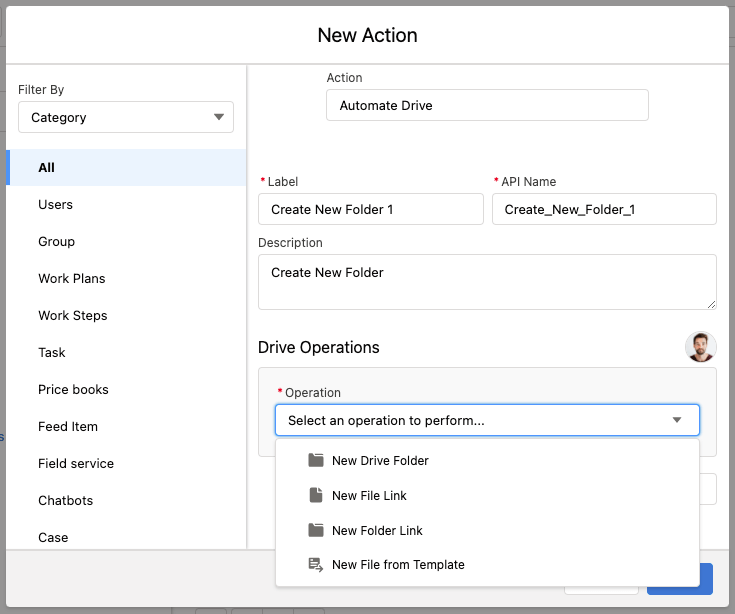
- When selecting Drive Operations, the following parent level options are available:
Adding Sibling Operations
Drive Connect Automation supports adding multiple sibling operations. These operations are considered same level operations to any existing operation in your flow. You can add a sibling operation by selecting the Add Drive Operation button for parent level operations (or select Add Child Operation for same level child operations).
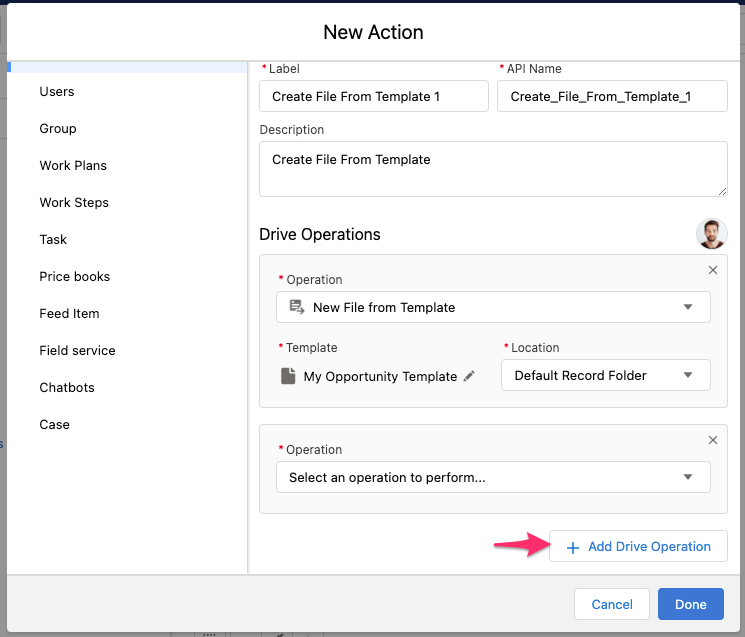
Note: If adding multiple sibling operations, the automation will run sequentially in the order they are created/listed in the Drive Operations builder.
Note: Operations defined in the Automate Drive action are subject to Google API usage limits. When using the action for Schedule-Triggered flows, we recommend configuring your filter conditions to limit batch sizes to 100 records or less in order to avoid failures for actions that include multiple operations.
Save and Activate Your Flow
Before you can trigger your newly created flow, you must ensure the flow is saved and activated by completing the following steps below:
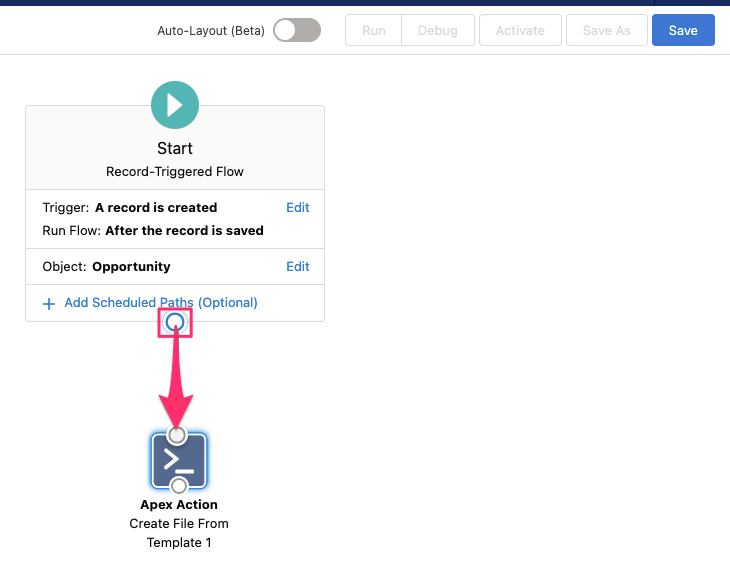
- Ensure all elements are connected. Select the node at the bottom of the Start element and drag the node to your Action element.
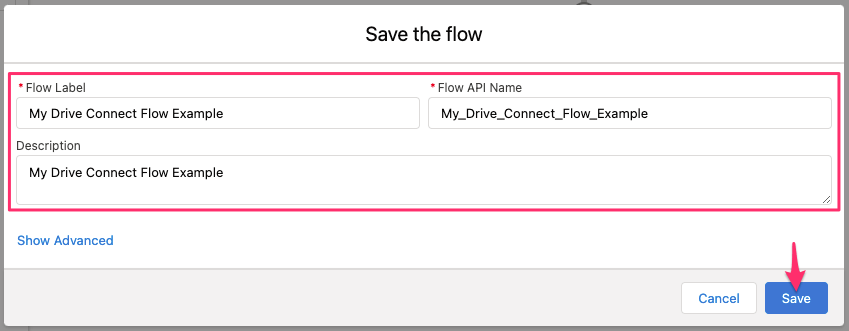
- Click Save.
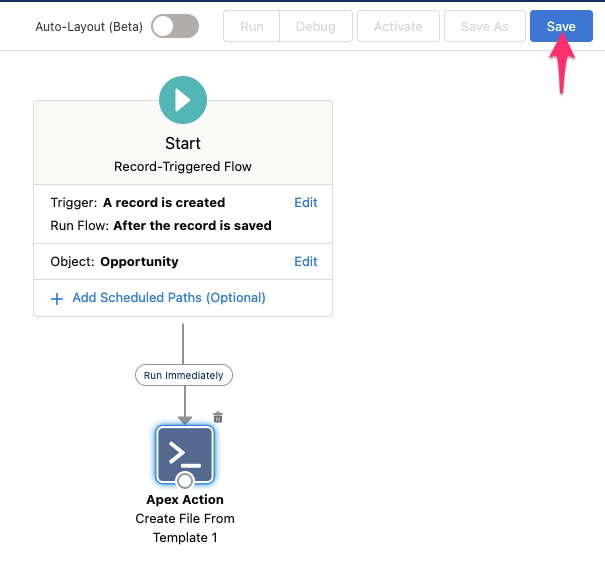
- Enter the required fields for Flow Label and Flow API Name, and click Save.
- Click Activate.
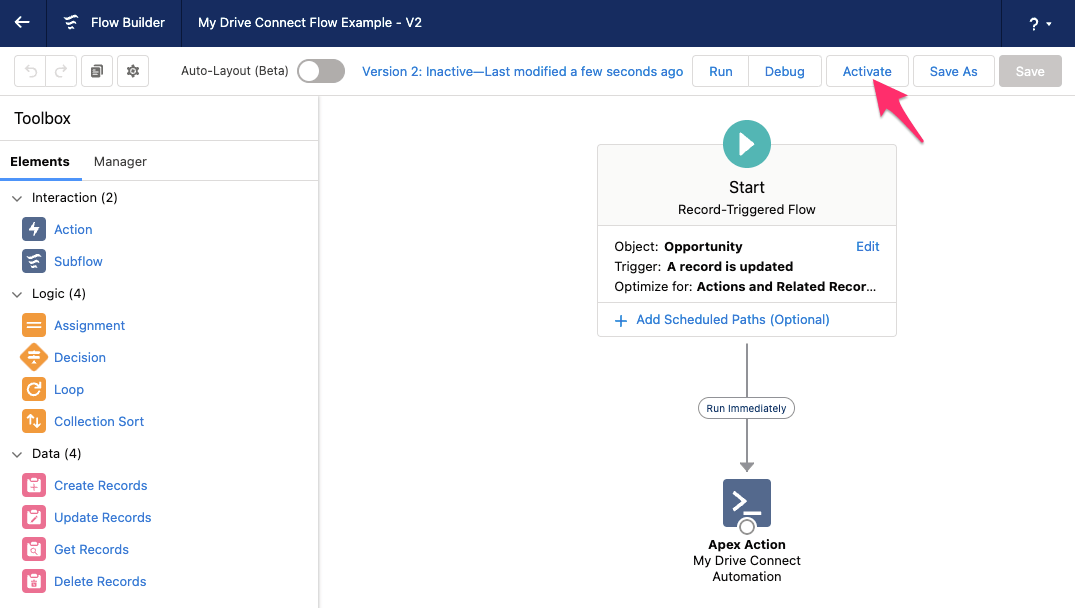
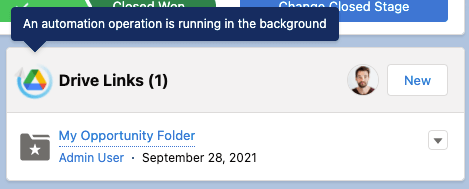
- For a Record-Triggered Flow, go back to your Salesforce object/record and trigger your flow. Once triggered you can see the component display a state where automation is in progress.
Note: The Automate Drive action performs operations asynchronously. A retry mechanism is built into the action to support multiple concurrent operations on the same record. If a failure occurs, Queueable Apex calls a Future Method to wait and retry the operations for a maximum of five times before they are deemed unsuccessful and terminated.