Installation and Configuration Guide [eSign]
This article serves as a configuration guide for the eSign Connect Salesforce app. The first section covers the installation of the eSign Connect package. The following sections will walk you through app configuration. This app supports Contacts, Person Accounts, and custom objects.
Table of Contents
Introduction
This guide is meant to walk you through configuring your org in a Lightning Experience environment. If using the Salesforce Classic interface, you can switch to Lightning by clicking Switch to Lightning Experience at the top of the page.

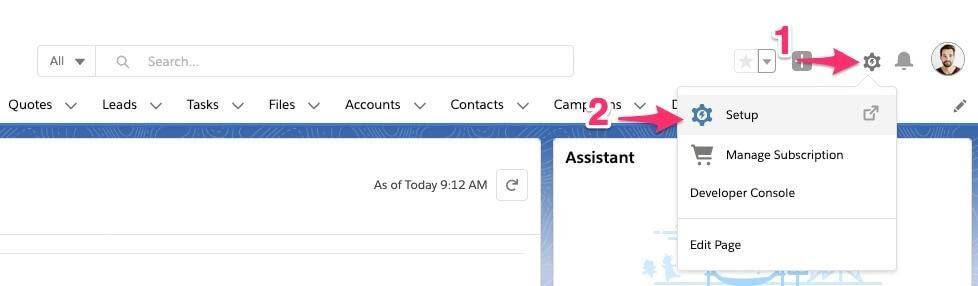
Throughout this guide, you will be instructed to navigate through Setup. To do so, you will need to click on the gear to the upper right and select Setup. Once in Setup, you may use the Quick Find box to find and navigate to the appropriate section.
Installation
Installing the eSign Connect Package
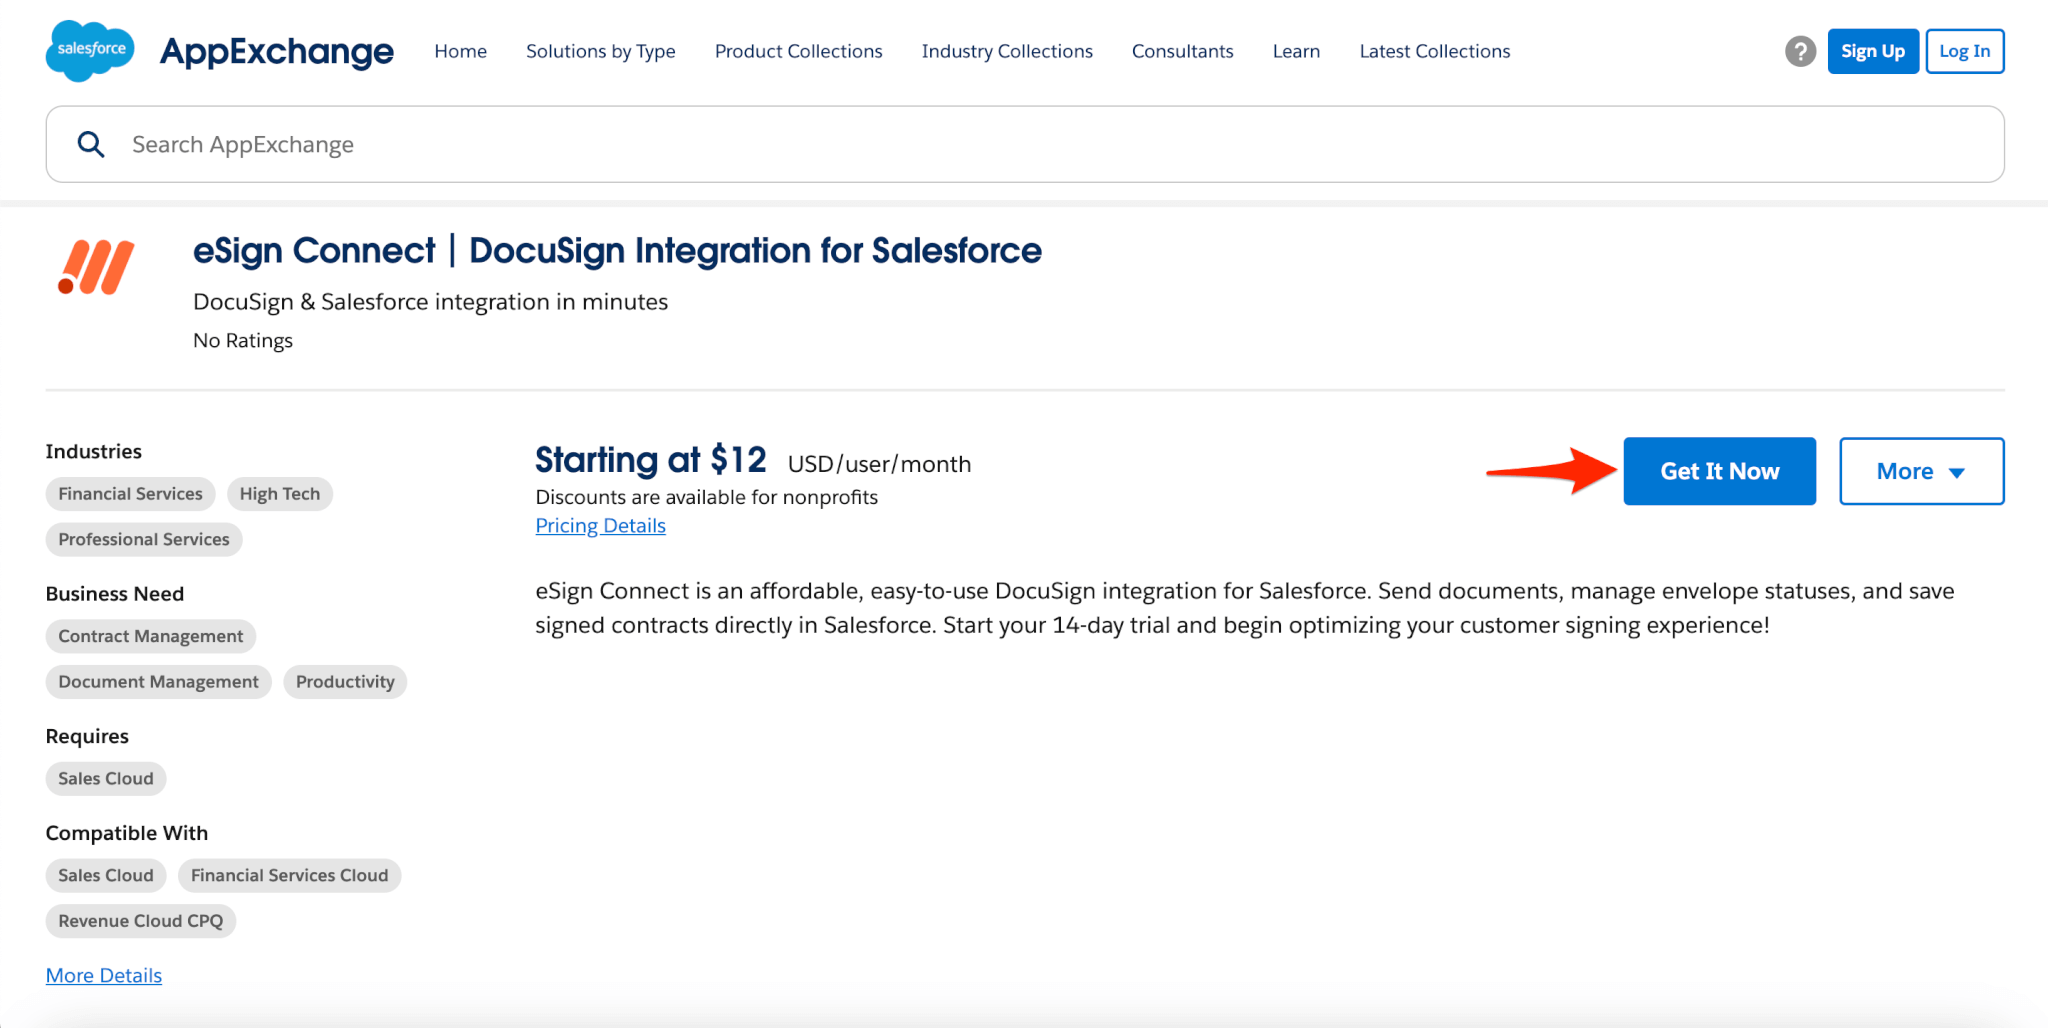
- Go to our Salesforce AppExchange Listing and click Get It Now.
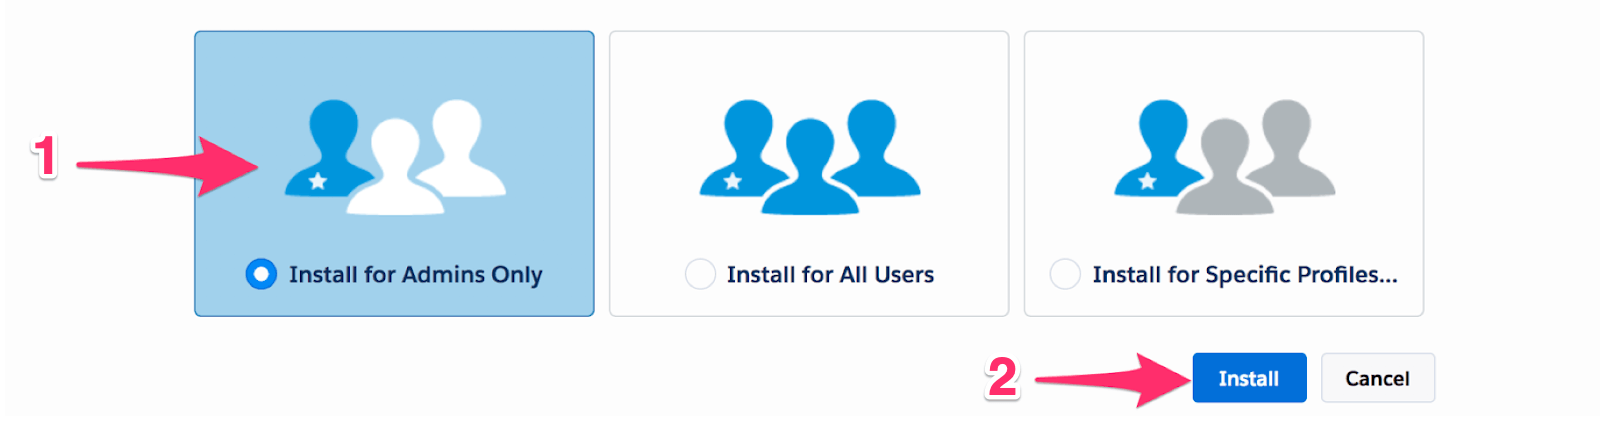
- Install for Admins Only is recommended — this option allows for controlling access and permissions after the package has been installed. For further information, click here to refer to salesforce documentation on Package Installations.
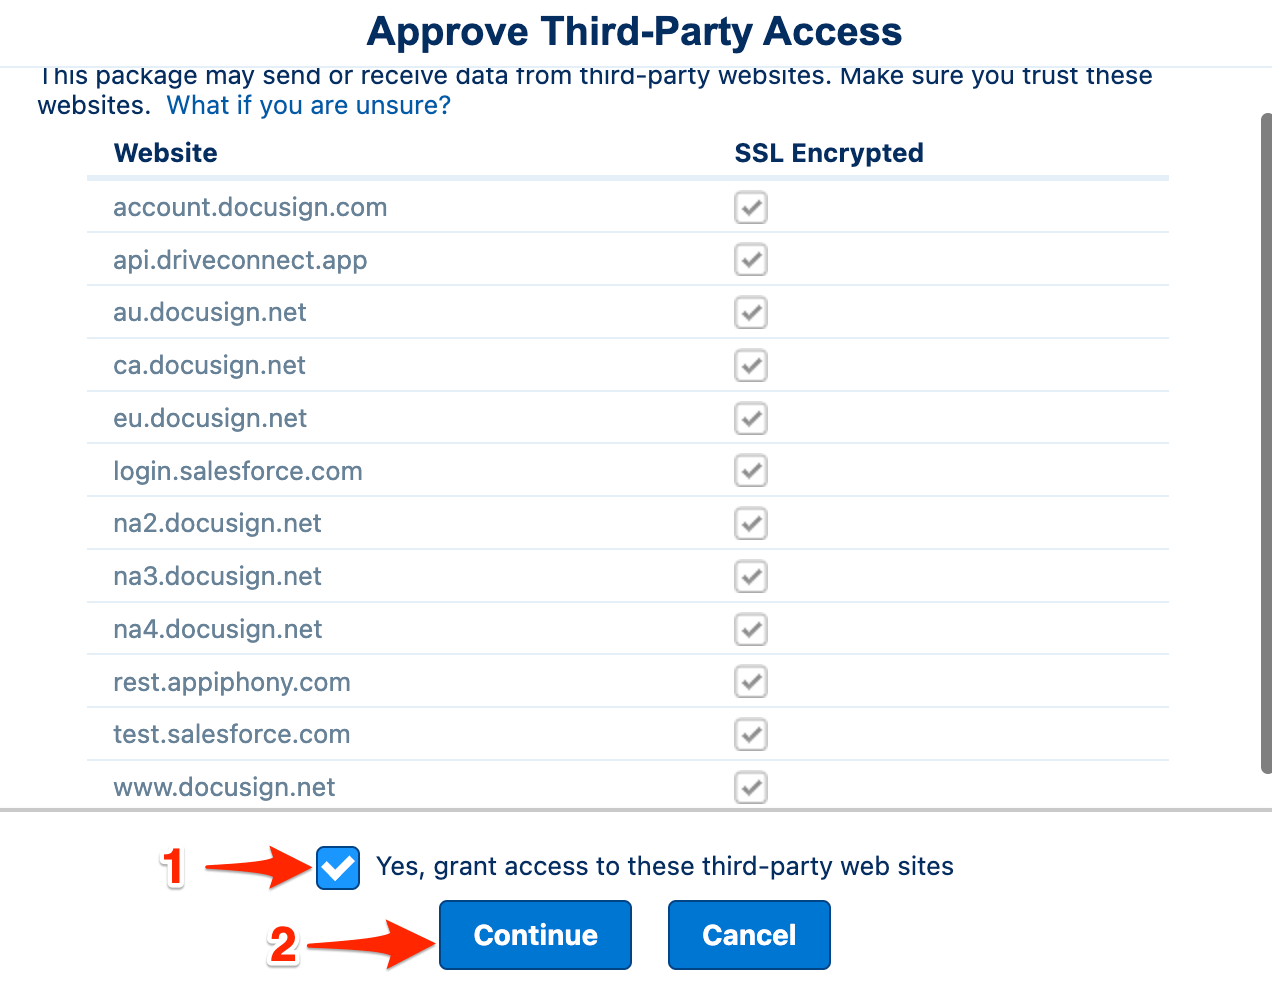
- Approve Third-Party Access — check off the box and click Continue to start the package installation when the modal appears. As it states, this is to allow data to be sent back and forth between your Salesforce org and eSign Connect:
- account.docusign.com
- api.driveconnect.app
- au.docusign.net
- ca.docusign.net
- eu.docusign.net
- login.salesforce.com
- na2.docusign.net
- na3.docusign.net
- na4.docusign.net
- rest.appiphony.com
- test.salesforce.com
- www.docusign.net
eSign Connect Configuration
eSign Connect Setup (Setup Assistant)
The eSign Connect Setup Assistant will need to be completed to receive updates to your Docusign envelopes and recipients, authorize us to push the data we receive from the Docusign's webhook service to your Salesforce org.
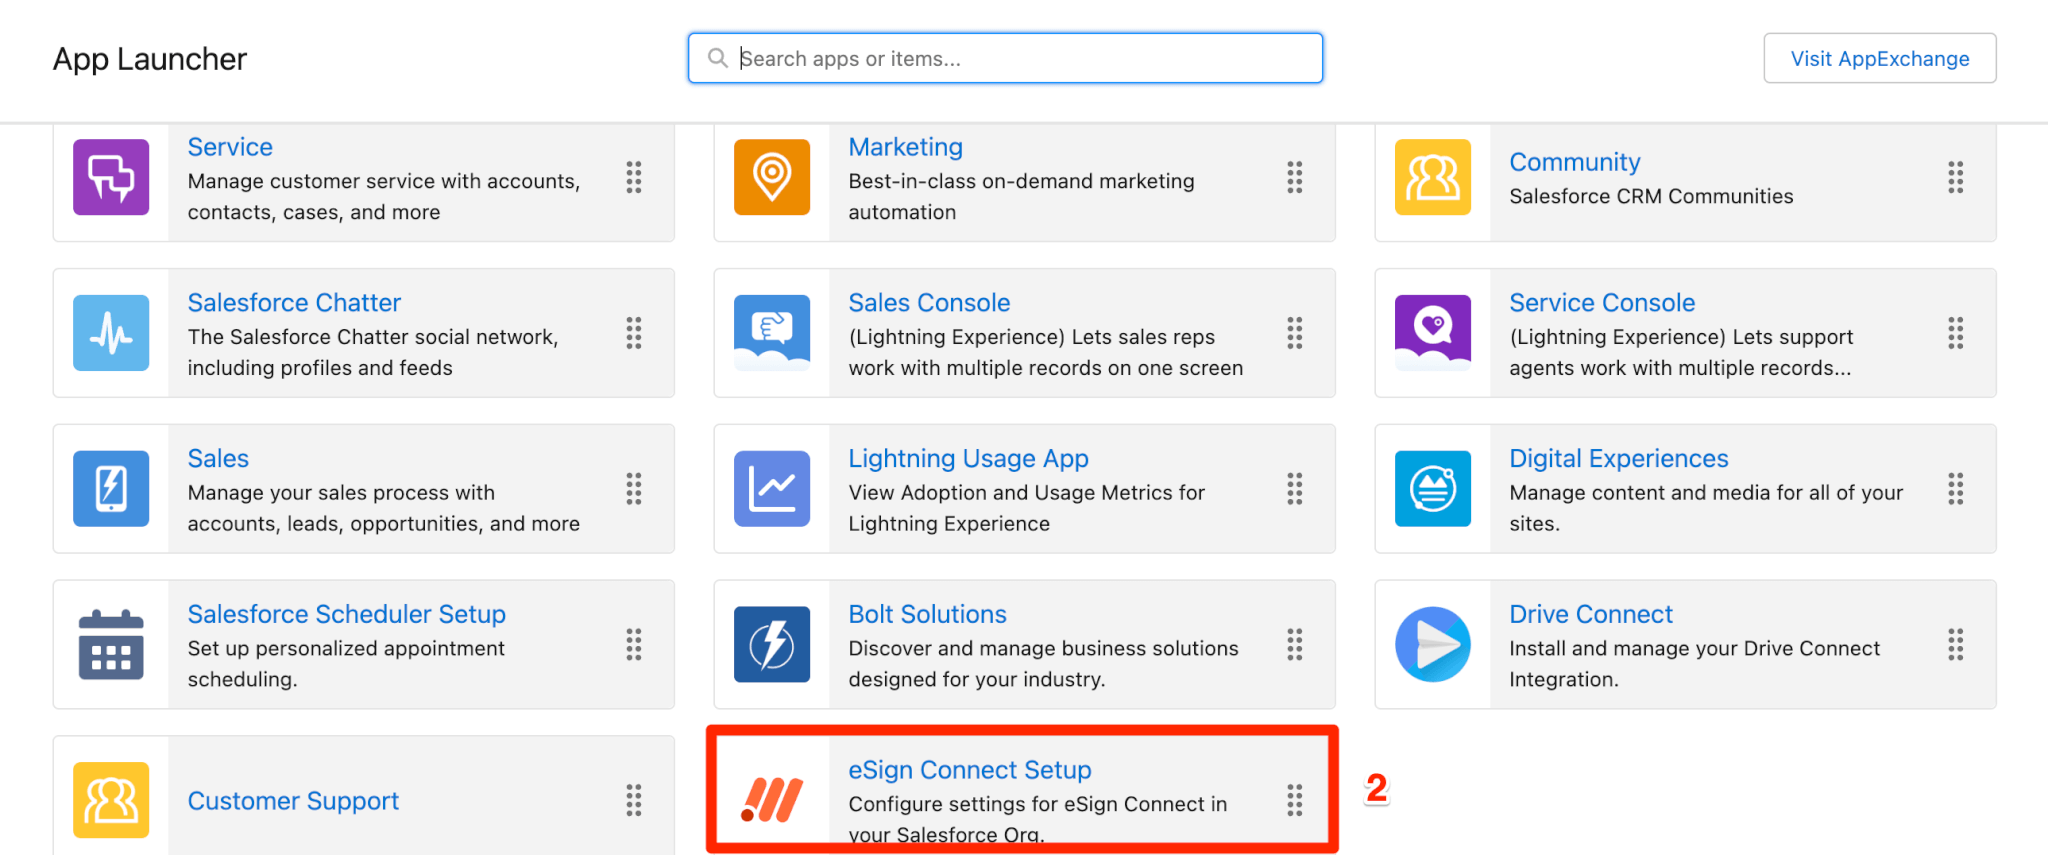
- To start the Setup Assistant, navigate to App Launcher > eSign Connect Setup

Note: You must grant tab visibility permissions for the Setup tab on the setup user’s profile/permission set to access these features.
For more information on creating permission sets and setting permissions please see User Permission and Access.
Getting Started
You will initially be taken to the main page of setup which contains 3 cards: Features, Configuration and Licensing & Permissions 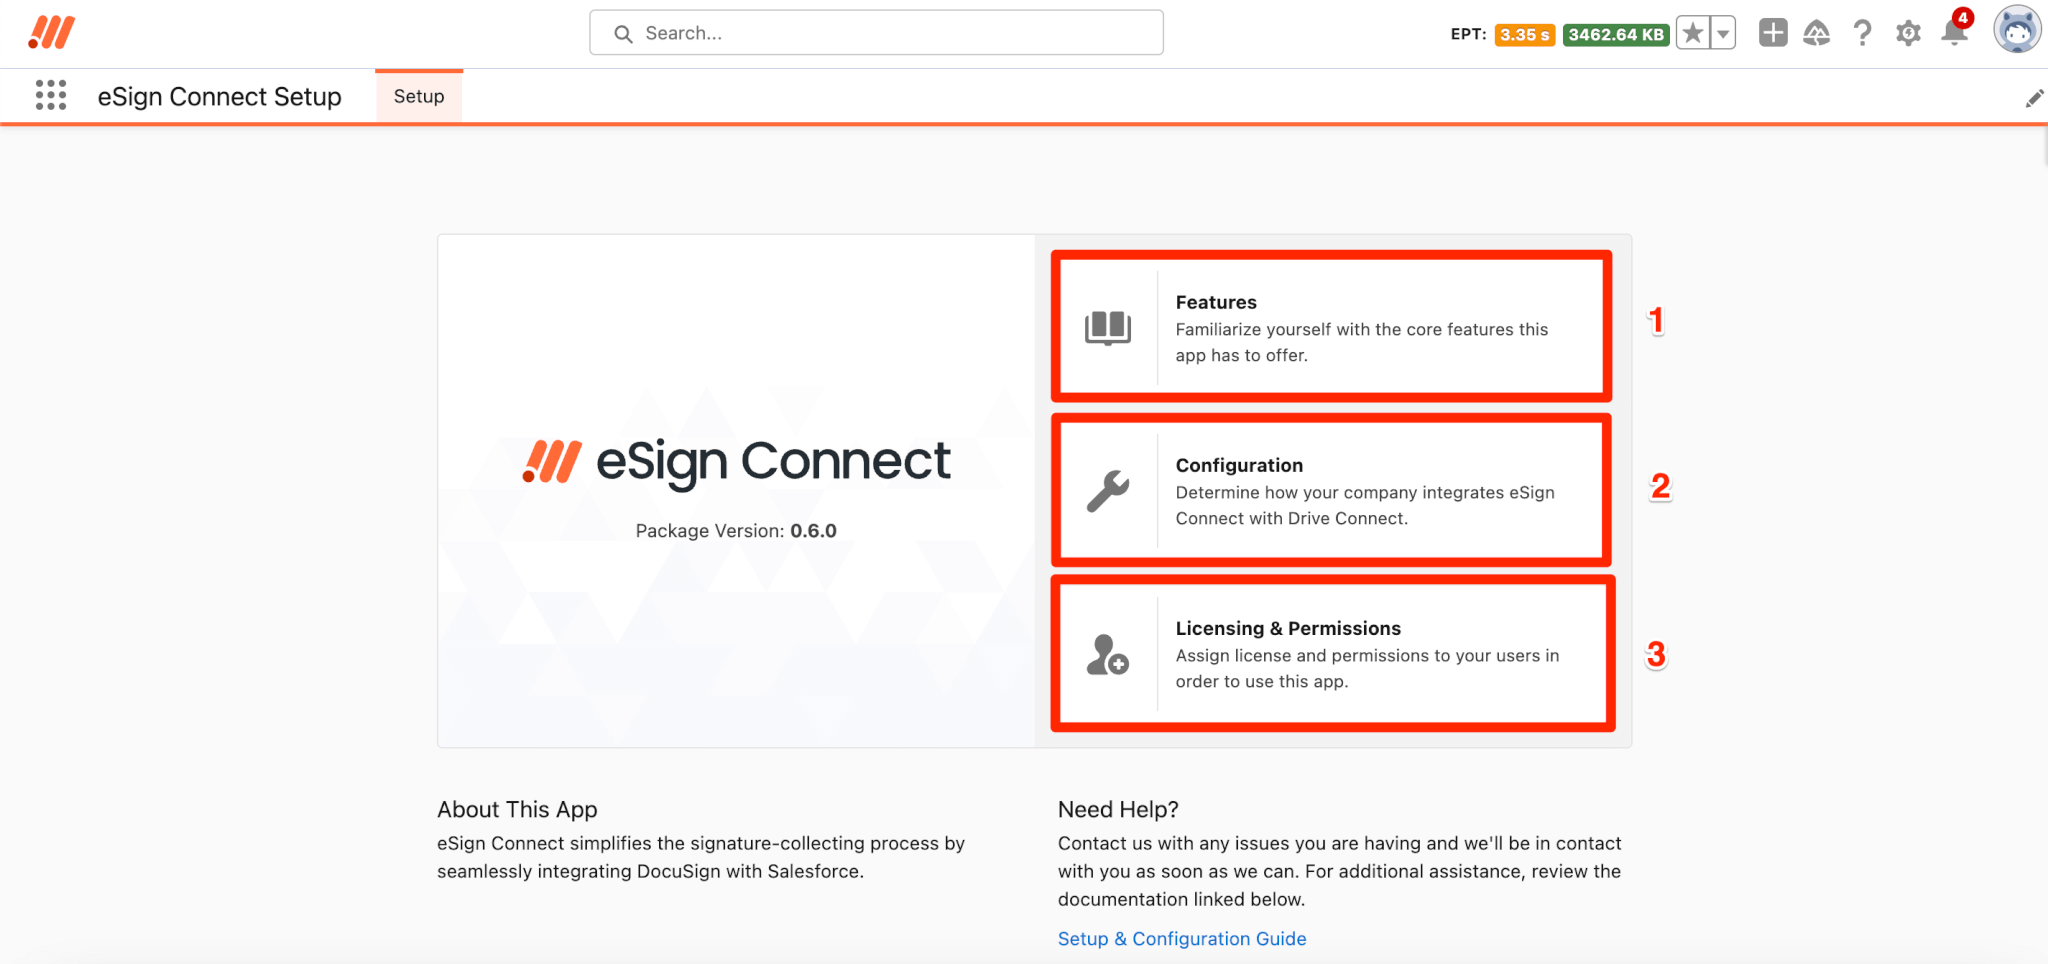
Features
In this section you will not need to do anything. This section only contains information on the features that the eSign Connect App provides. 
Configuration
Under this section you will see 3 sections on the left hand side of the page: System Connections, File Destination Settings and Template Role Mappings.
System Connections
In order to fully utilize the features in eSign Connect you must first authorize eSign Connect with your org in order for both sides to communicate with each other. This is done by clicking on the Authorize button which will open a new window prompting you to confirm the authorization. 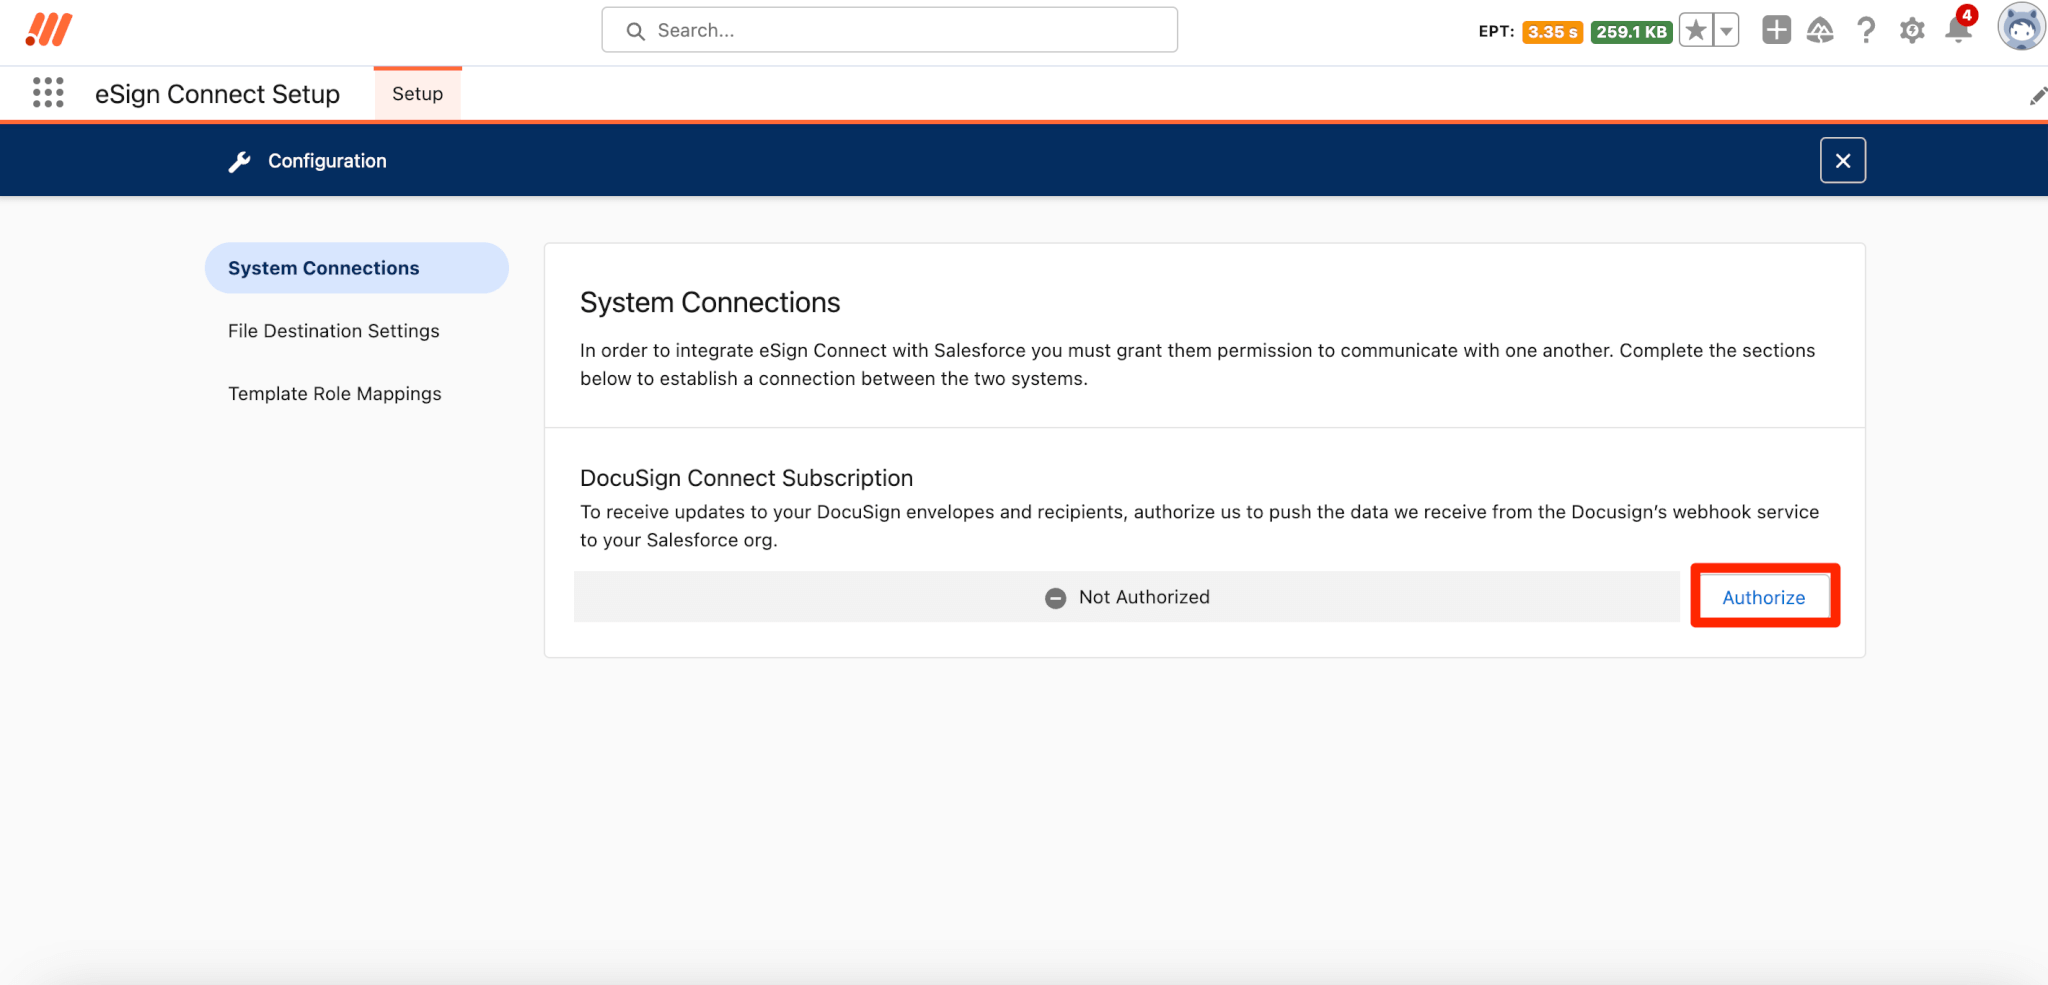
Once authorization has been successfully completed you will see which user authorized the org and will also see a Deauthorize button.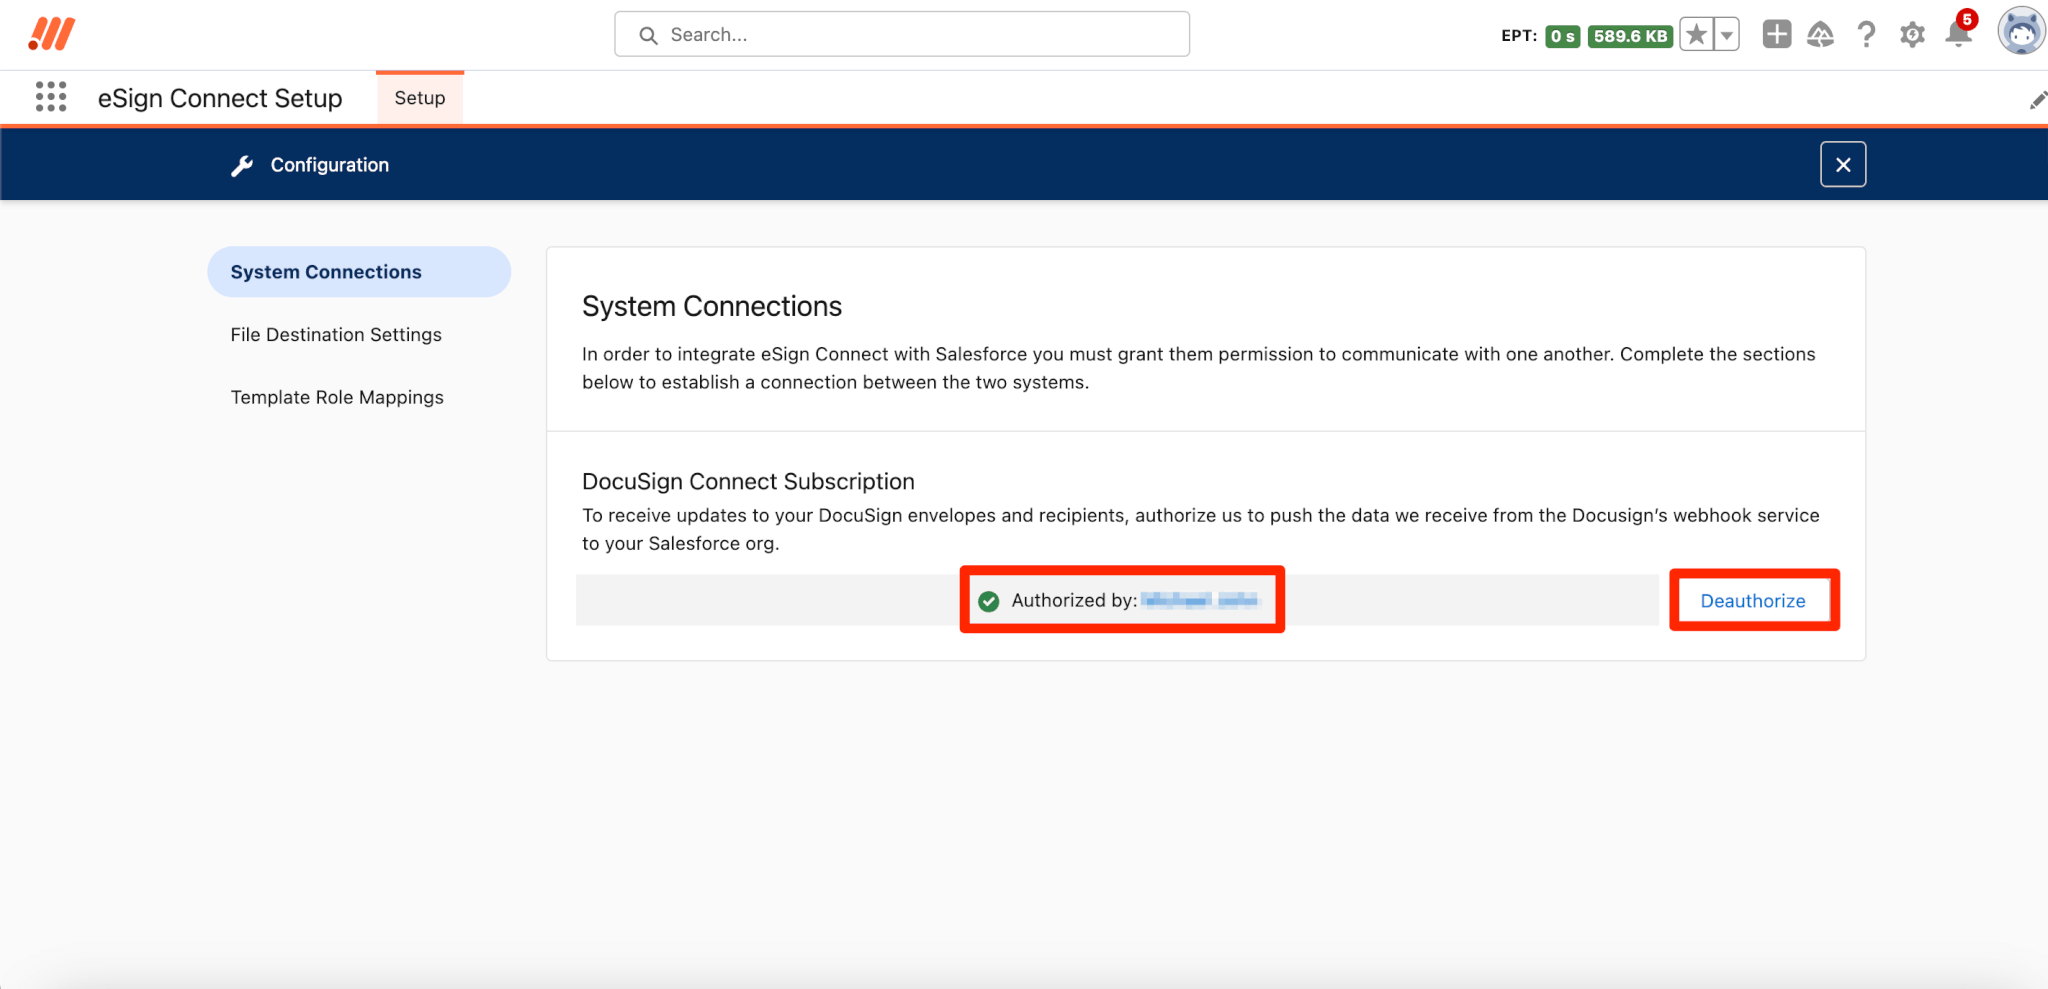
File Destination Settings
In this section you are given the option of setting up how completed envelope files are saved in either an existing drive folder (Drive Connect must be installed and the component on the same page as the eSign component) or Salesforce through the Add Preference button. The saved settings will then appear when creating an envelope on the selected objects if the requirements for the location are met. If you would like to edit any existing settings, you can do so with the Edit button on each setting. 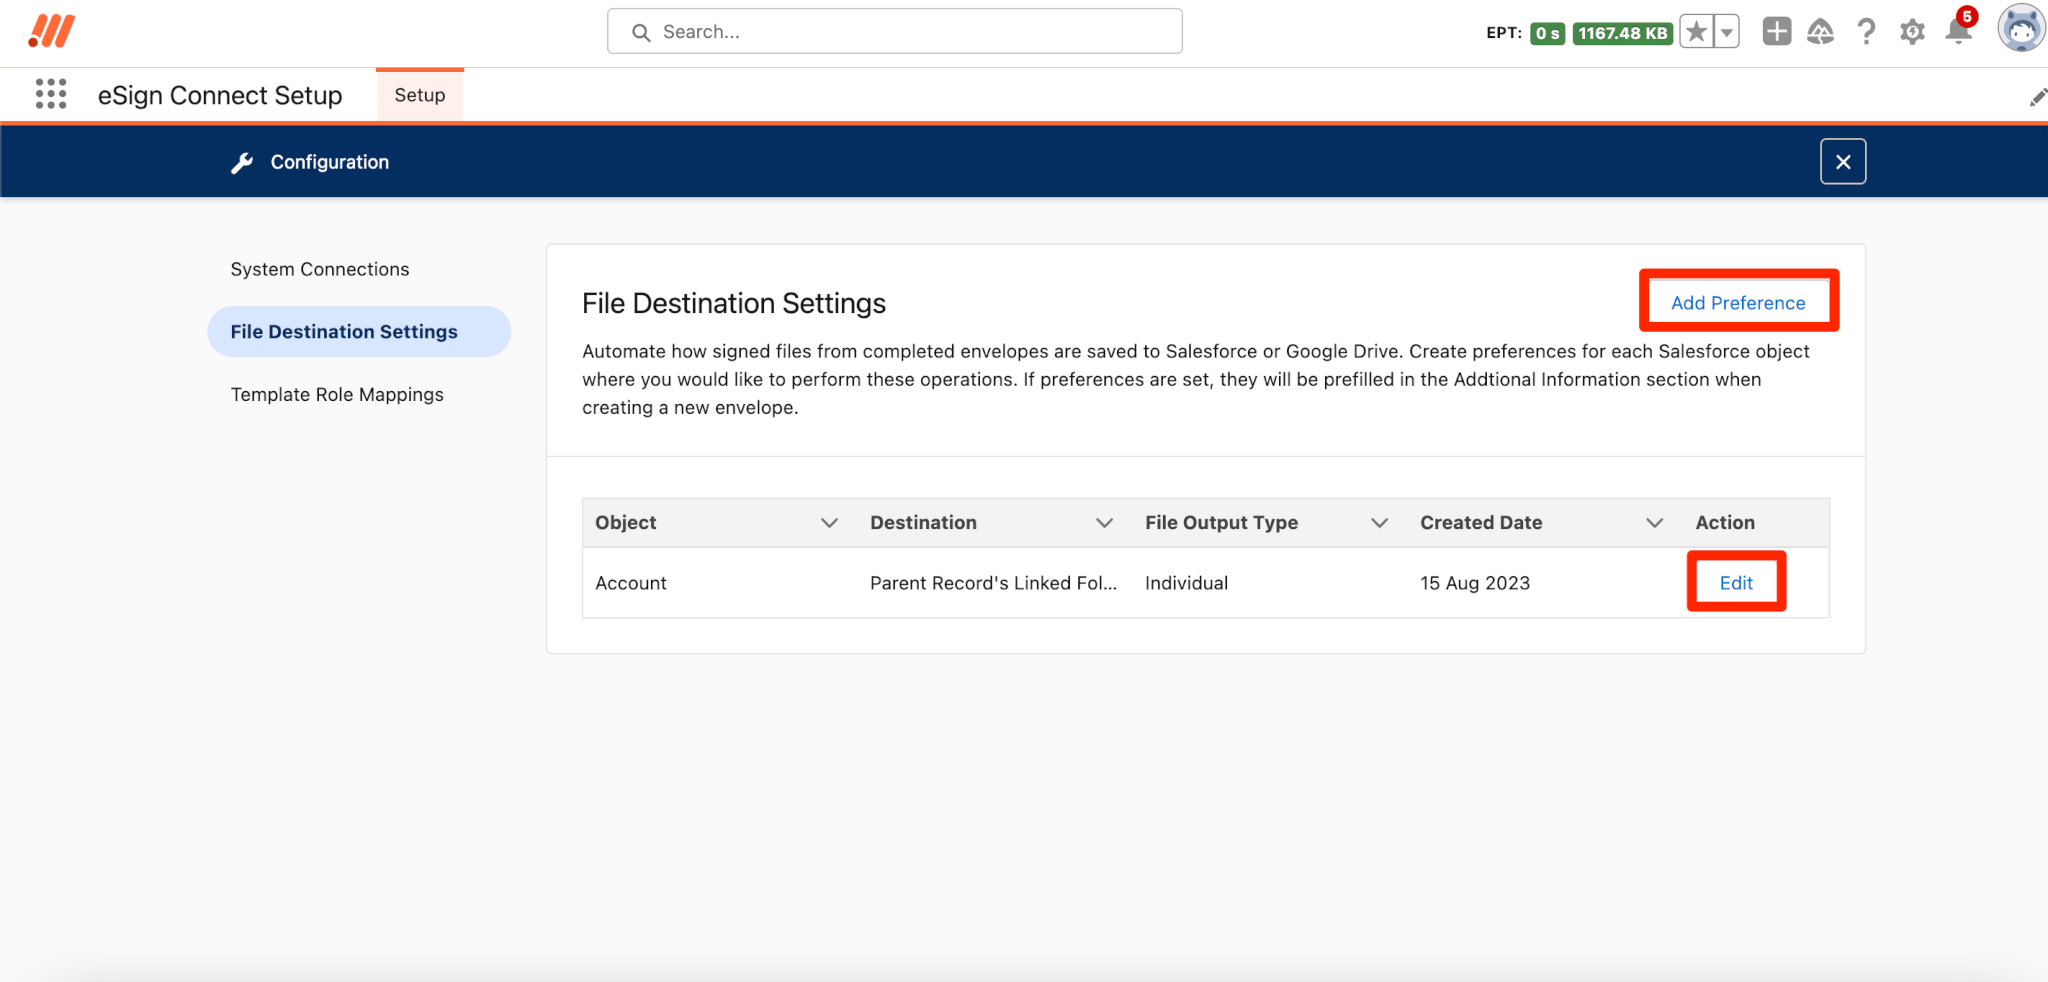
Note: You are only allowed one setting per object.
Template Role Mappings
When first accessing this section, if you have not signed into Docusign through eSign Connect, you will need to sign into your Docusign account using the sign in button.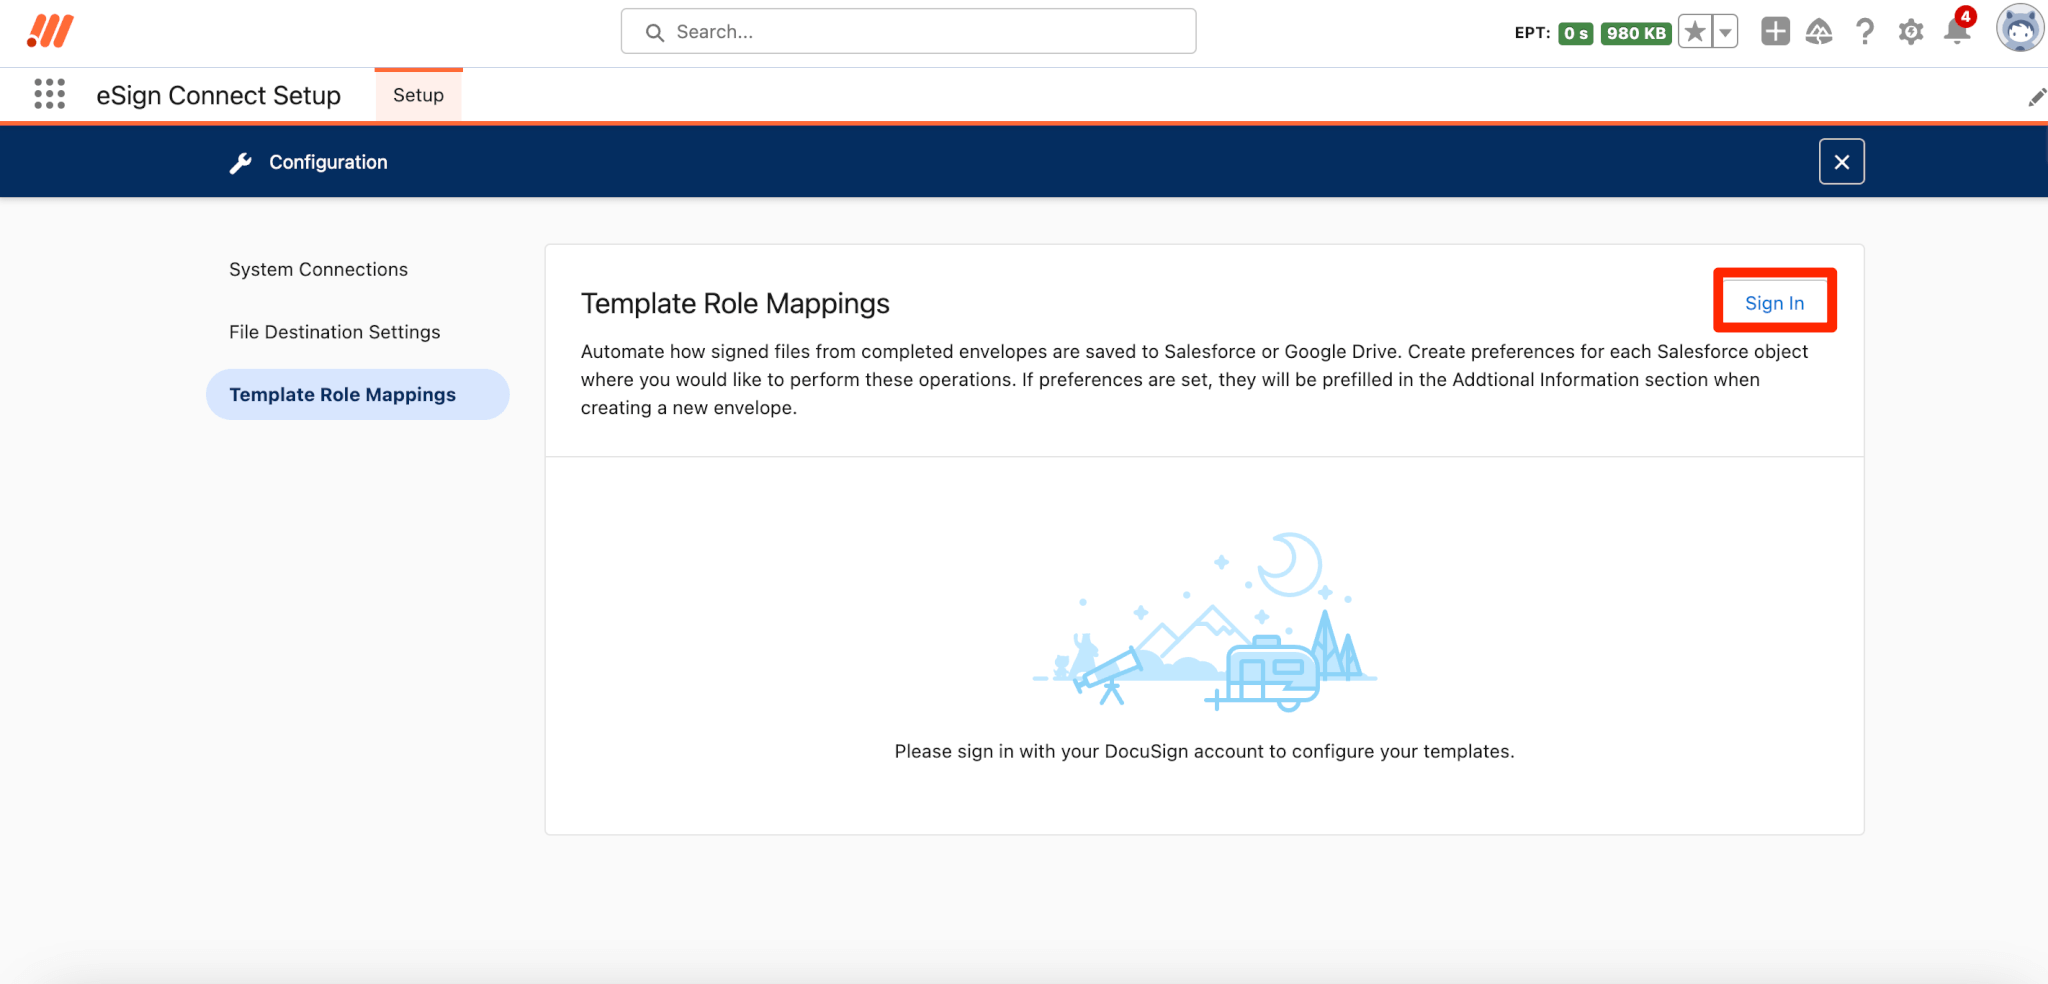
Once signed in you will be able to add template role mappings through the Add Template button. This allows you to assign new recipients per role for each Docusign template you assign to an object. Your list of source types will consist of Sender of Envelope, Manual Entry and User or Contact Lookup for every object. When accessing an object record you setup with a template role mapping and on envelope creation select it, the newly assigned recipients will automatically populate. If you would like to edit any existing template role mappings you can do so through the Edit button on each mapping. 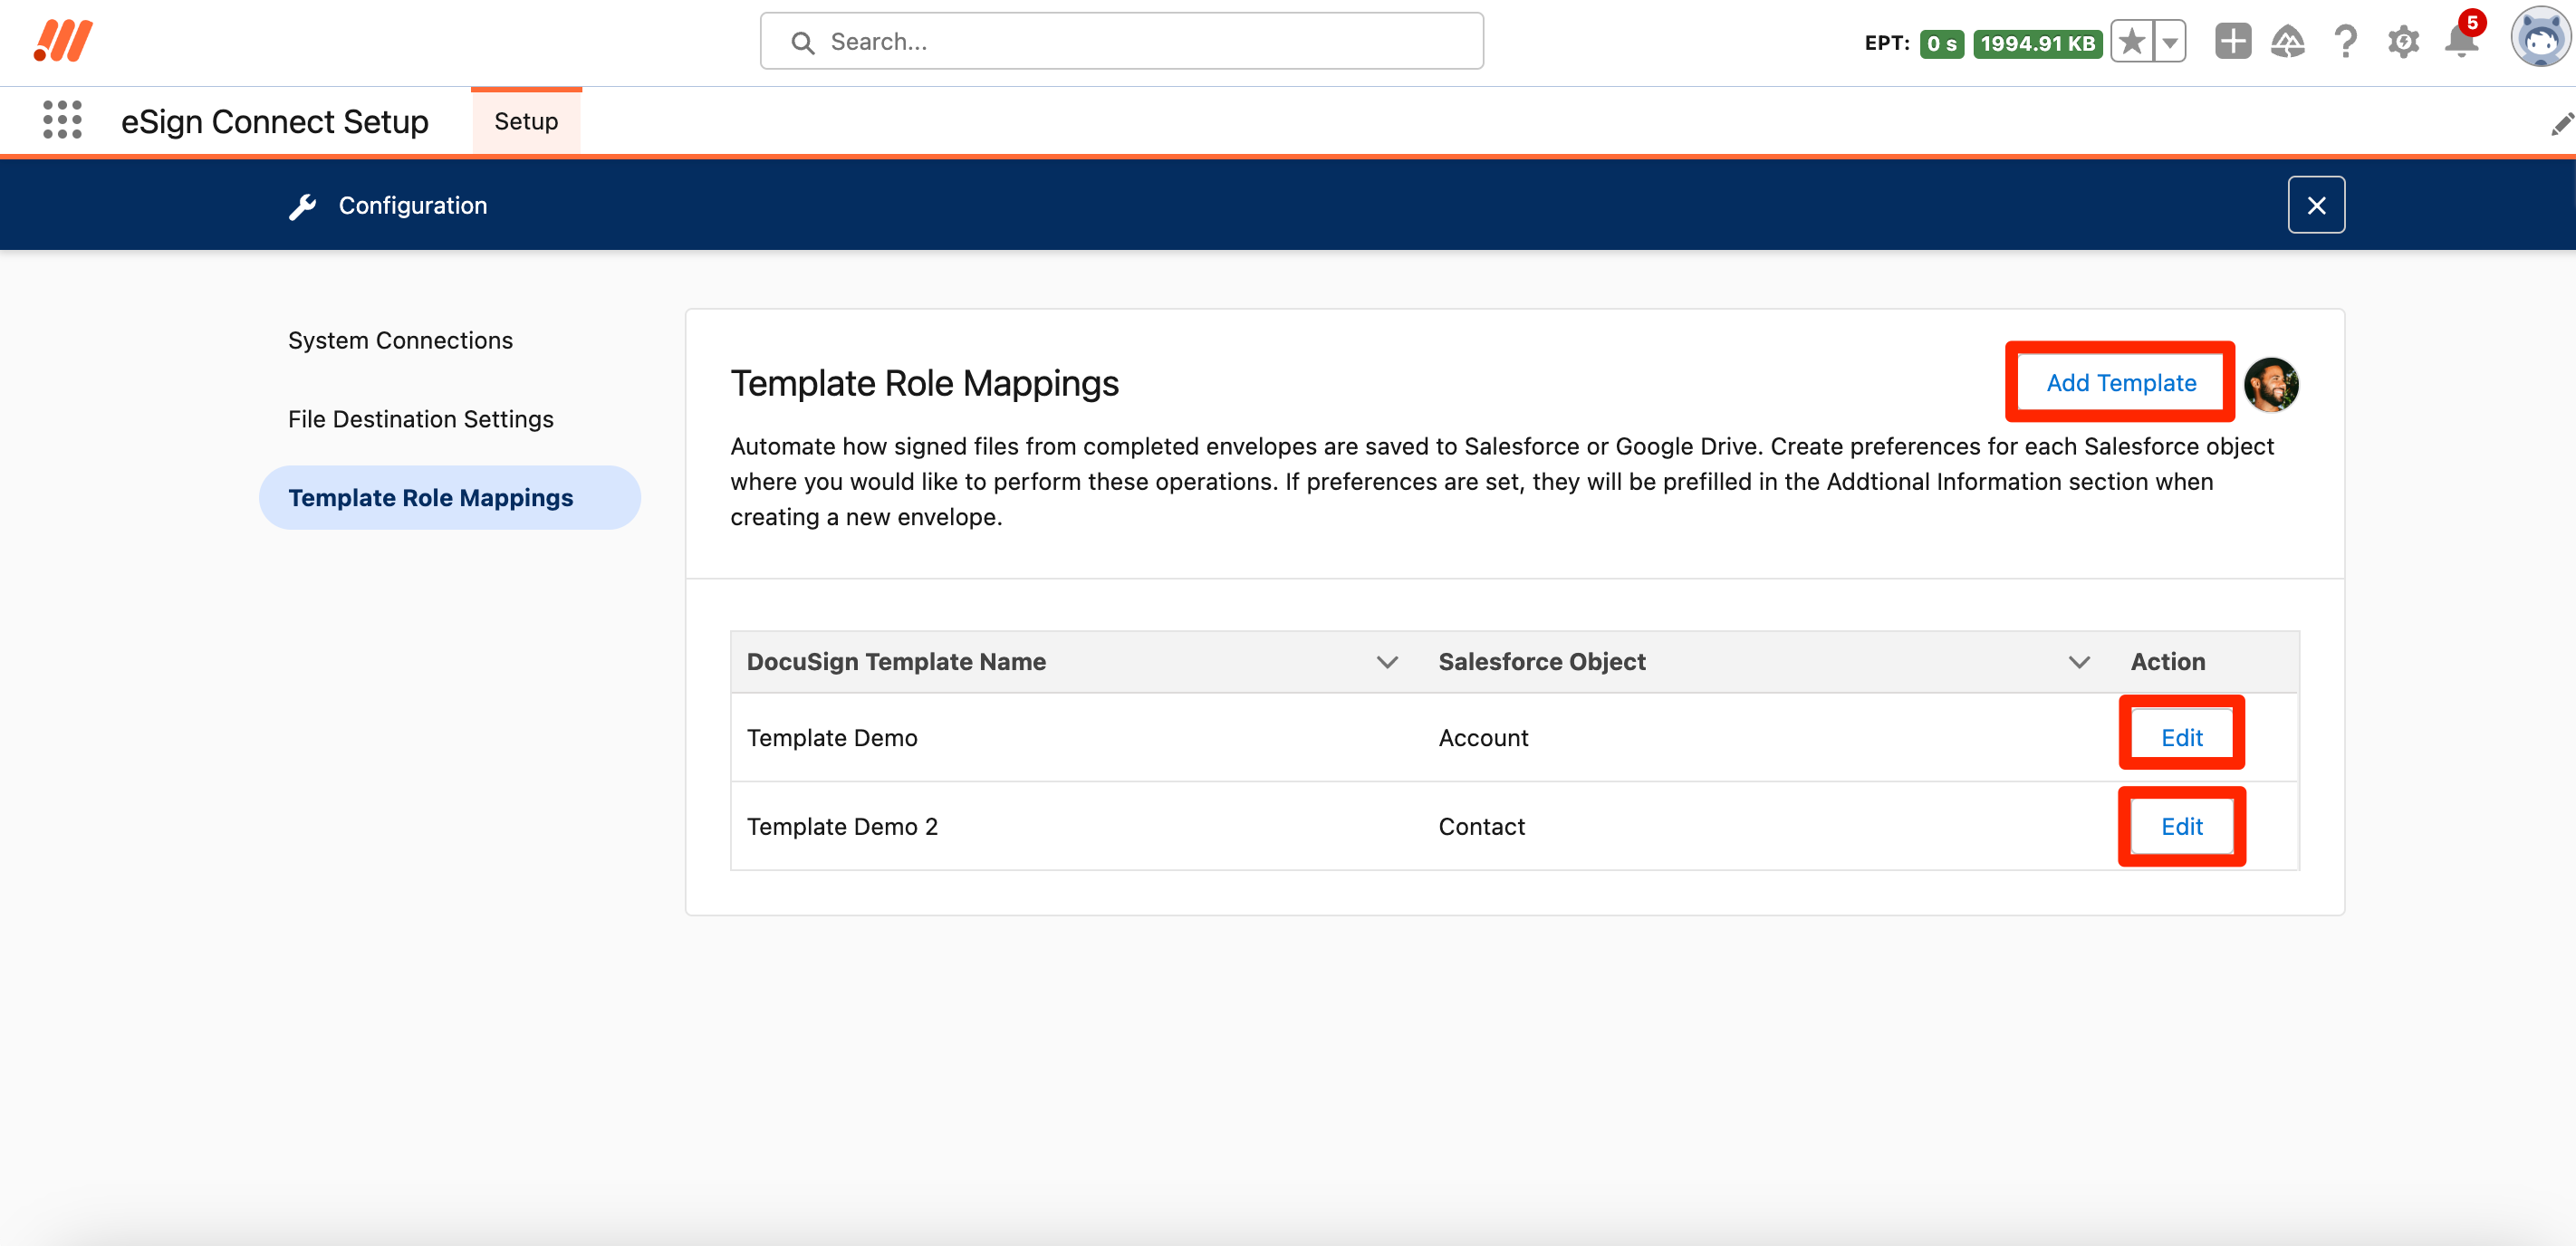
Note: For the opportunity object you will be given an additional source type in Opportunity Contact Roles.
Licensing & Permissions
You will need to assign Salesforce users the eSign Connect License as well as the packaged permission sets in order for them to use the app.
- Assign licenses and permission sets to each user that will need access to the app and its features.
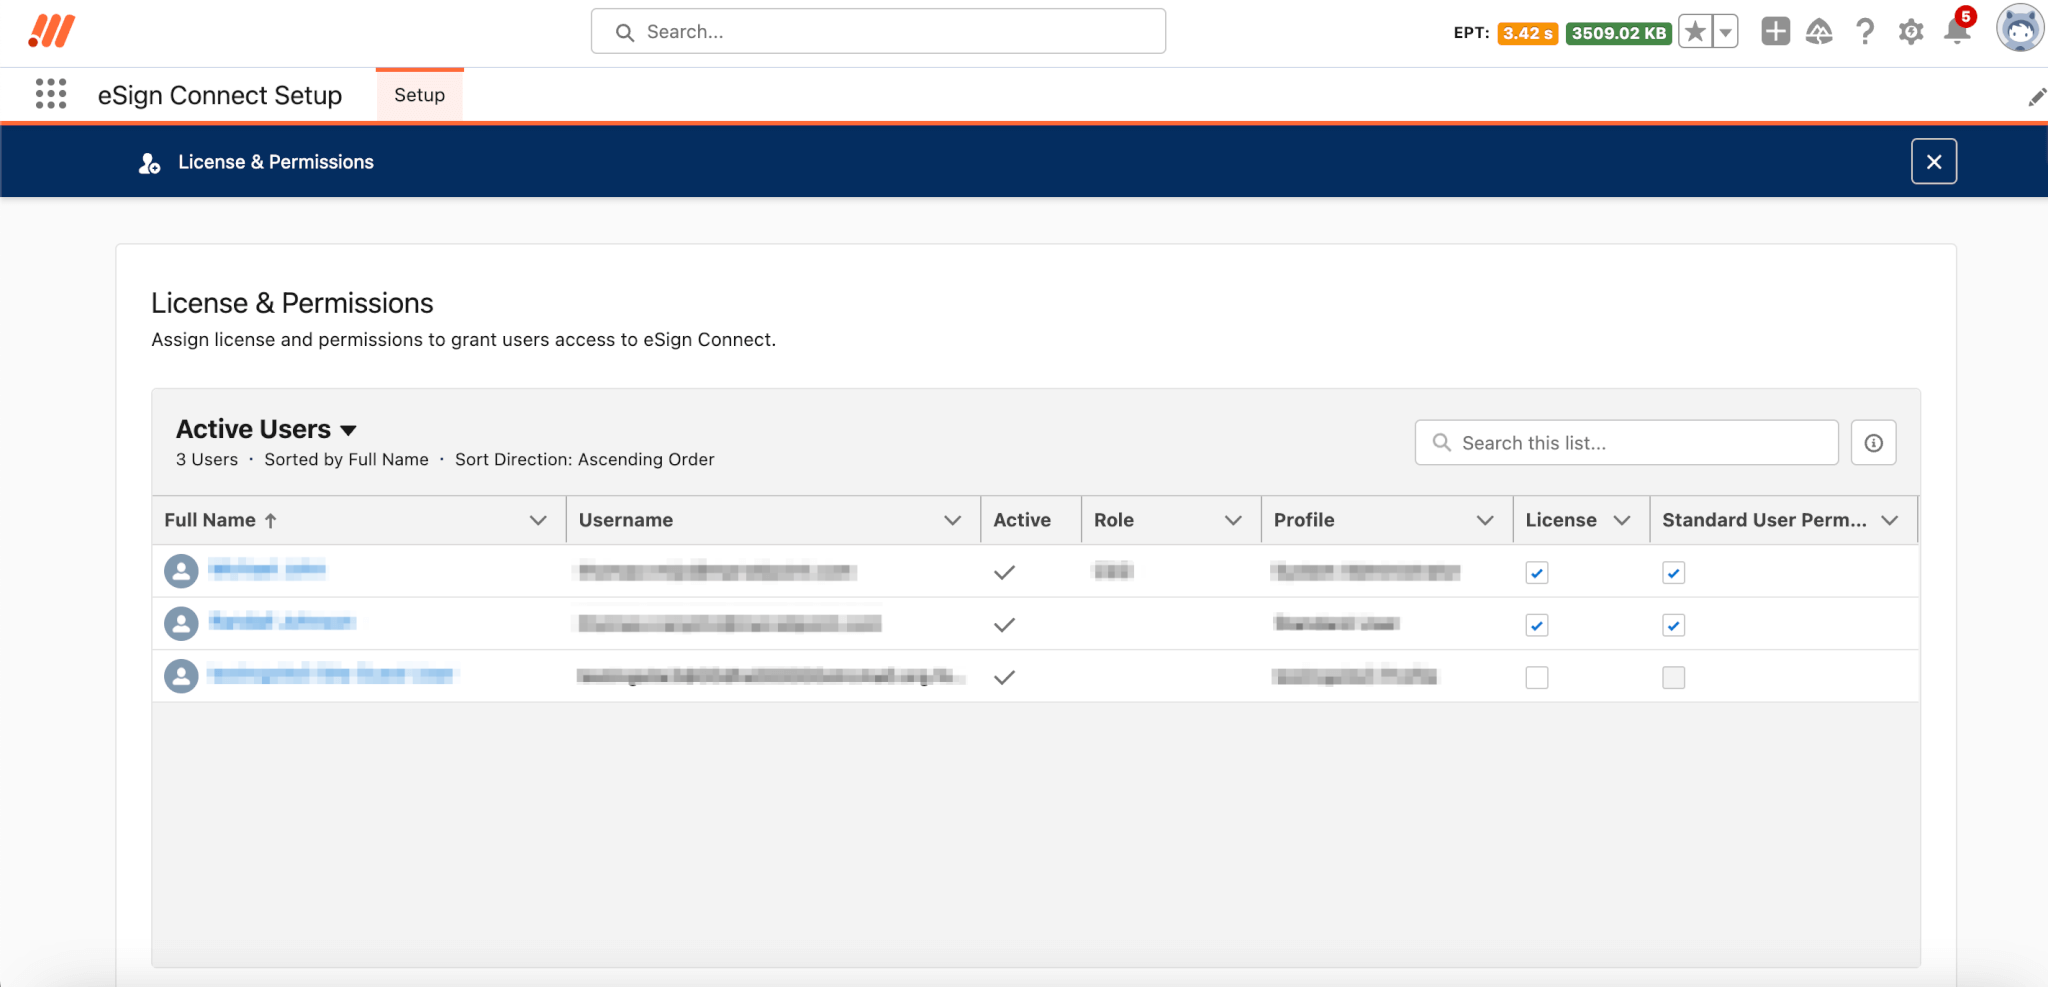
- Close the Licensing and Permissions page by clicking the "X" button on the top right of the screen.
The configured users are now able to use eSign Connect.
eSign Connect Lightning Components
Manually Adding Components to Desktop Page Layouts
The Docusign Envelopes component can be added to any object supported by Salesforce Content. This can be done using the steps below.
To add the component to a lightning record page, navigate to ![]() Setup > Object Manager.
Setup > Object Manager.
- Select the object to modify.
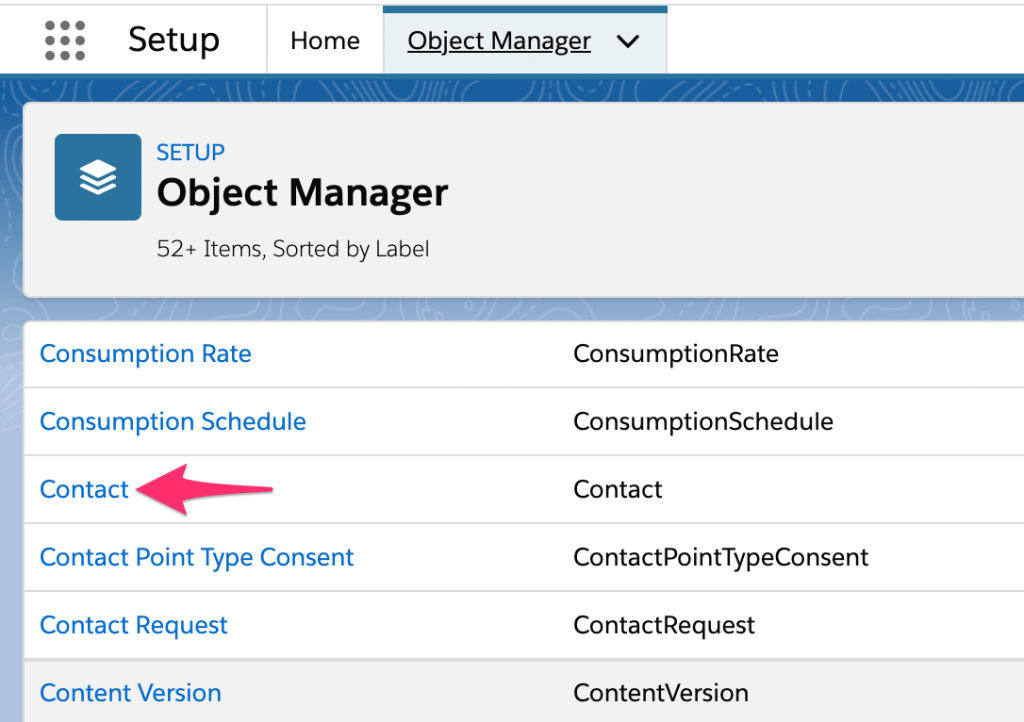
- Select Lightning Record Pages.
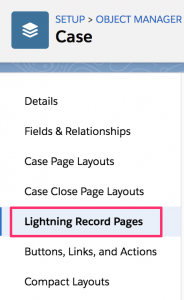
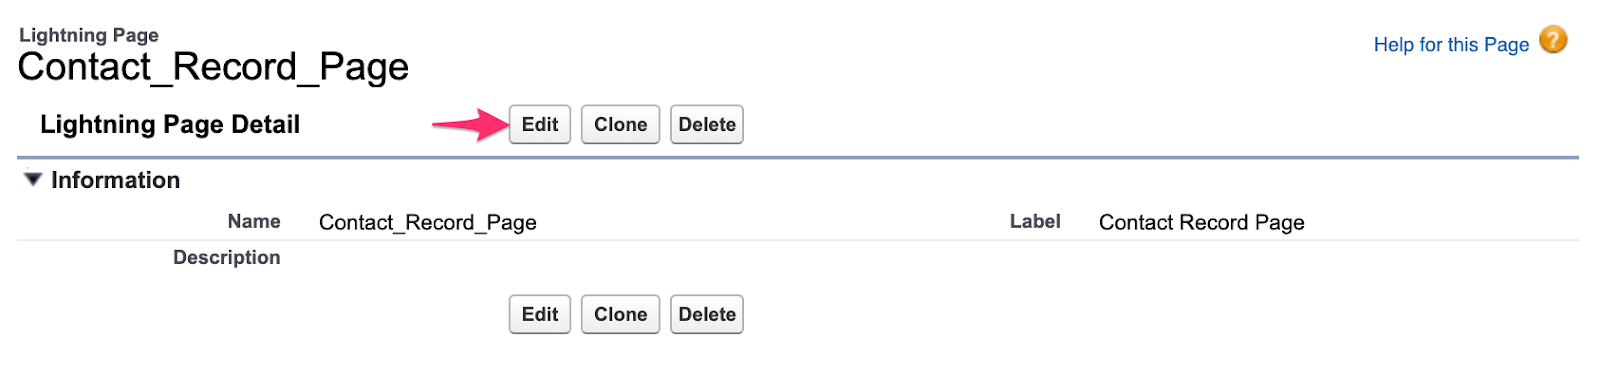
- Select a lightning record page, then click Edit to add the component to an existing lightning page layout. This will launch the Lightning App Builder.

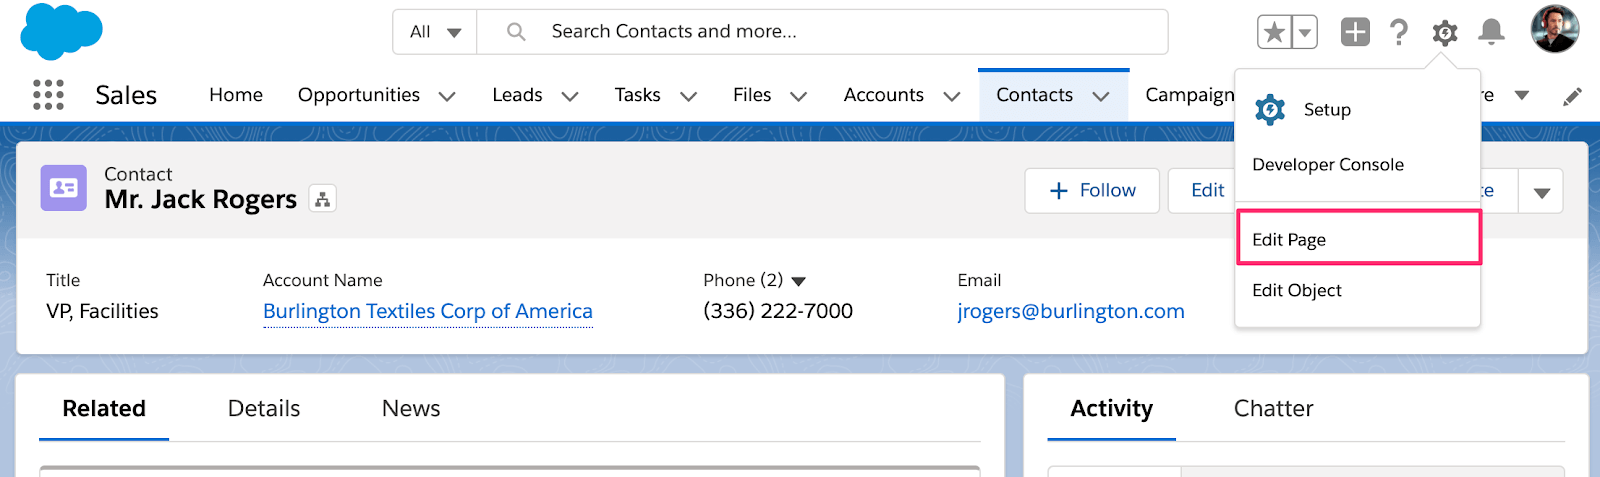
 Note: You may also click Edit Page in the
  Setup dropdown menu from the object record page to get to the Lightning App Builder.
- Once in the Lightning App Builder, from the list of components on the left panel, find the Docusign Envelopes component under the Custom-Managed components section and drag and drop them onto the page layout.
- The Docusign Envelopes component does not require any additional configuration once added to the page layout.
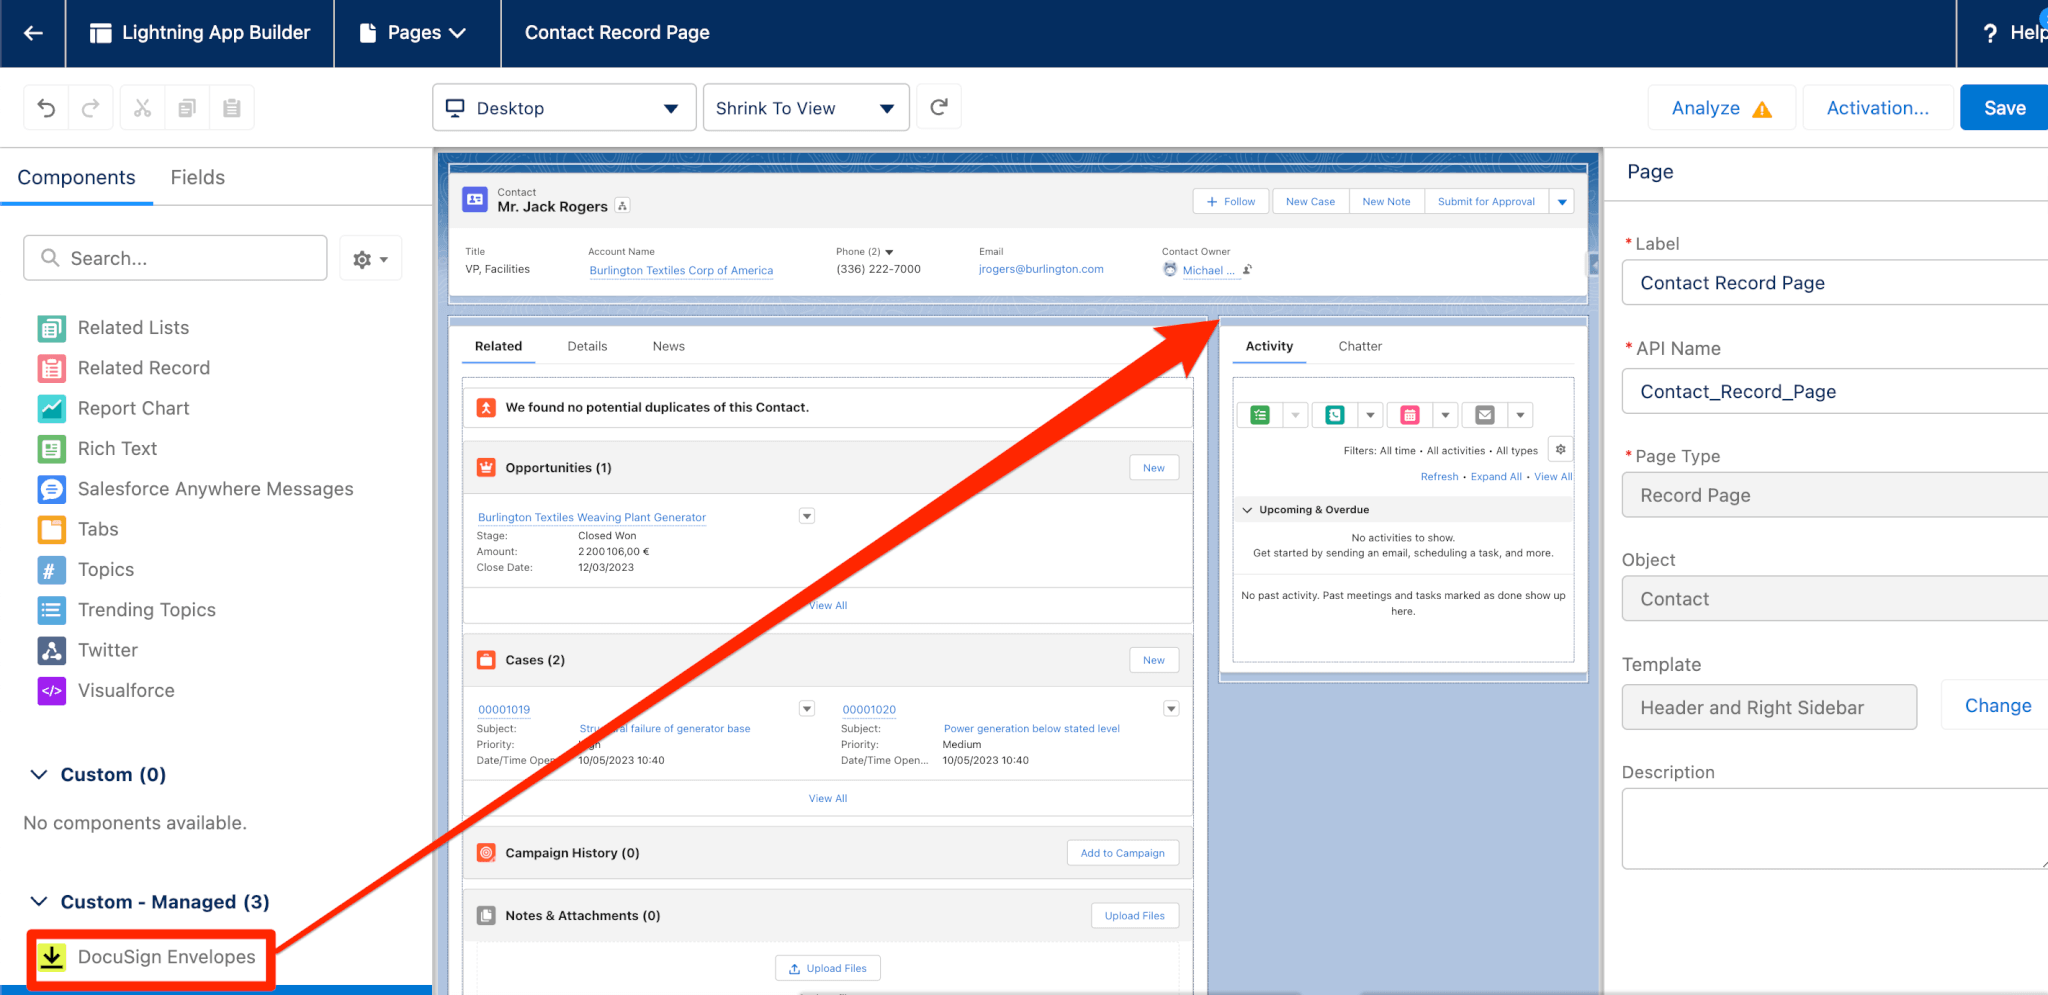
- Click the Save button.
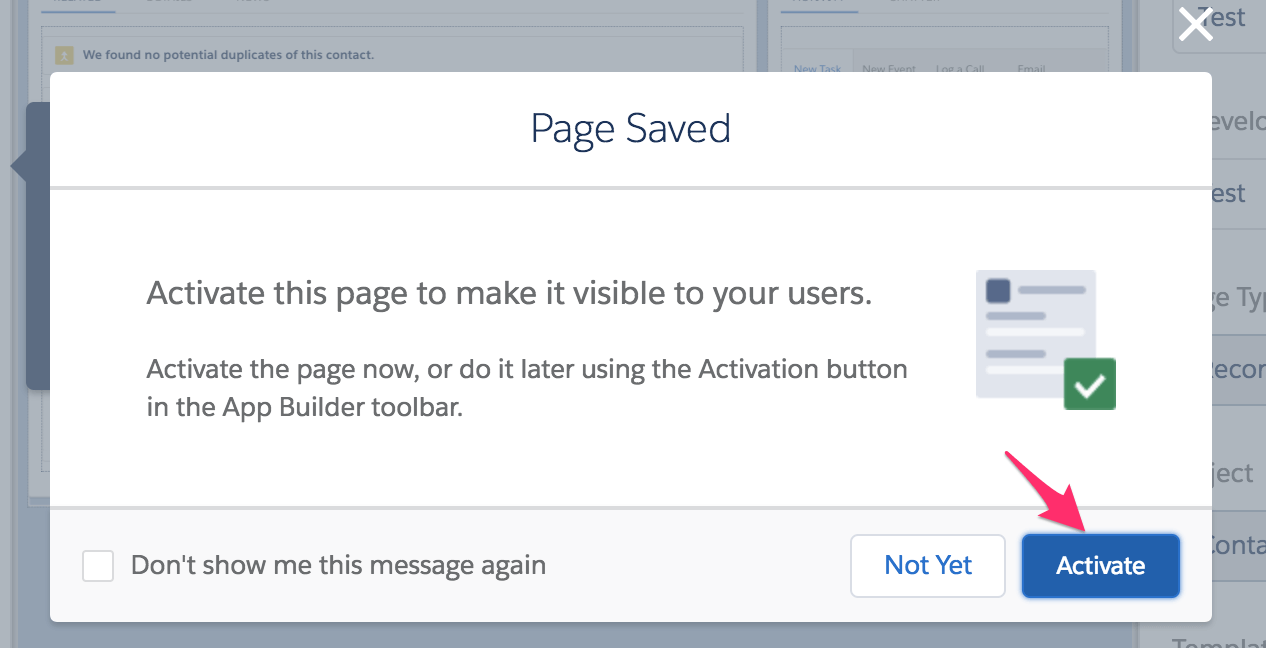
- Click Activate from the Page Saved modal or click Activation… from the Lightning App Builder if activation is required.
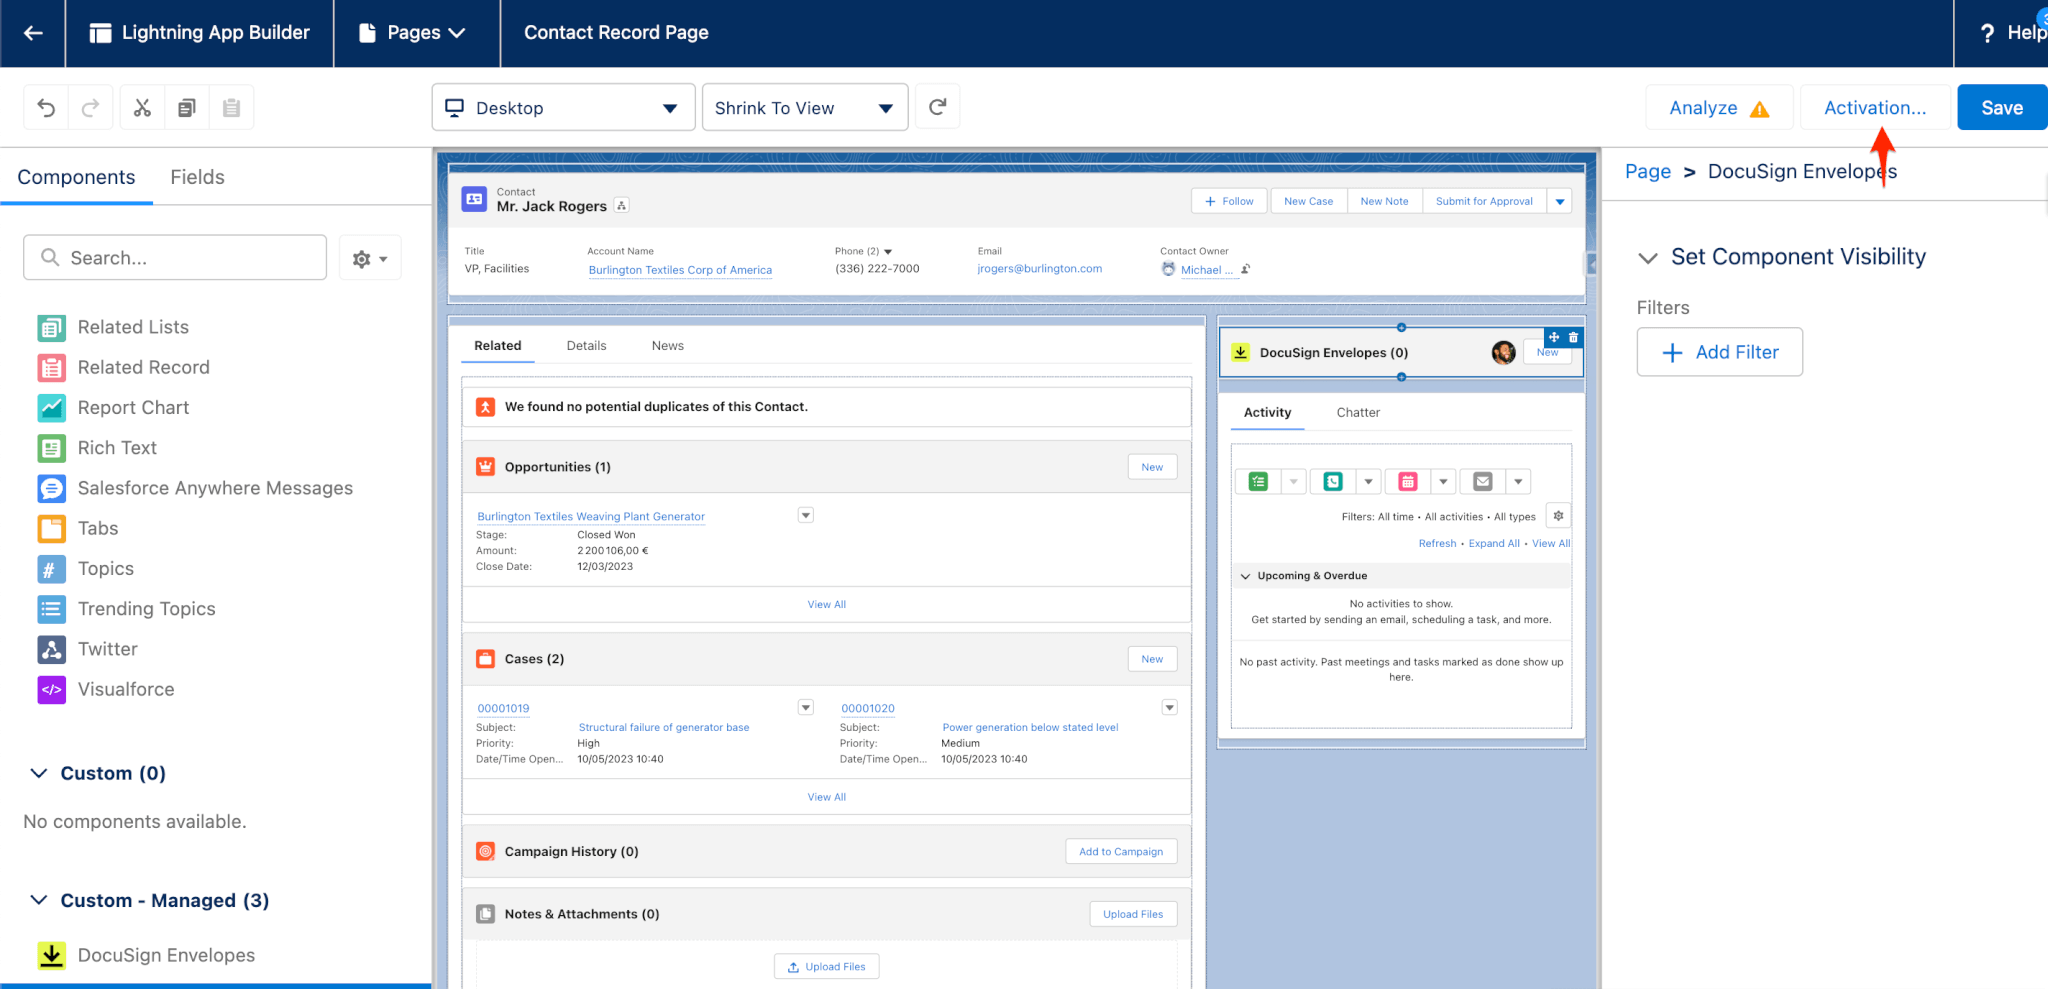
Note: To fully utilize all of the features for eSign Connect you will need to also add the Drive Links component to the same page as Docusign Envelopes.