How to use DocuSign templates with eSign
In this article, you will learn how to use your saved DocuSign templates with eSign Connect. You will be able to set up template role mappings, apply your DocuSign templates' recipients, subject and message to attached files and use your DocuSign Templates.
Table of Contents
What are DocuSign Templates
DocuSign templates are preset formats to send documents or files through DocuSign so that users do not need to recreate the format each time they wish to send documents to the same recipients or send the same documents to different recipients. DocuSign does this by allowing users to save documents or files with set recipients, roles and signing fields in any combination. This is useful for the main purpose of these templates which is to send documents to recipients so that they may be electronically signed while keeping track of the signature status. To learn more about DocuSign templates and how to create them please see the following: How to Create and Use a DocuSign Template
Template Role Mappings
Template role mappings is a setting in eSign Connect that allows users to automatically populate recipient data using a combination of a specific Salesforce object and template that has roles with no recipient information using Salesforce data.
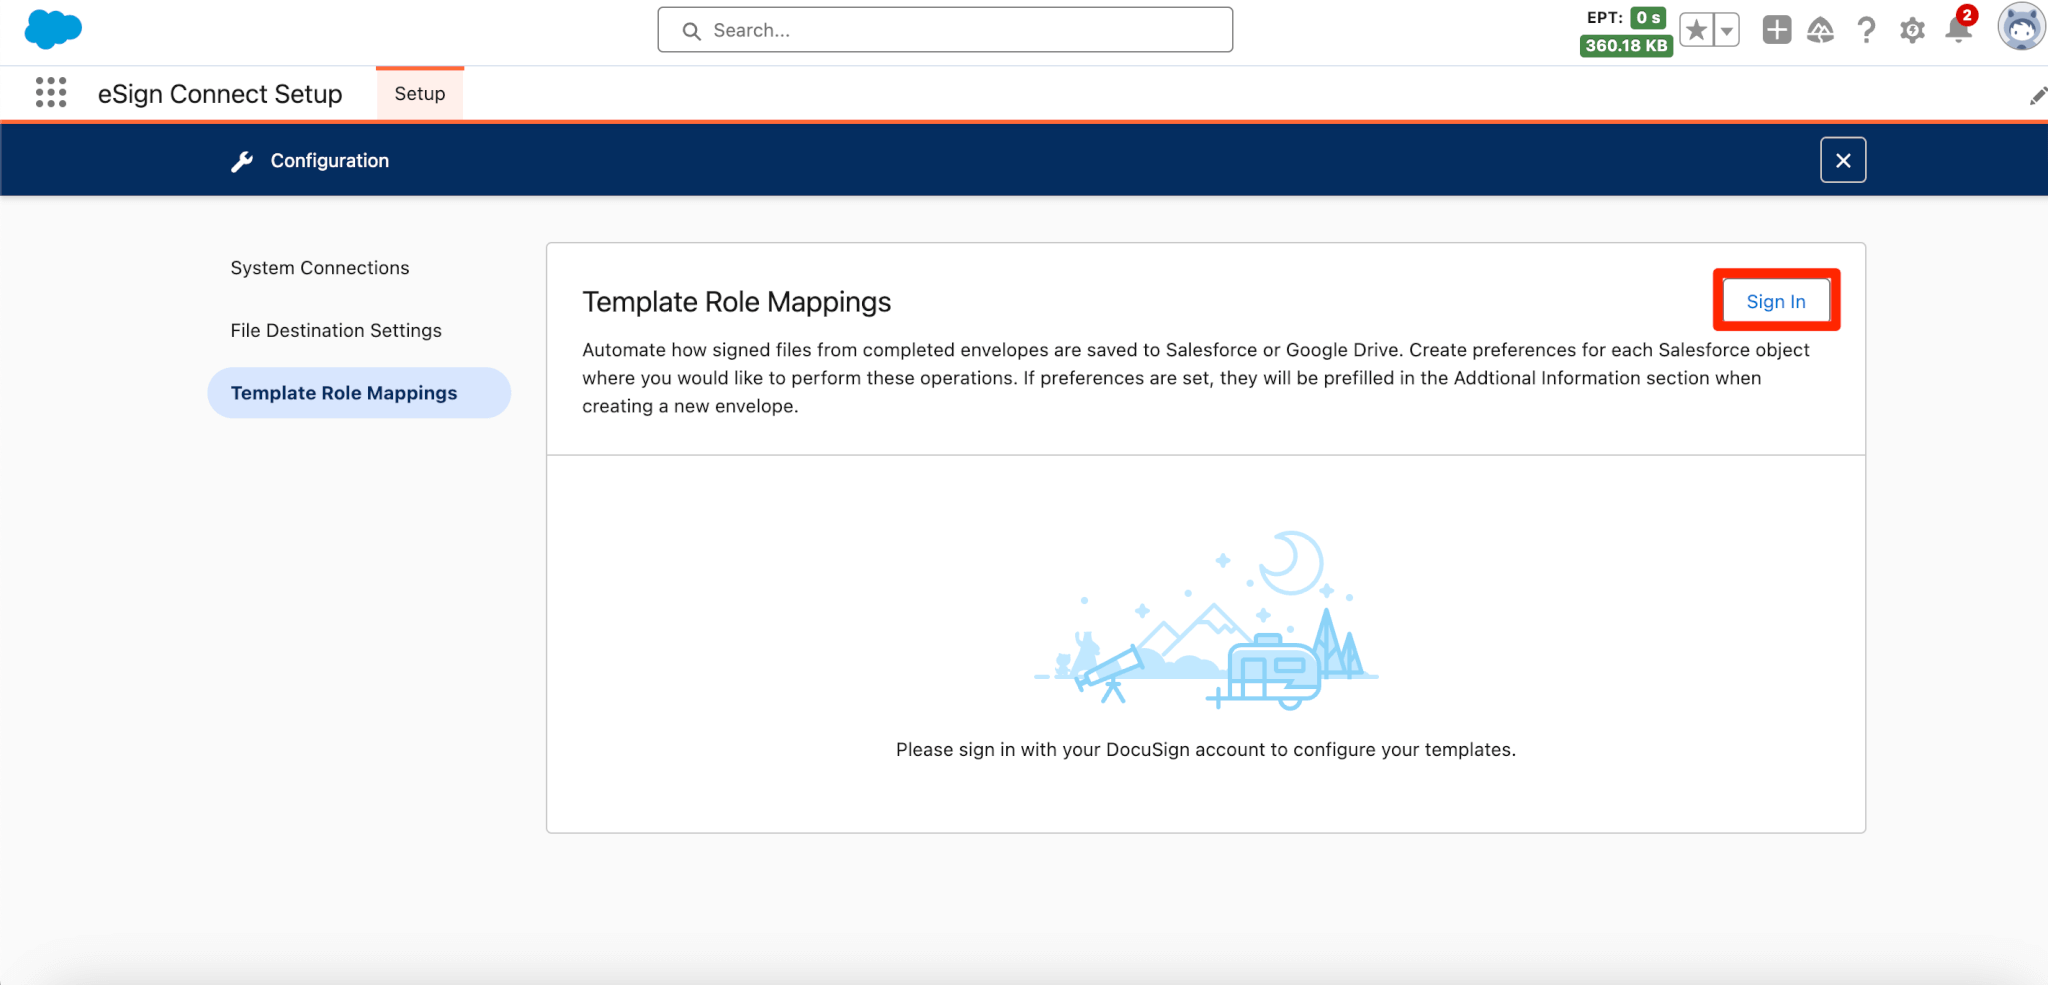
Setting up template role mappings
- Go to Apps.
- Select eSign Connect Setup.
- Select the Configuration card.
- Select the Template Role Mappings section.
- Click the Add button.
- If you are not signed into DocuSign throught eSign Connect you will first need to do so using the Sign In button.
- If you are not signed into DocuSign throught eSign Connect you will first need to do so using the Sign In button.
- Once Add has been selected you will be prompted with a modal with two picklists. One containing your DocuSign Templates and another for the Salesforce Object you want these changes to apply to.

- Once you have selected both a template and object you will be give the option to assign what Salesforce data you want from the object as recipient data for each role. Your options for data will be listed under source type and will contain the following to choose from:
- Sender of Envelope – No action
- Manual Entry – Will have two input fields
- Recipient Full Name
- Recipient Email
- User or contact lookups – Picklist
- Opportunity Contact Roles – Only available if the Salesforce object is set to Opportunity also a picklist
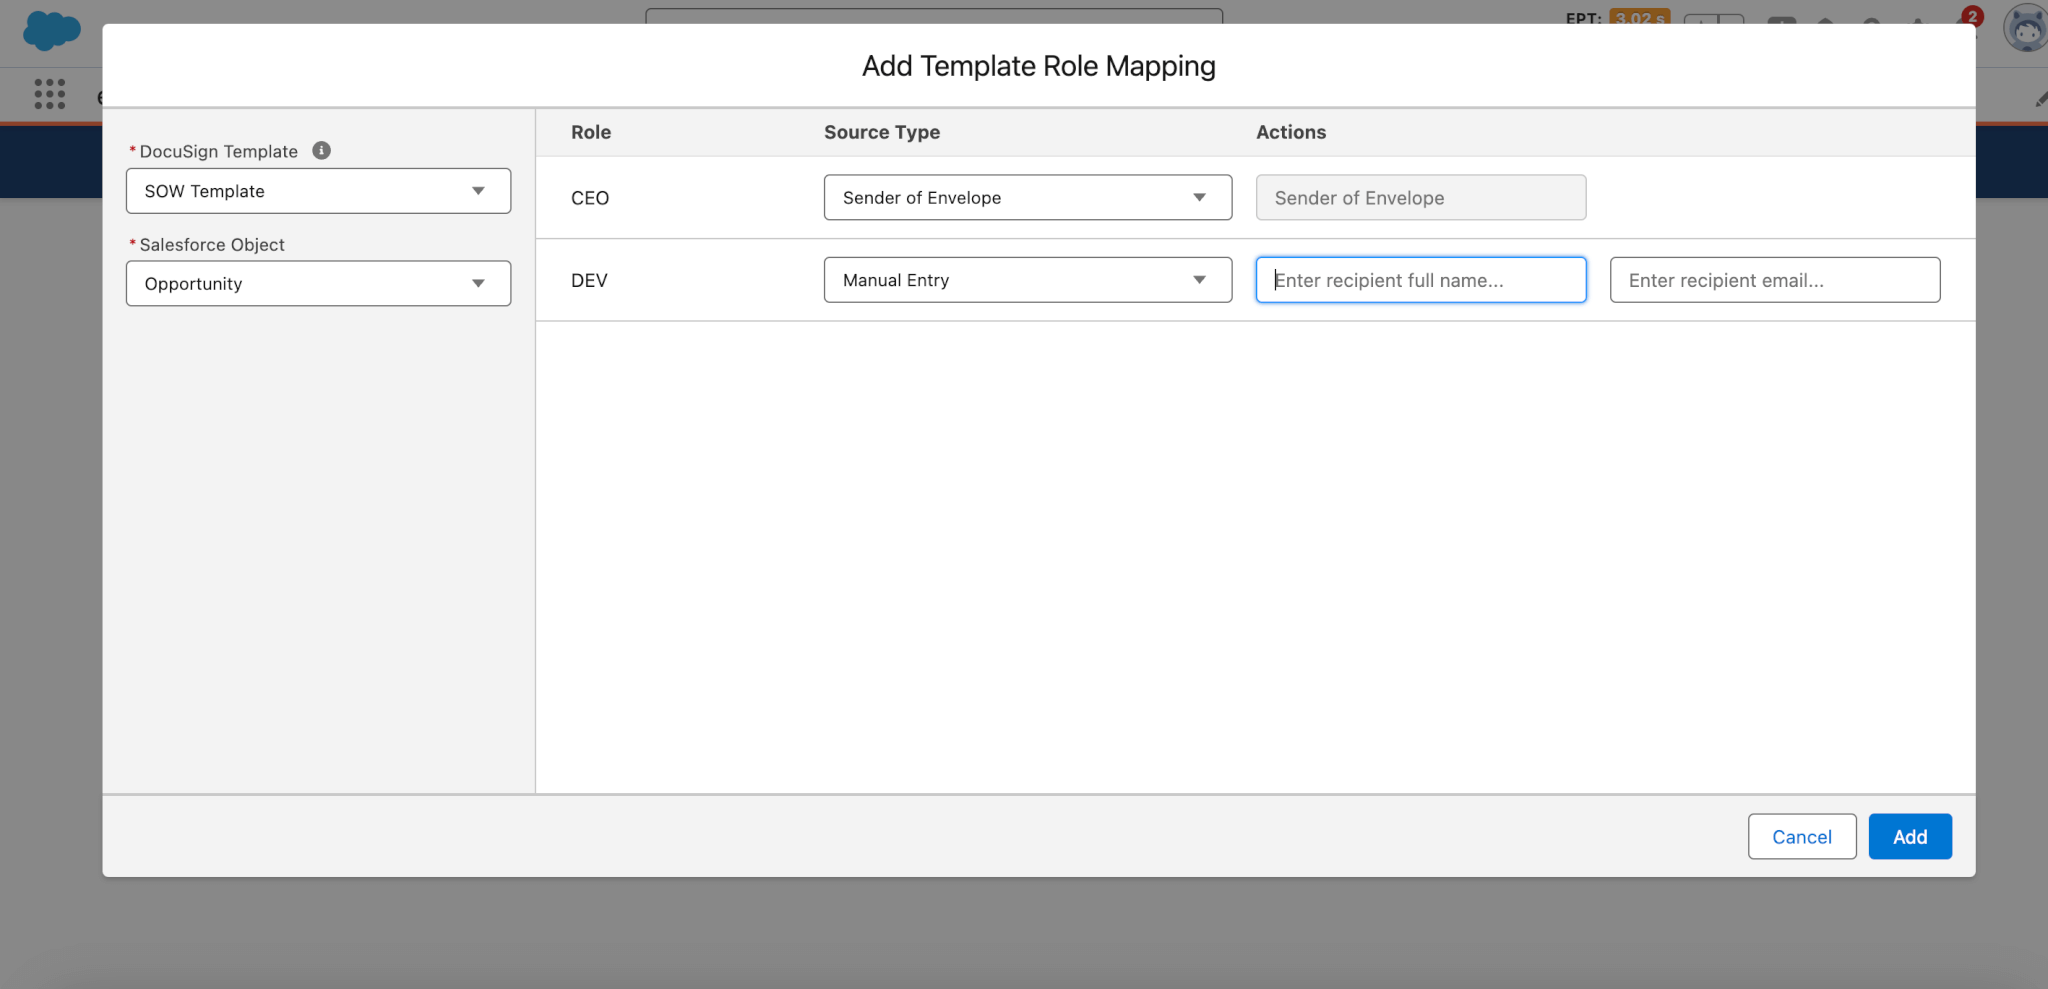
- Once you have completed setting up your template role mapping you can click on the Add button. This will close the modal and you can now see your template role mapping with the option to edit it or add more.

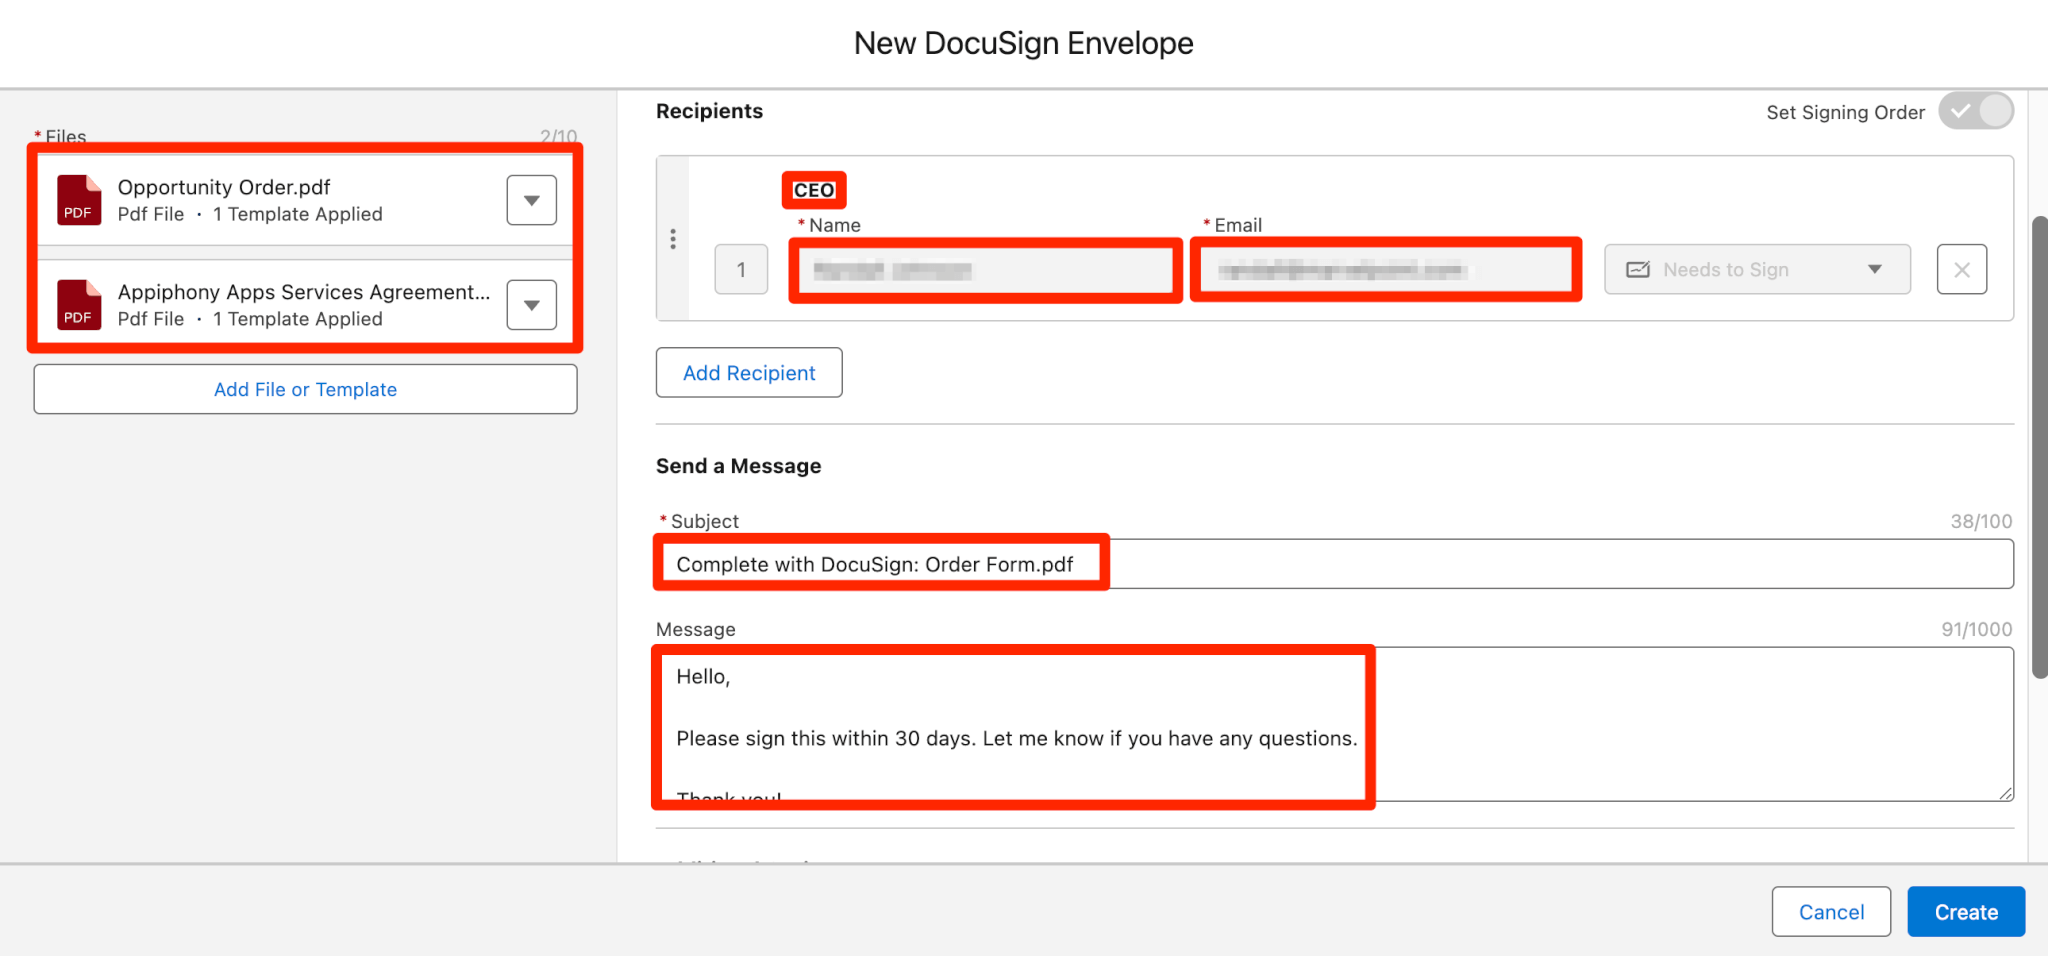
- Now if you go to the object you set up in Template Role Mappings and then the New DocuSign Envelope modal and select that template you set up in Template Role Mappings in DocuSign Templates… when adding a file you will see your changes.
Note: Due to DocuSign limitations, you will only see DocuSign Templates that have at least one role without any Recipient Name or Email. However, you will only be able to set up template role mappings to your selected DocuSign Templates for roles that contain no Recipient Name and Email.
Adding Templates on Envelope Creation
Through the DocuSign Envelopes component users can add templates to added files so that the recipients, subject and message from the template are applied to that file or users can add templates which will also automatically populate the files that are in the template.
Add template to added files
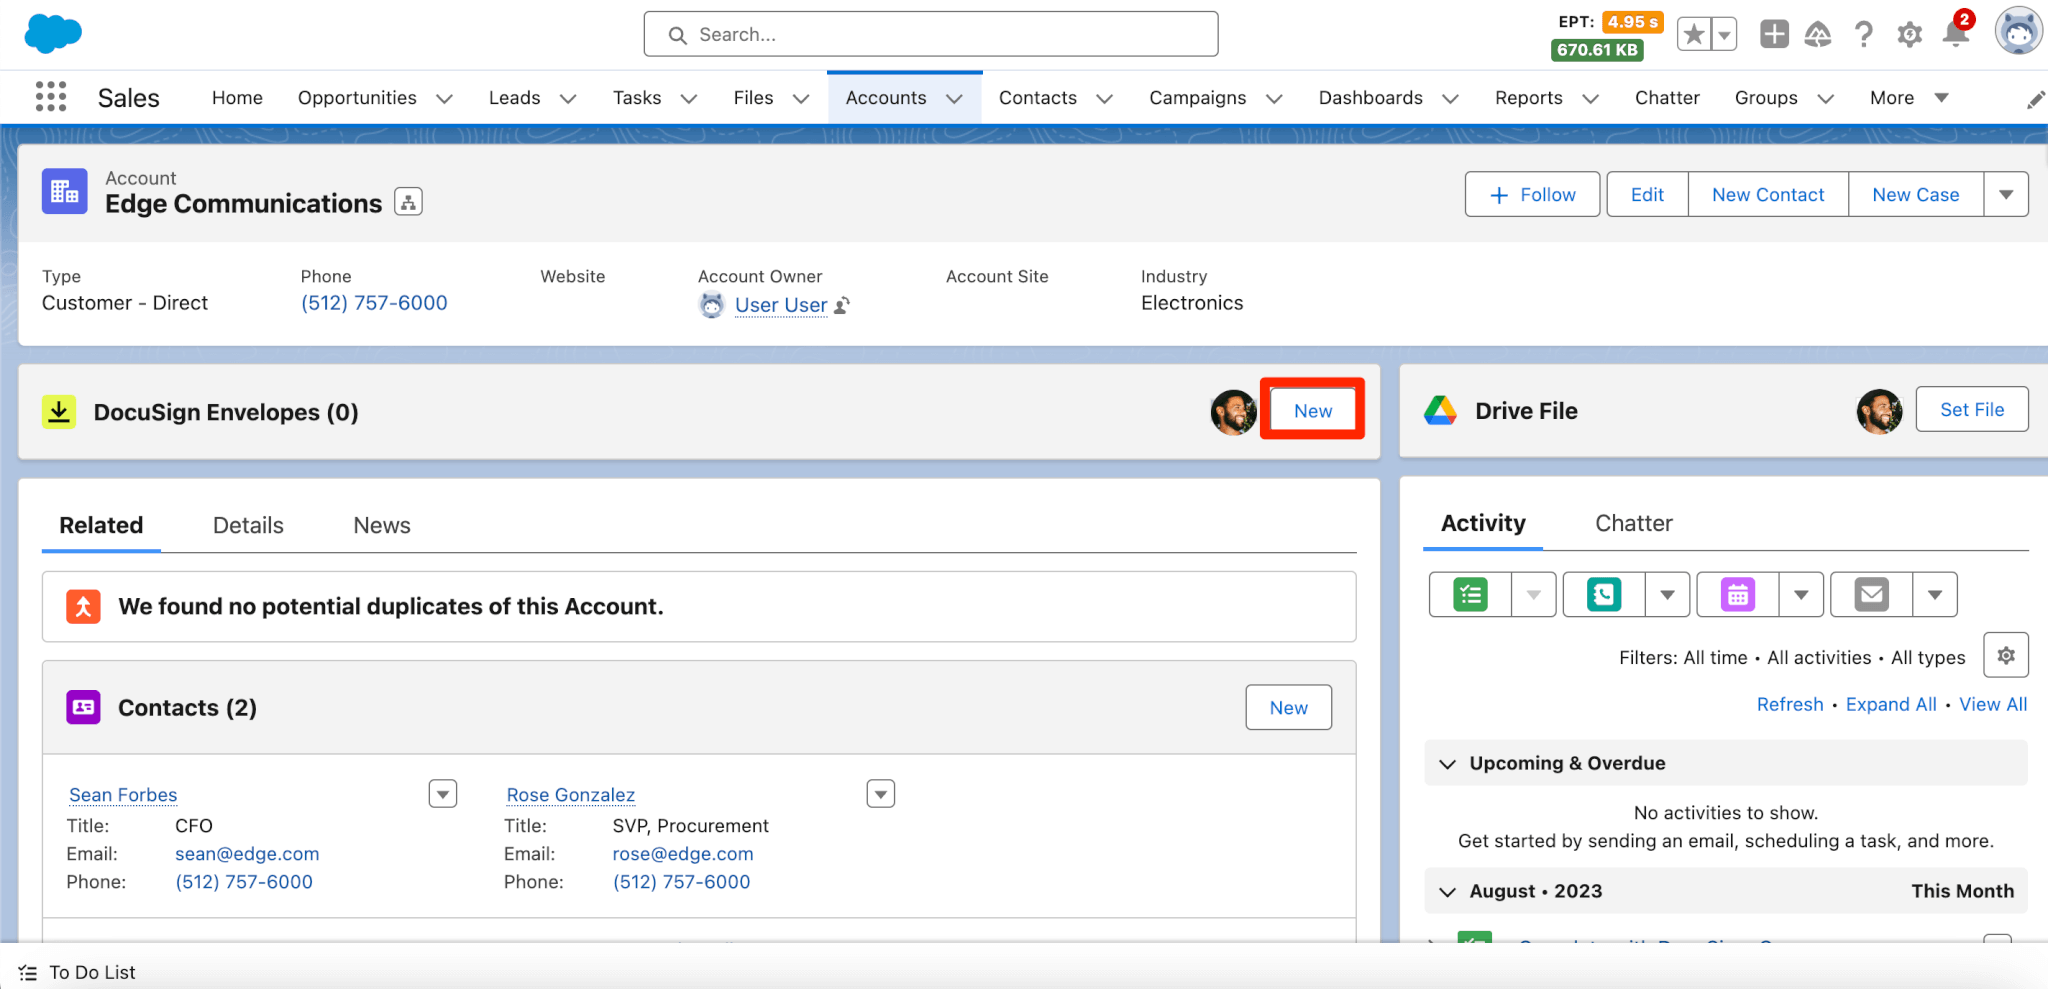
- Go to your desired object record that has the DocuSign Envelopes component.
- Click on the New button.
- In the New DocuSign Envelope modal click on Add File or Template.
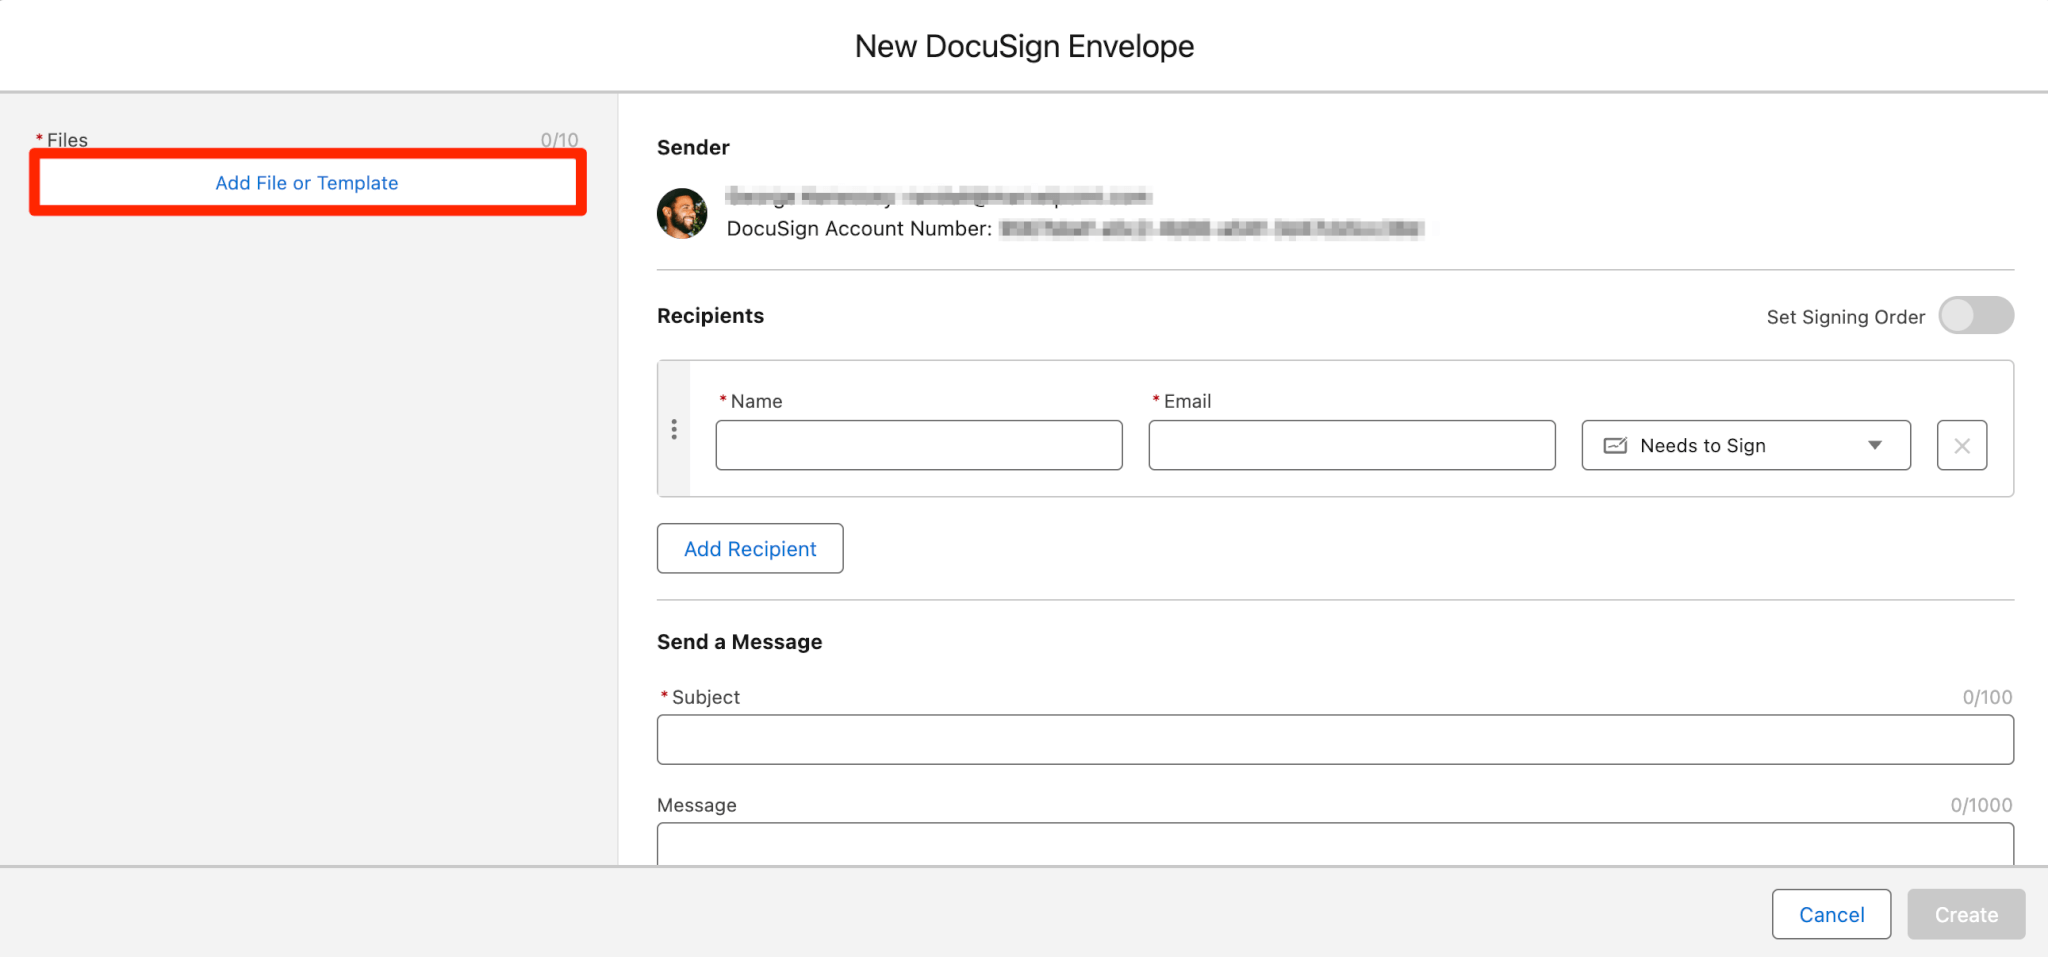
- Add a file or files.
- Click on the drop down option for any file.
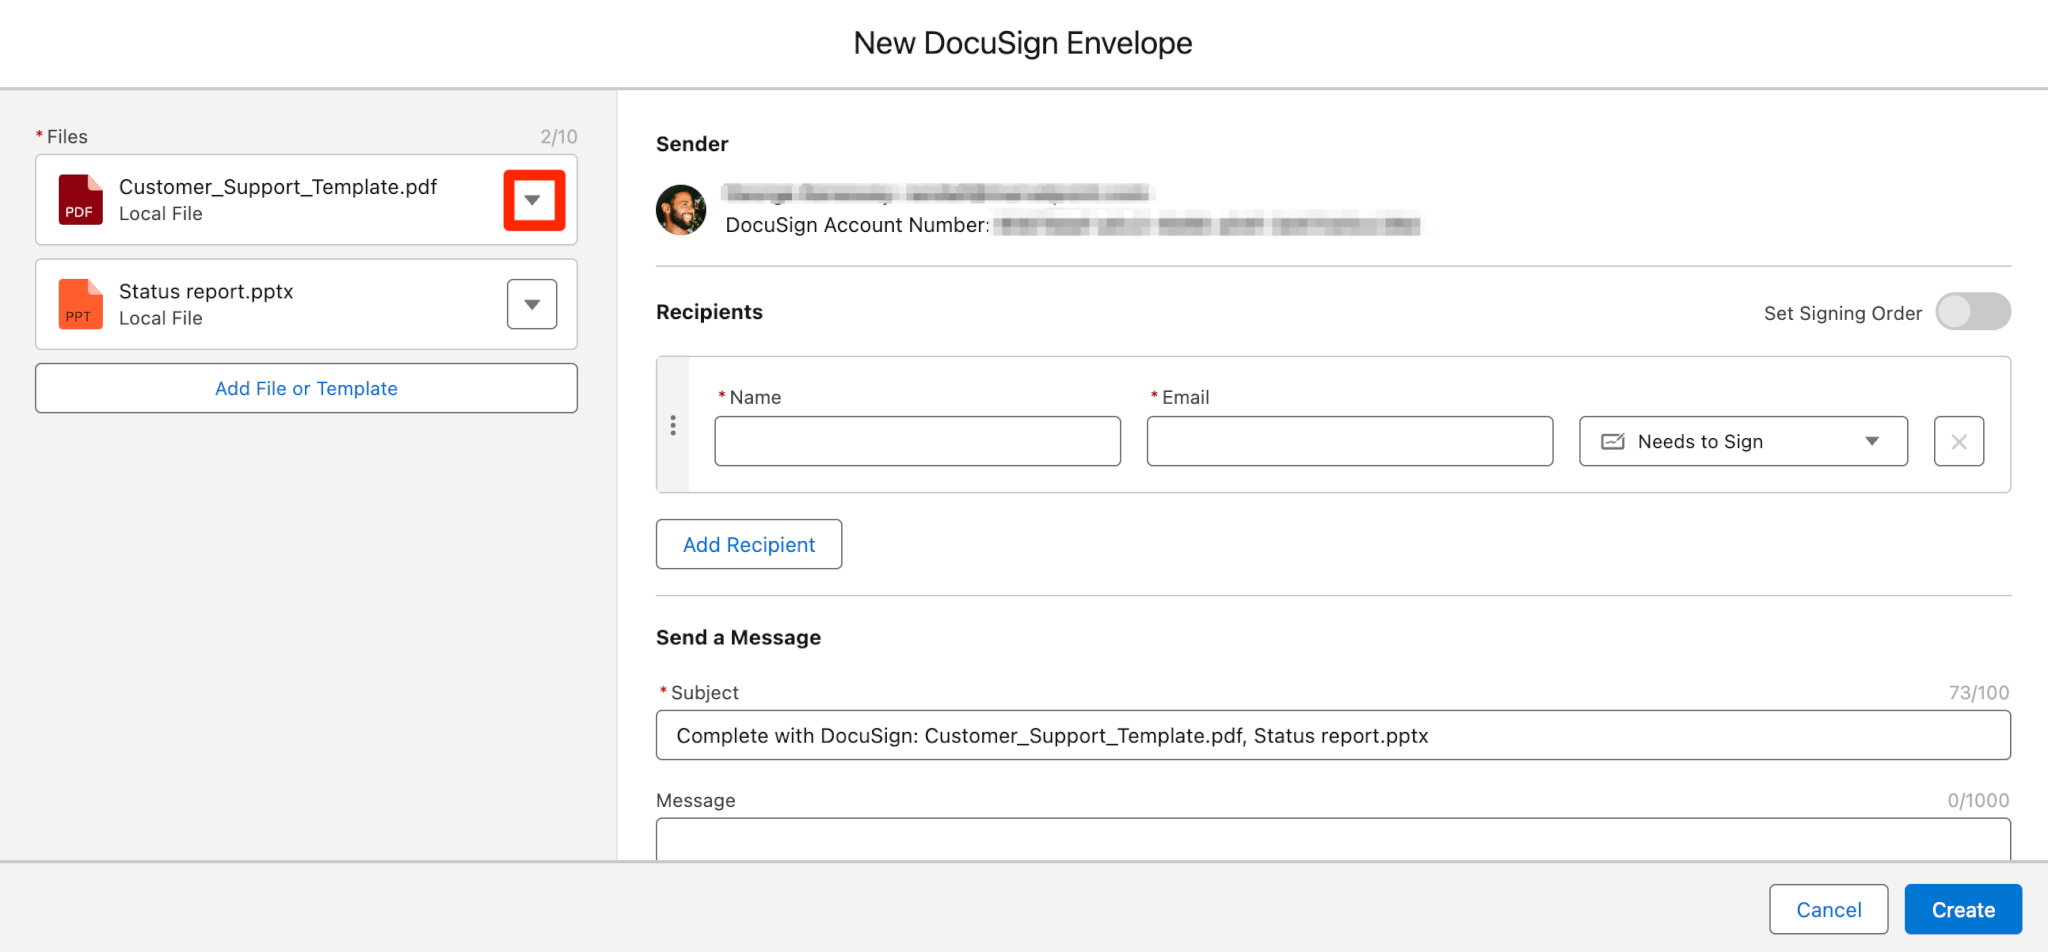
- Select Add Template.
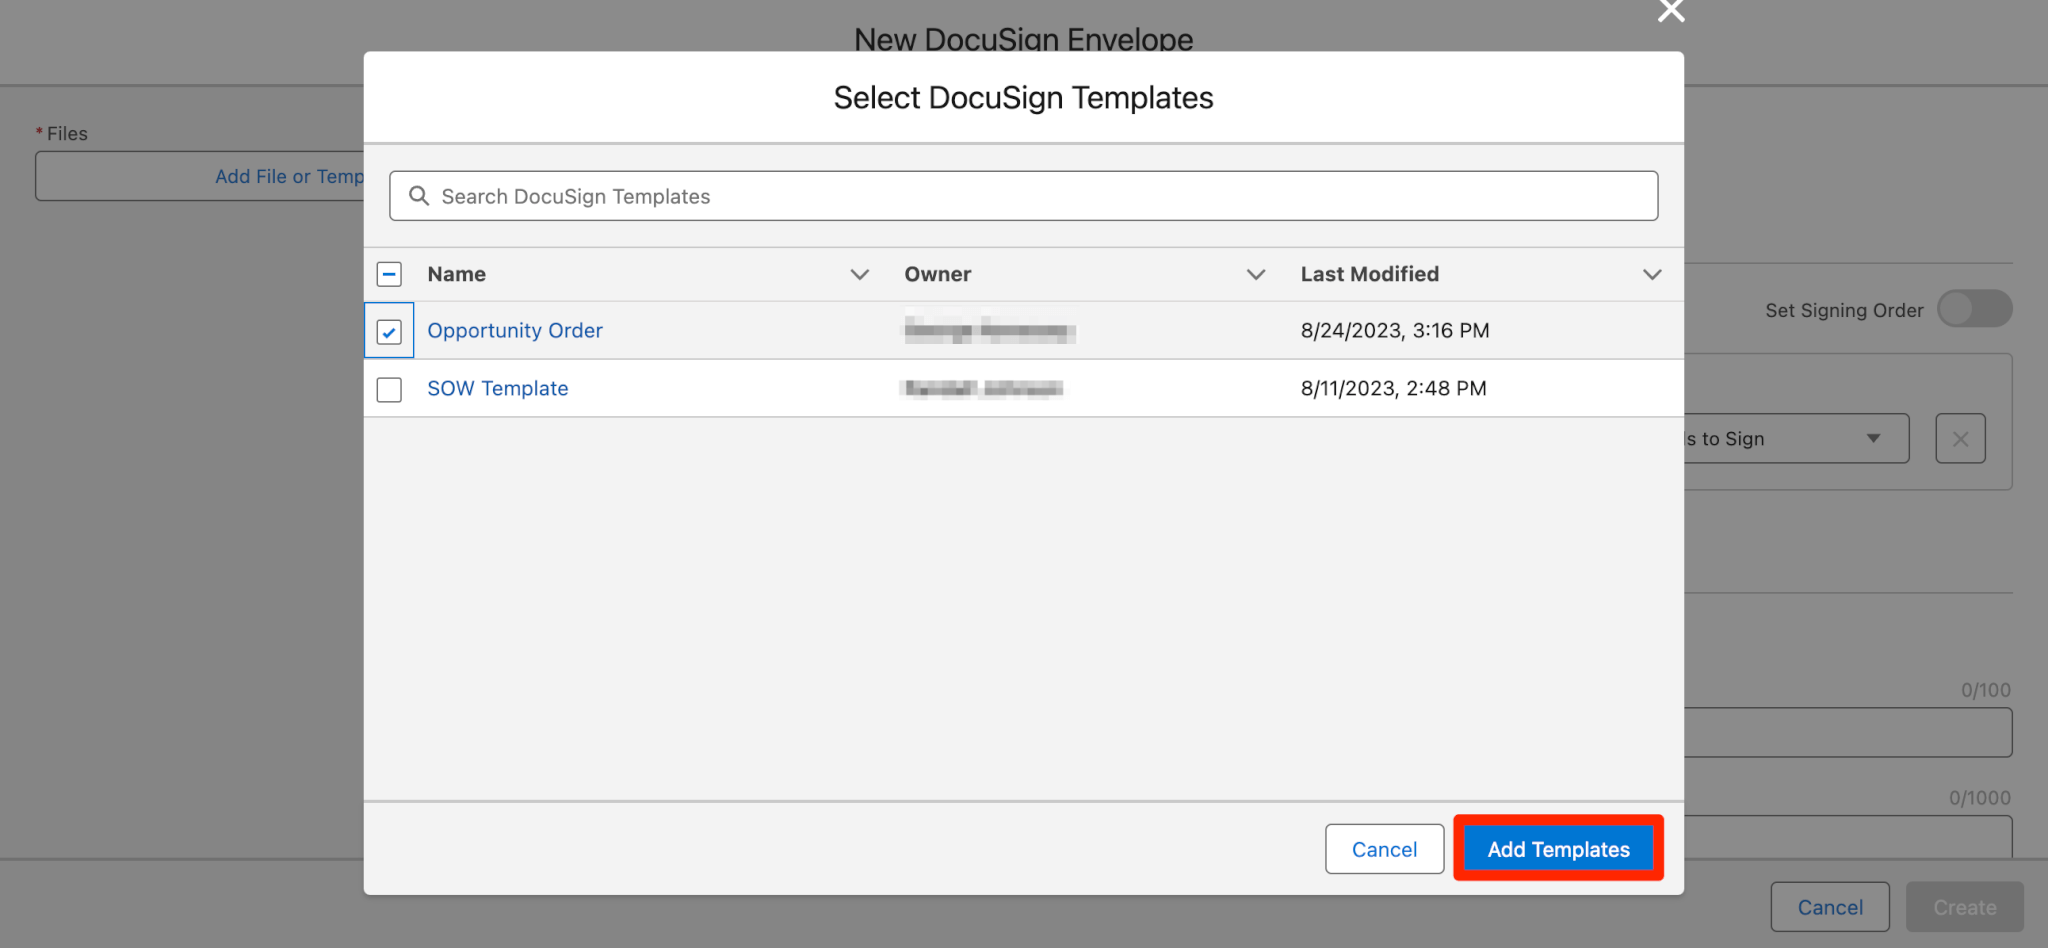
- From the Select DocuSign Template modal select from the list of templates you would like to apply to the selected file.
- Click Add Templates.

- You will now notice that your recipients, subject and message have automatically populated with the information in that template.
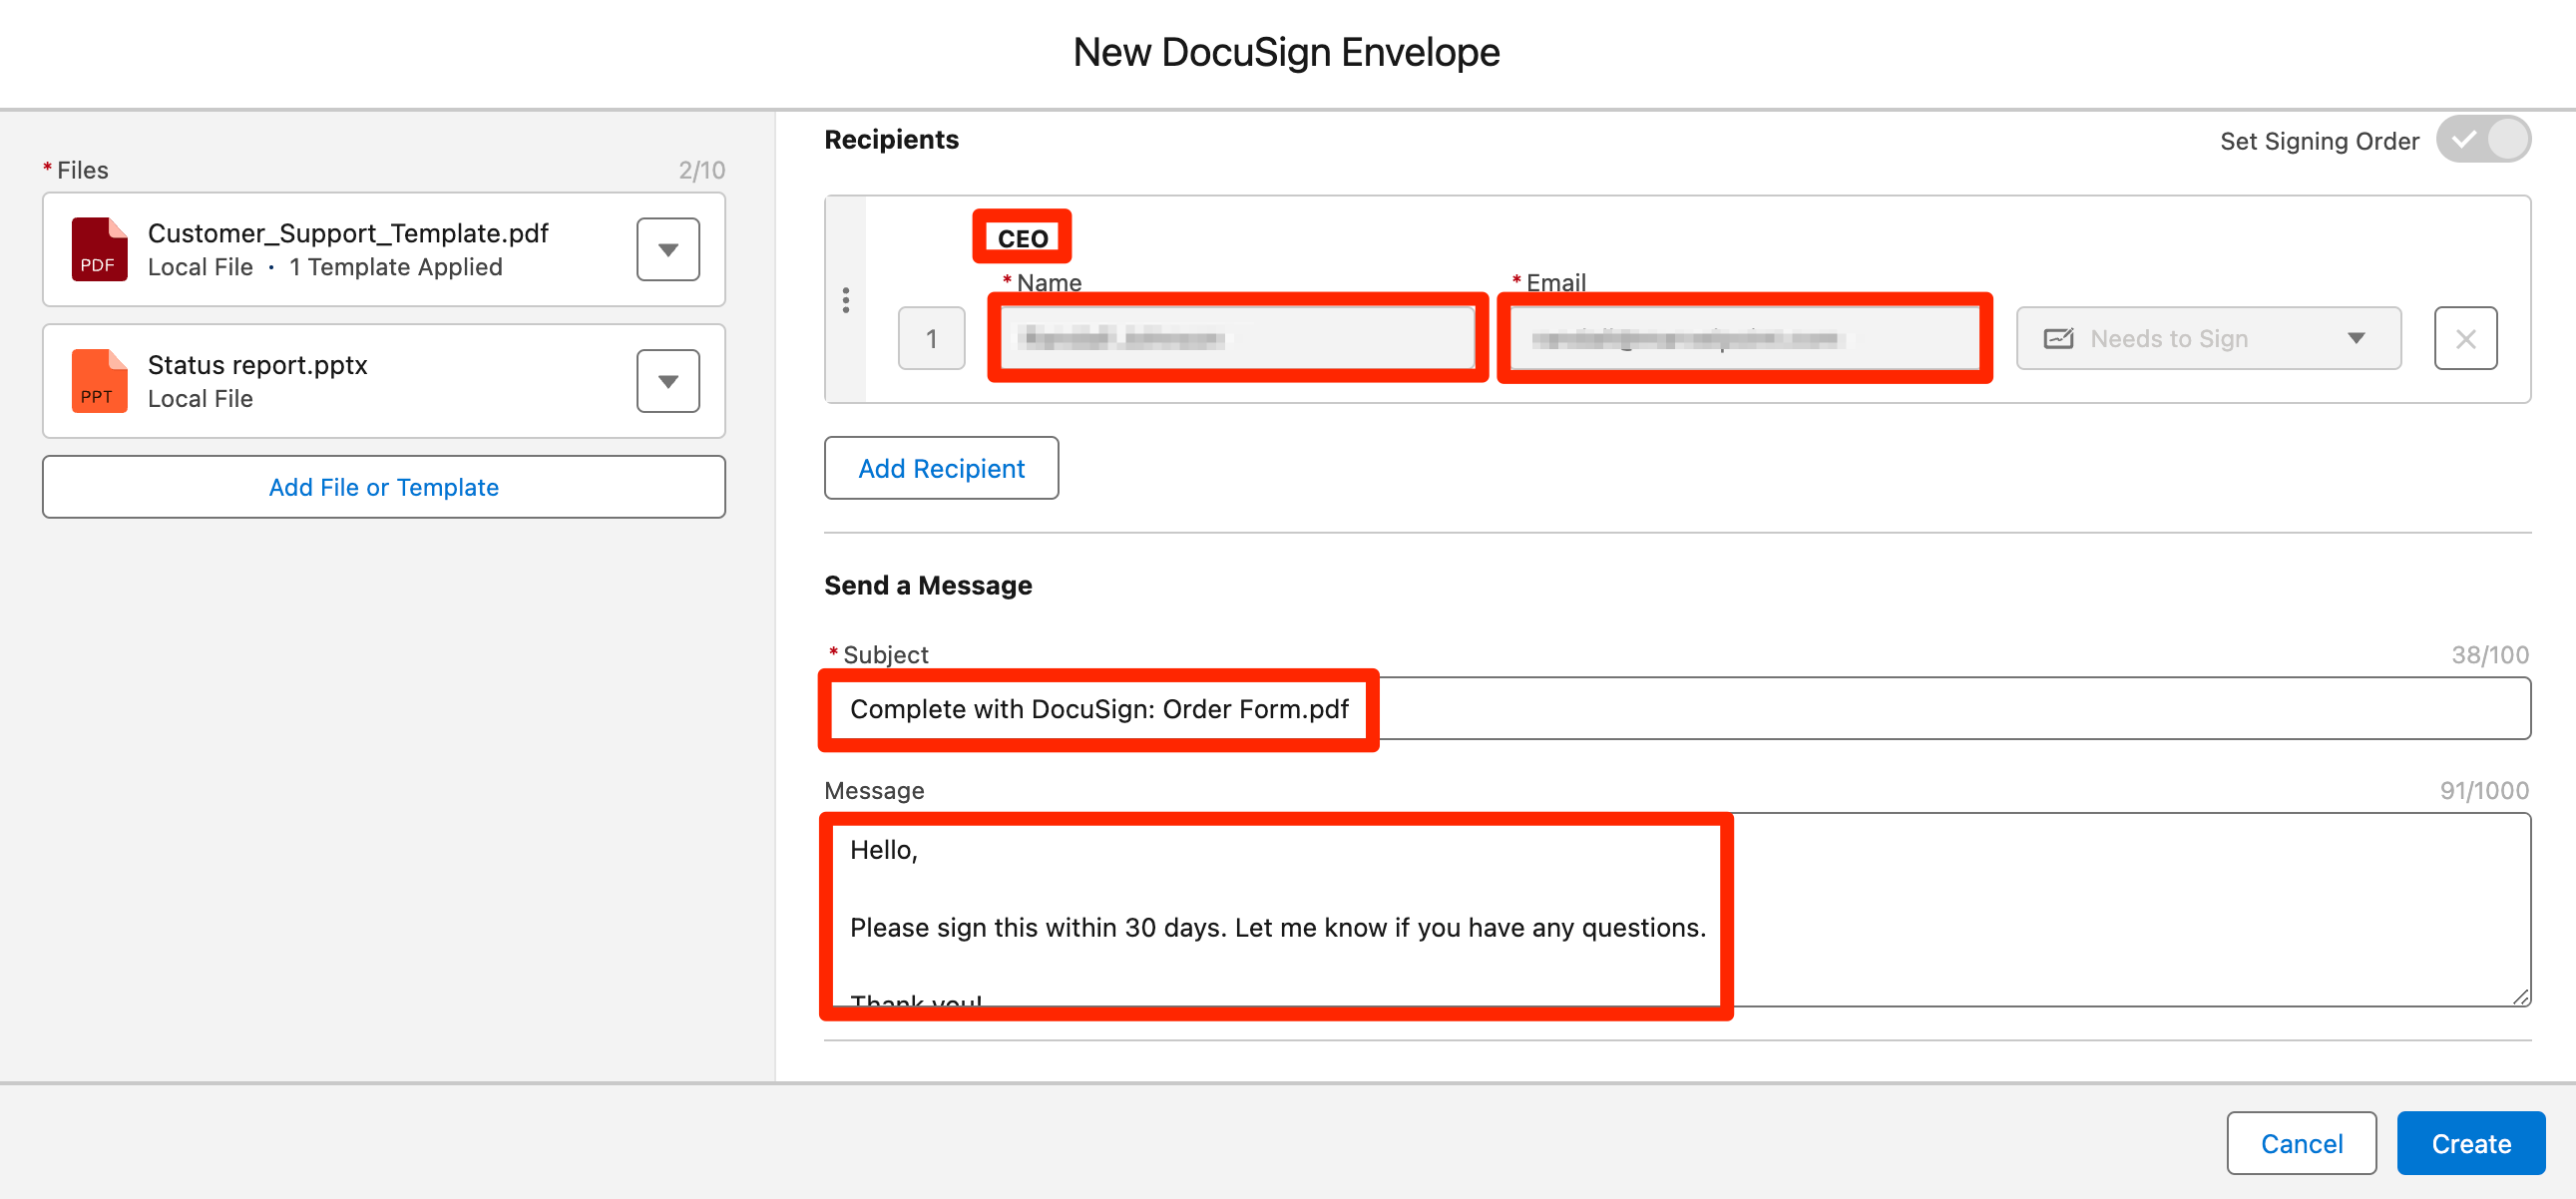
- If more than one template is added to files then the subject and message will populate from the last template from the list.
Adding templates with files included
- Go to your desired object record that has the DocuSign Envelopes component.
- Click on the New button.
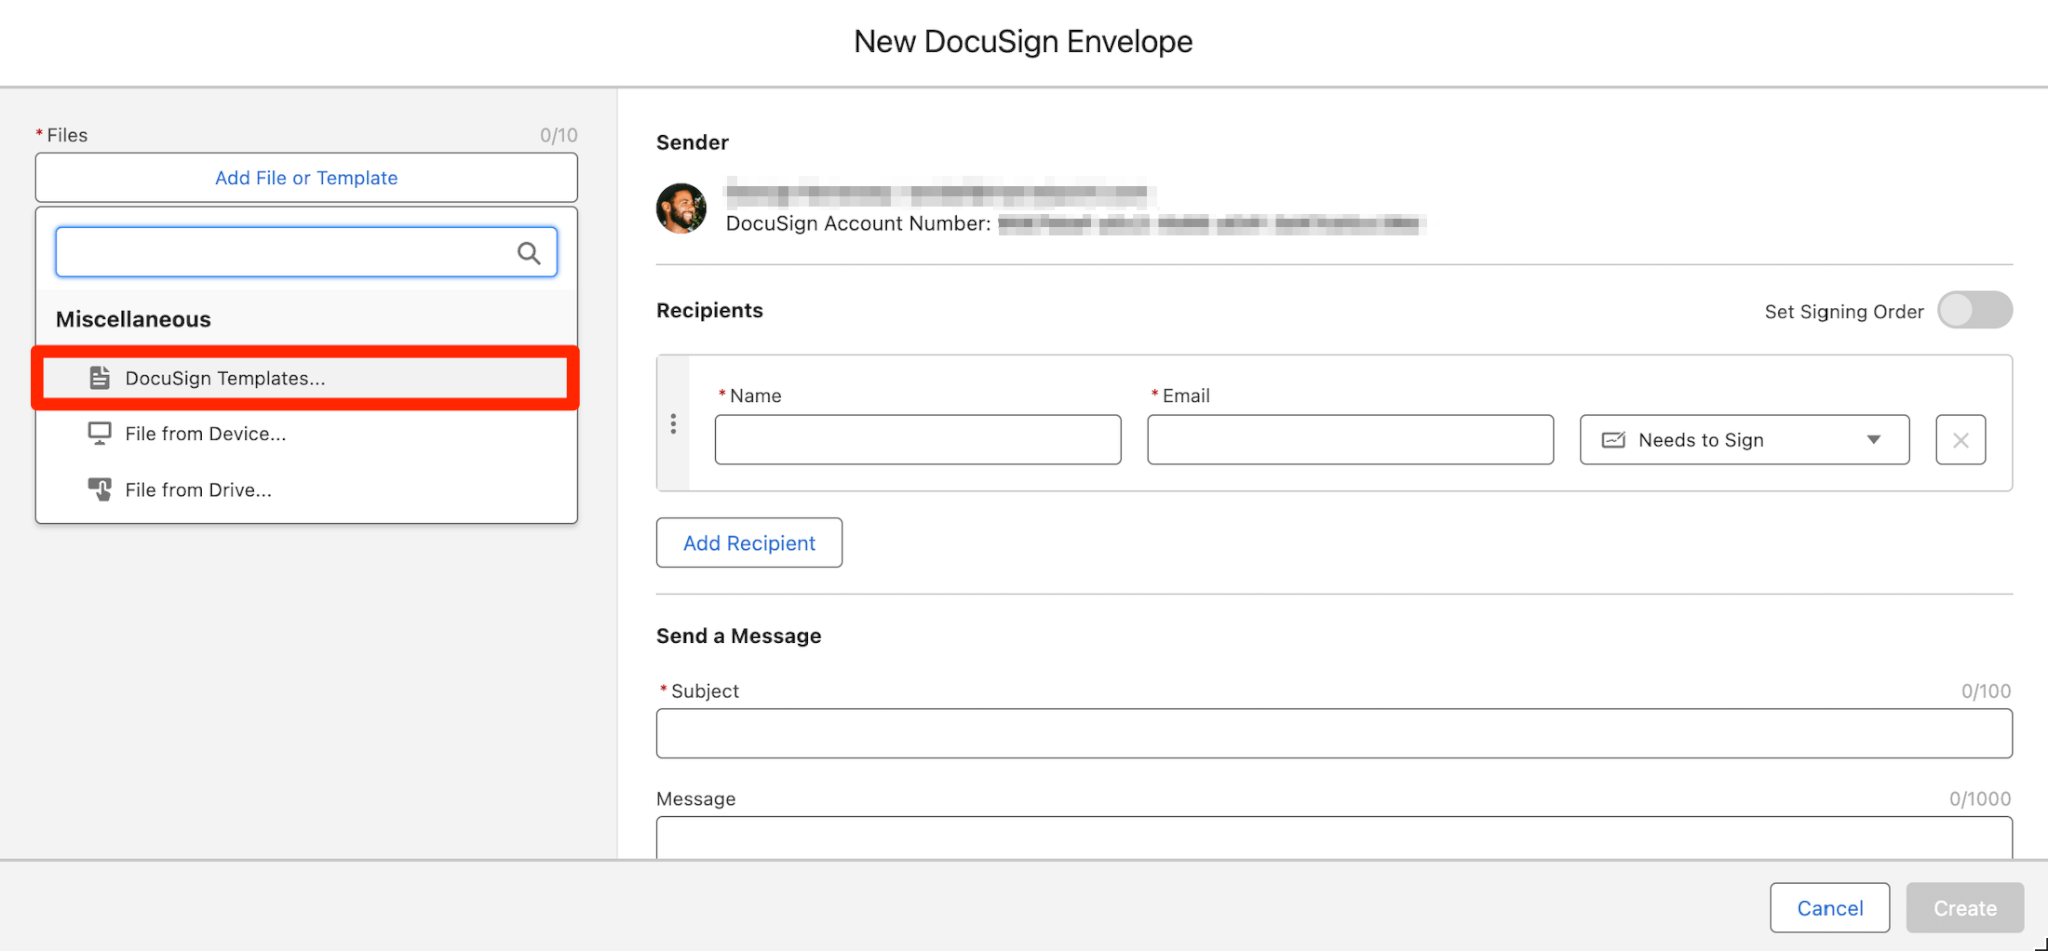
- In the New DocuSign Envelope modal click on Add File or Template.
- Select DocuSign Templates…
- From the Select DocuSign Template modal select from the list of templates you would like to add to the envelope.
- Click Add Templates.
- You will now notice that your files, recipients, subject and message have automatically populated with the information in that template.
- If more than one template is added to files then the subject and message will populate from the last template from the list.