How to use Drive Connect Templates to Automatically Place Tags
With both Drive Connect and eSign Connect, in conjunction with anchor tags in DocuSign, users can create a smoother and more efficient signing process. Below, you will find the steps to create anchor tags and see how they can be used with Drive Connect and eSign Connect.
Creating Anchor Tags
To create anchor tags, users need to modify their files in a DocuSign template to include strings of text that DocuSign will search for when applying the template to another document or envelope. In this example, we will demonstrate how to do this using Drive Connect and a sample template.
- Go to Drive Connect Template Builder.
- Select Browse Template Gallery.
- Click on Opportunity Order.
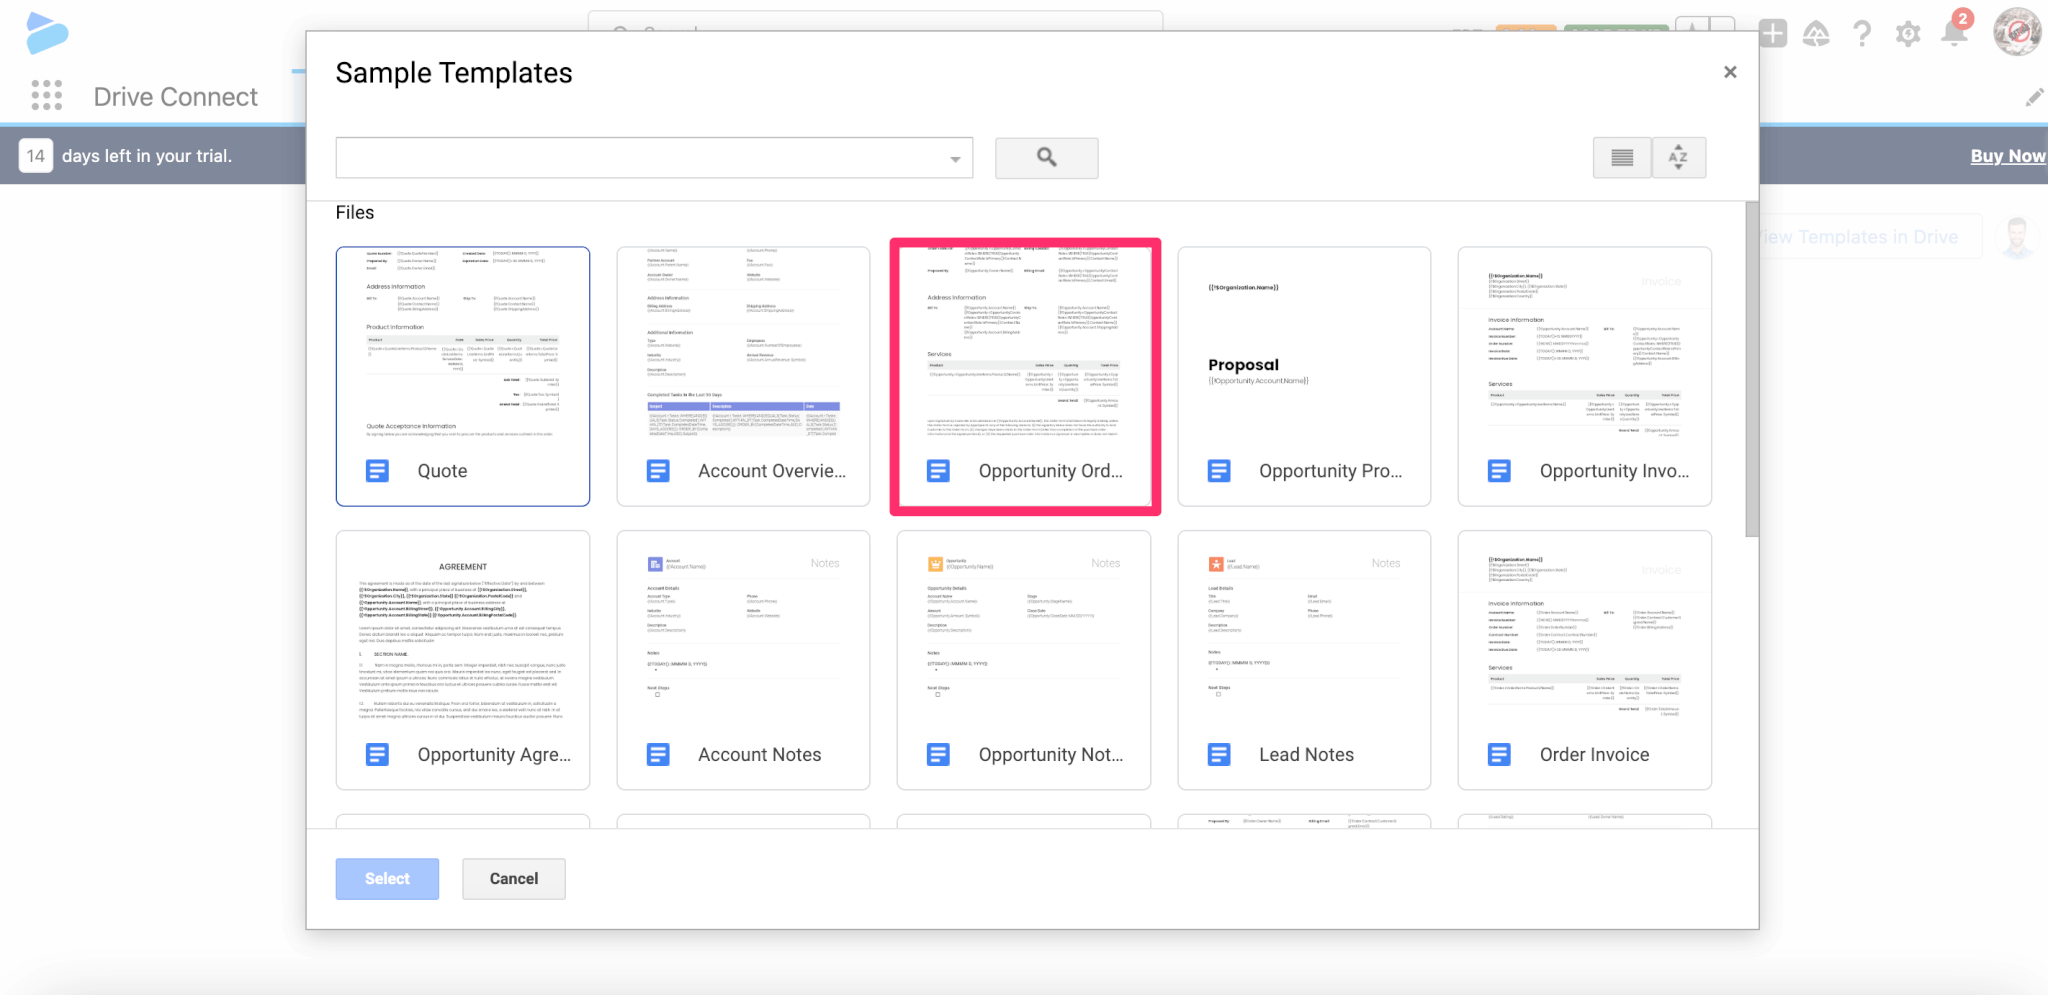
- Click on the Add This Template button.
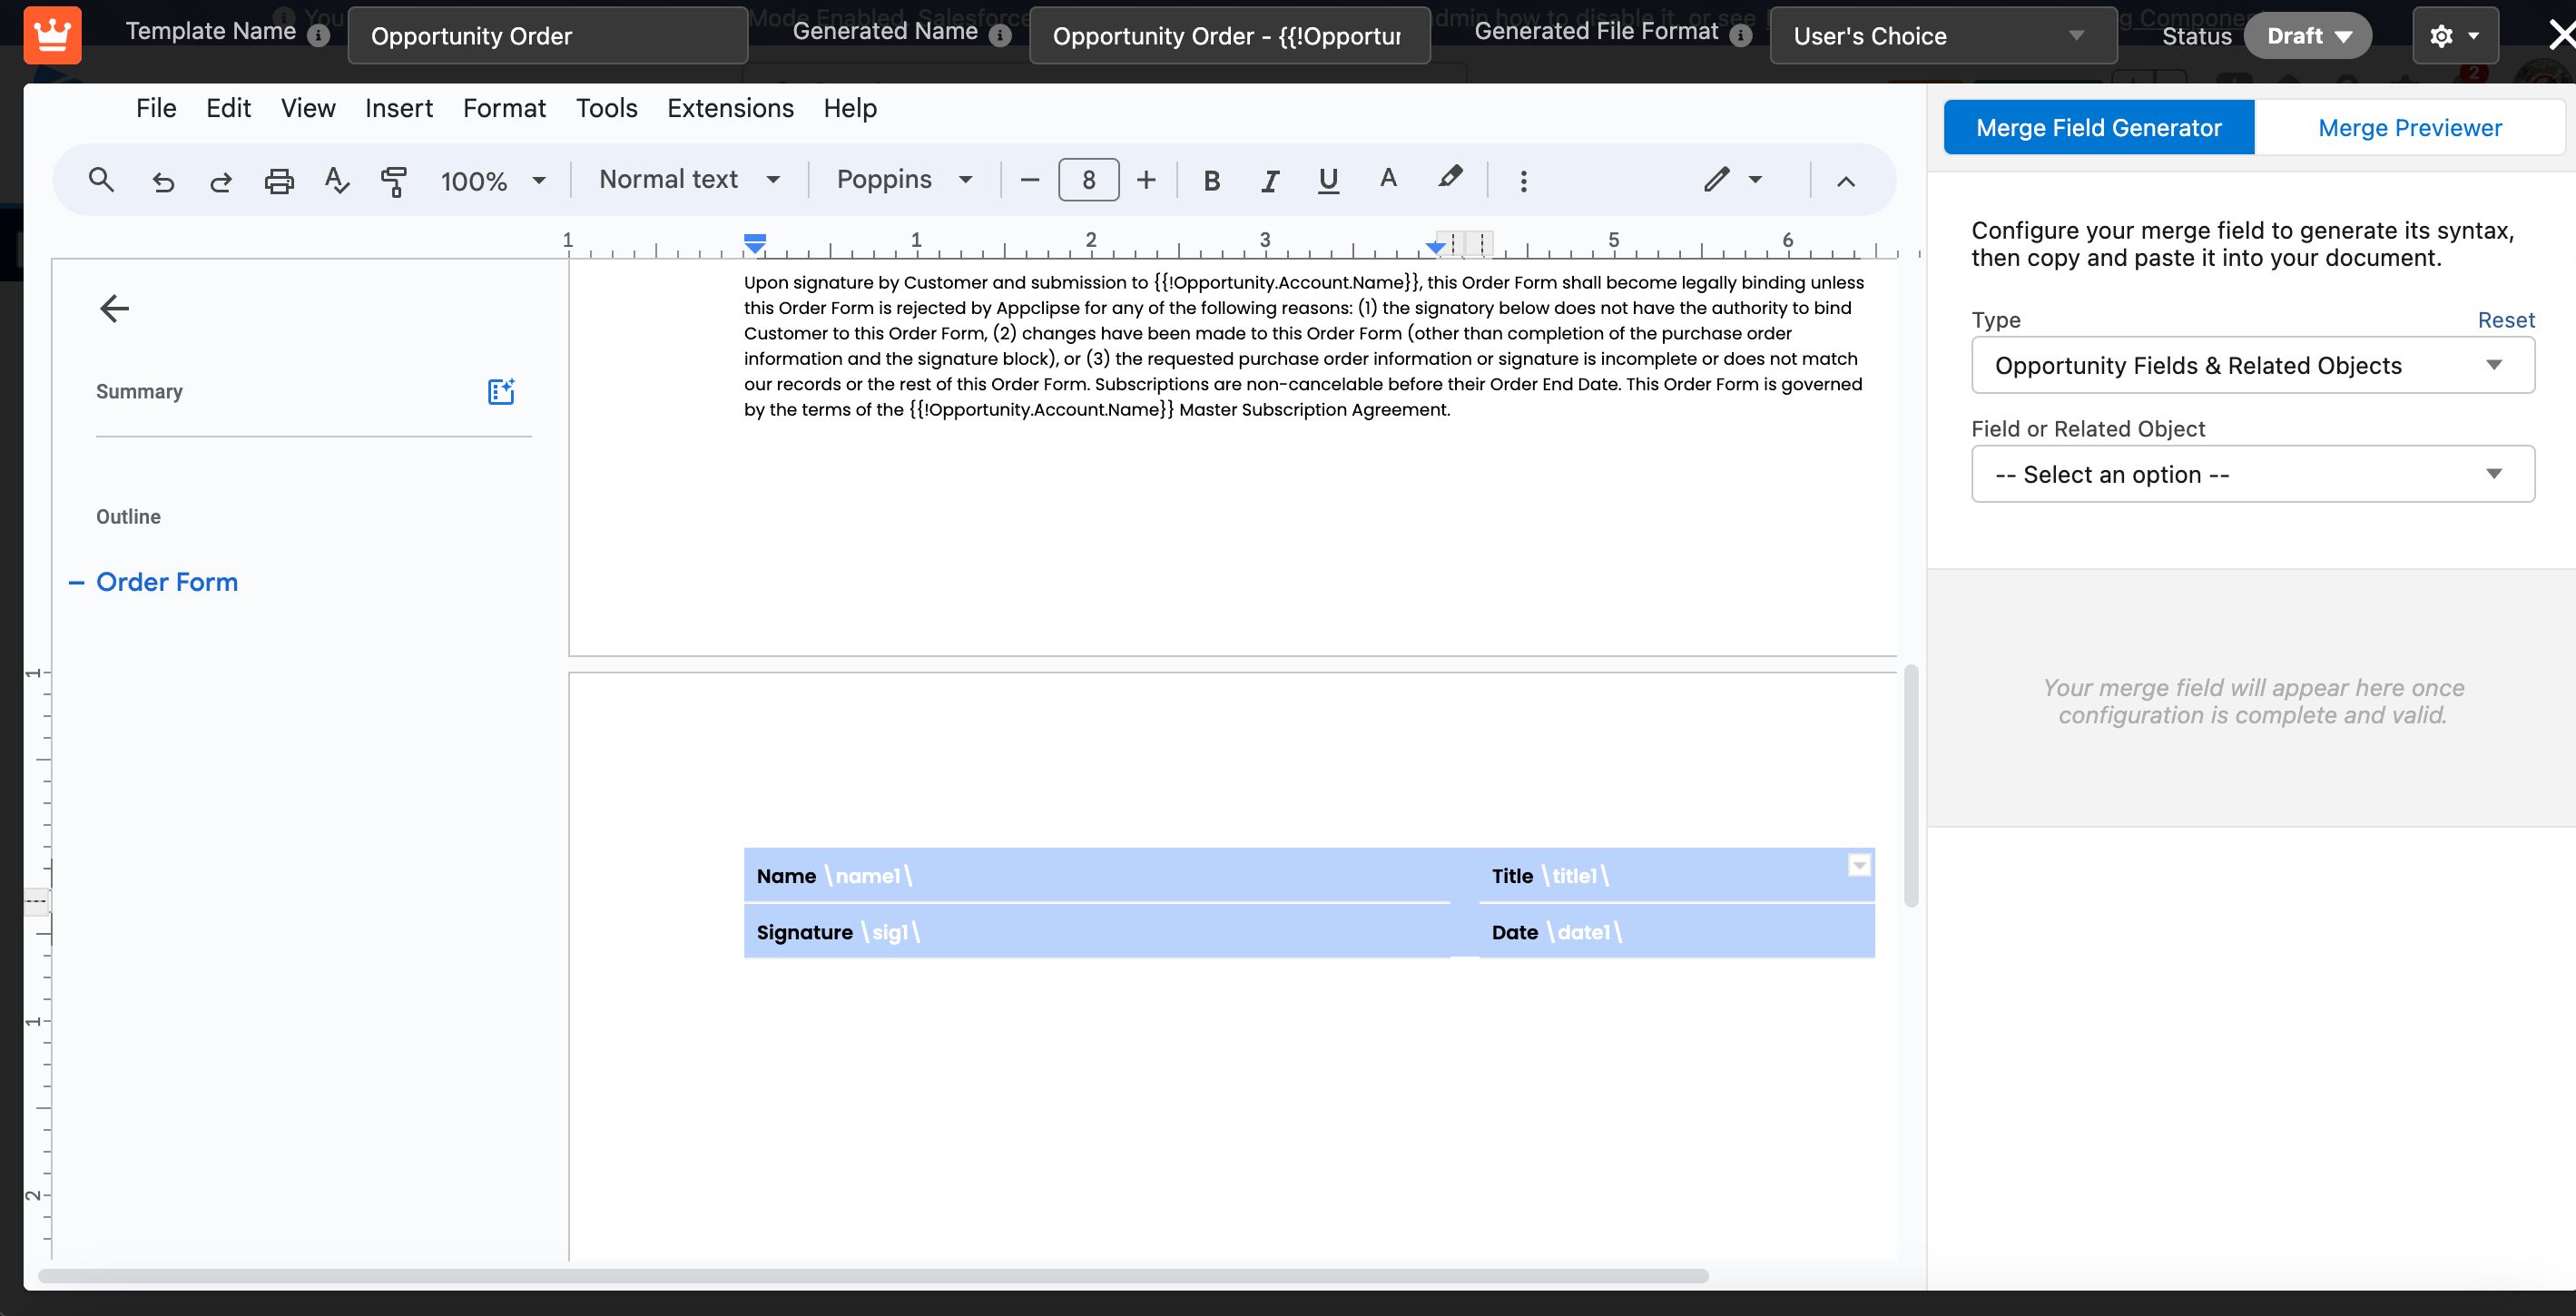
- At the bottom of the document we will need to create a string of text that has it's own syntax so that we can ensure that a tag isn't placed anywhere else we do not want in a document. In this example for signature we will be using \sig1\, for name \name1\, for title \title1\ and for date \date1\. It is also recommended that you change the color of the text to match the background color of the document so that signees do not see the string of text. Once completed, you can close your document.
- Next we will need to go to our DocuSign account.
- Select Templates.
- Click on the Create Template button.
- Fill out all the necessary information for this template.
- Under the Add Documents section, select the modified file that was either downloaded or accessed through the Google Drive option.
- Click Next
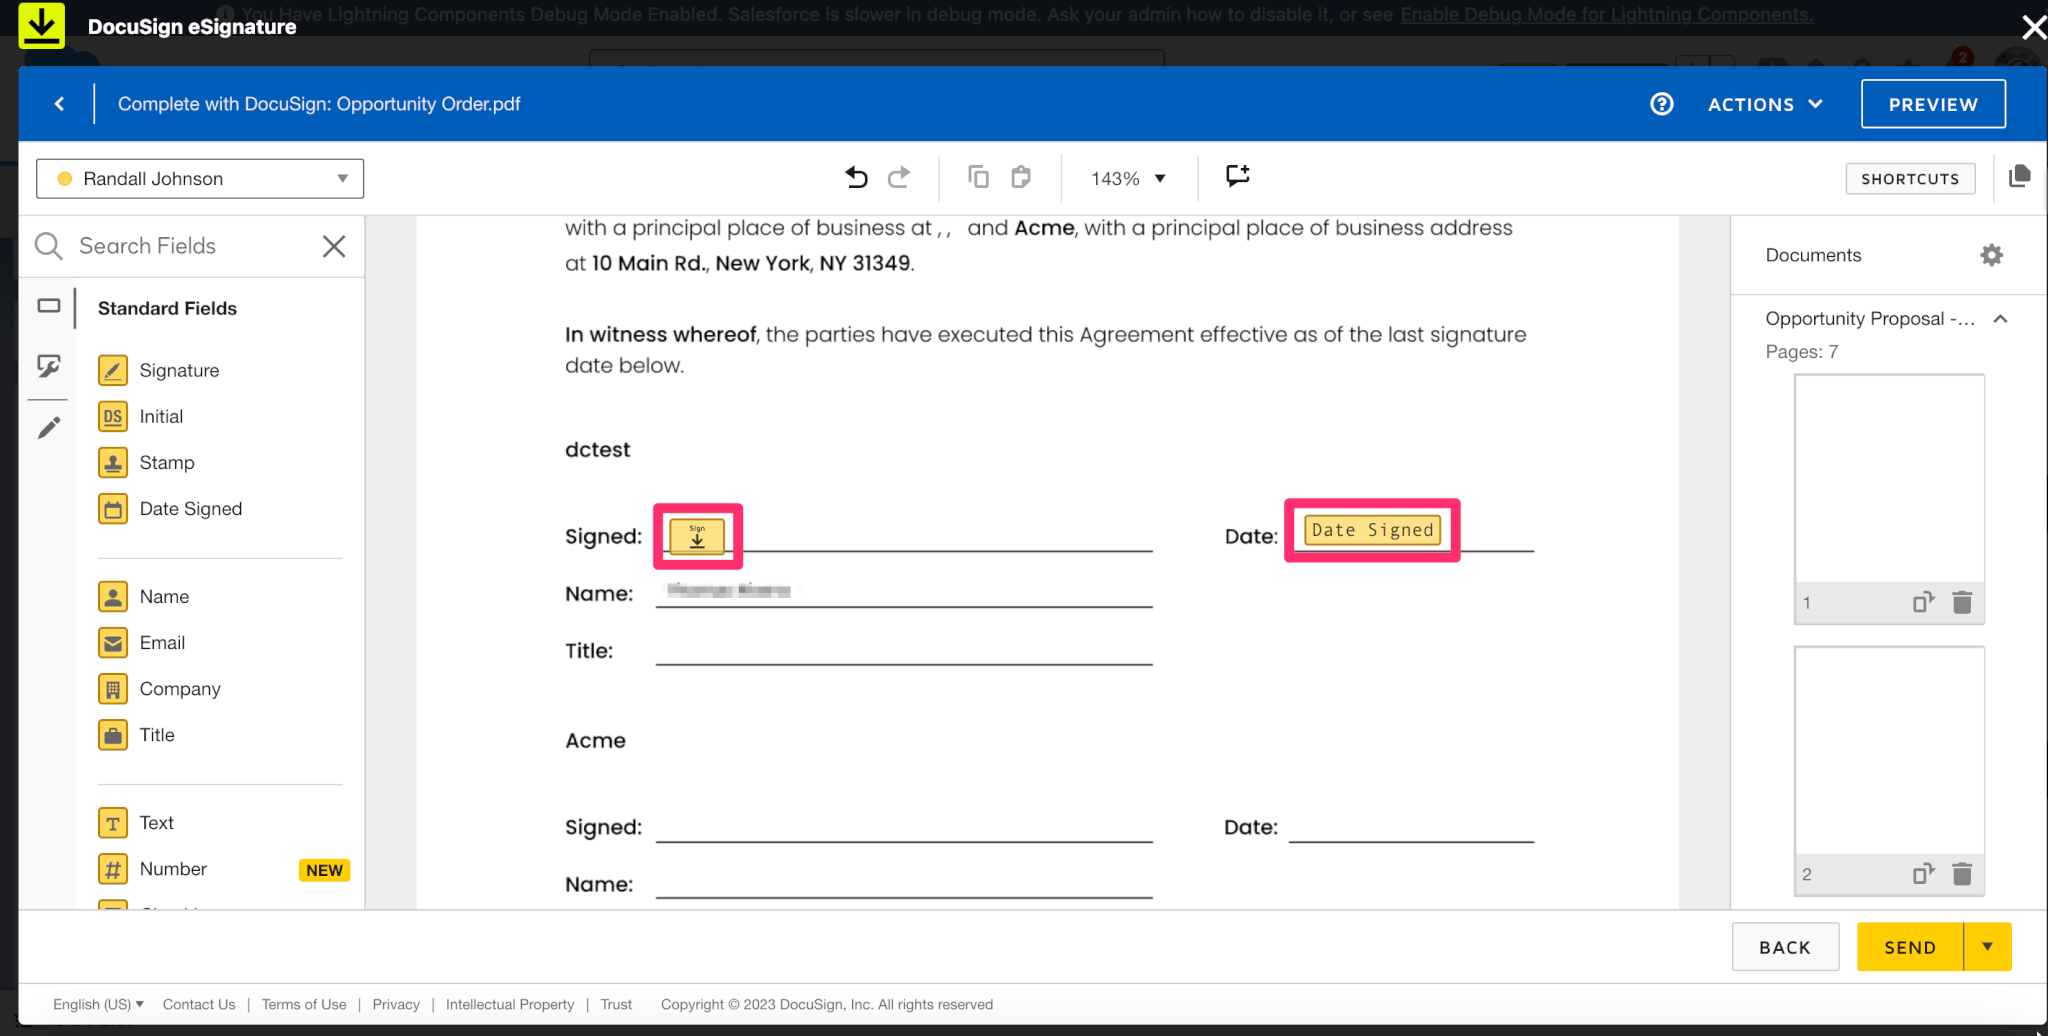
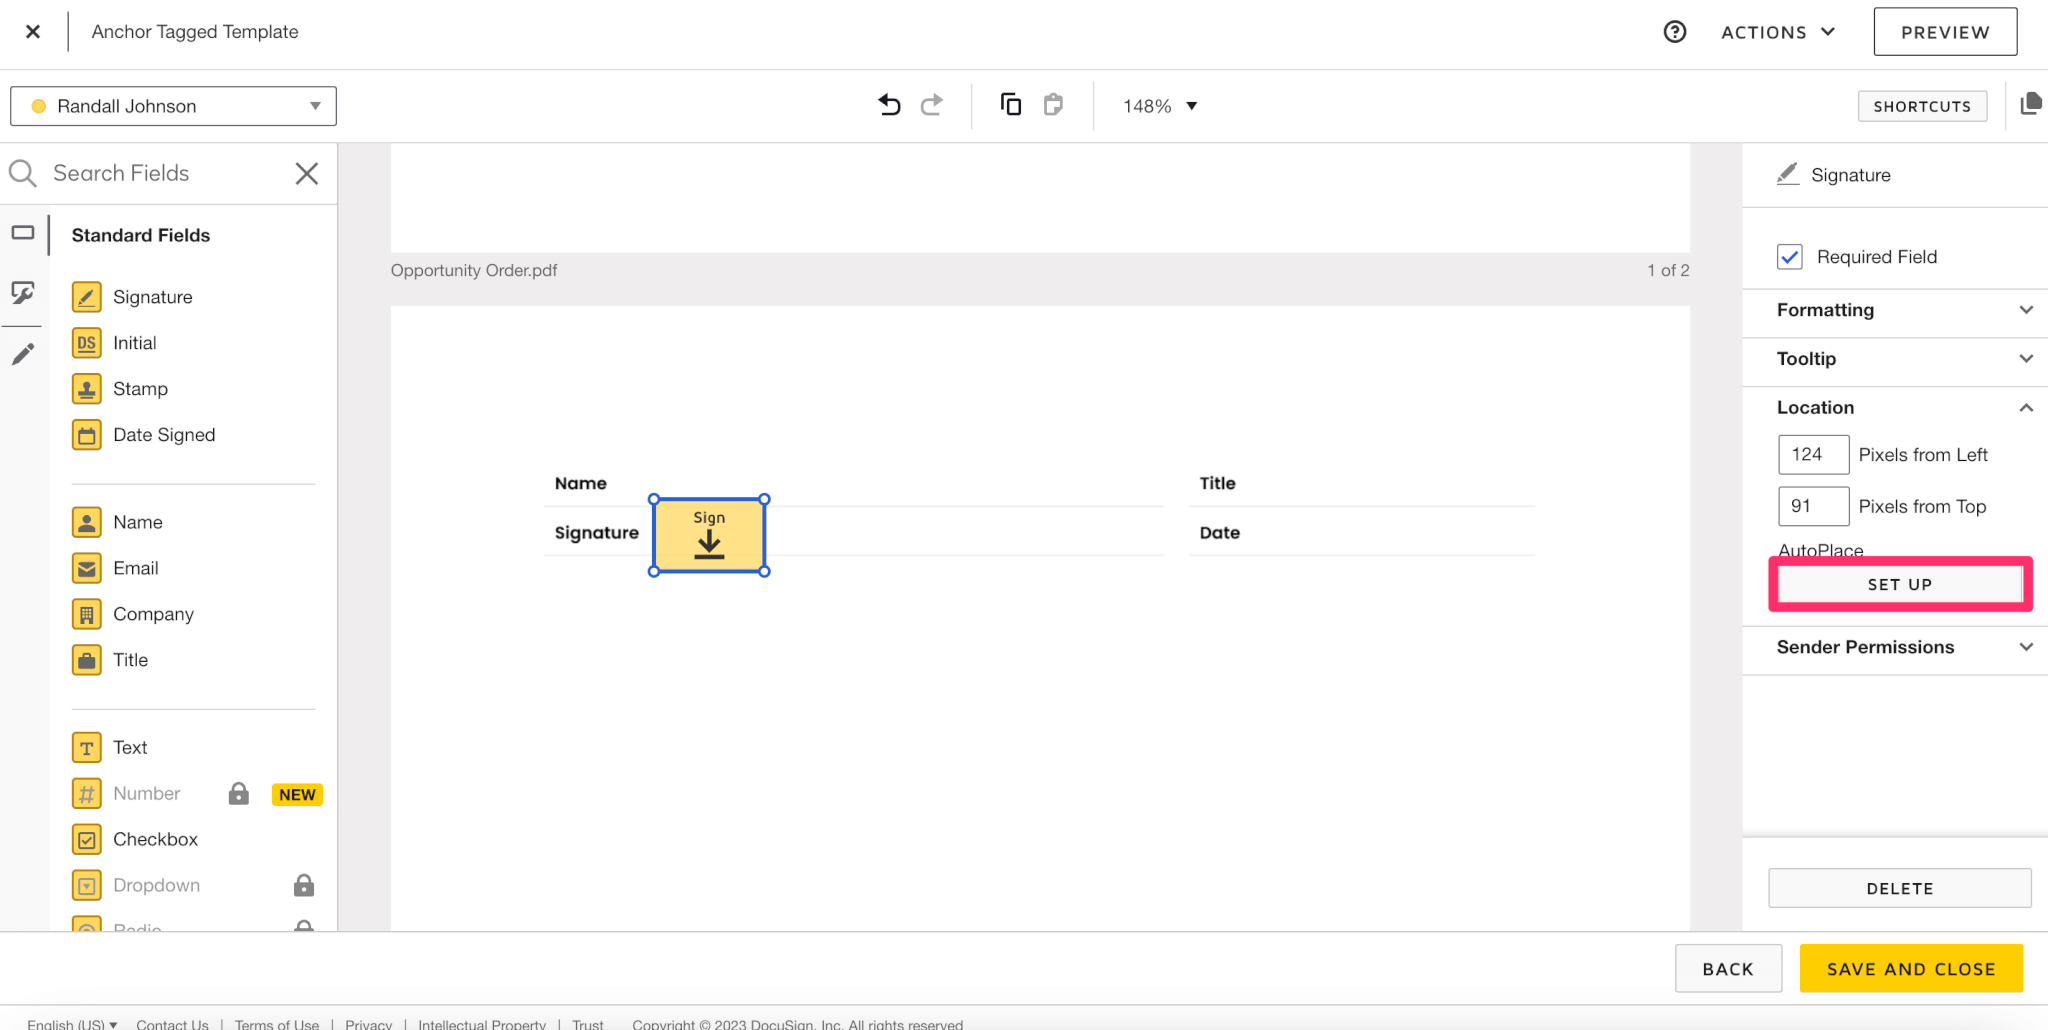
- We will now place the Signature tag where we put our string of text. Once placed look to the far right and under the Location section click on the Set Up button.
- In the input field we will want to use the exact same string of text we modified our document with. In this case, \sig1\. What this does is when this template is applied to a document that contains the same string of text in an envelope then DocuSign now automatically places these tags into the document.
- Click the Apply button. If done correctly you will get a success toast.
- Repeat this for Name, Title and Date.
- Once completed you can click on Save and Close. You have now set up a template with anchor tags.
- To test this out let us go back to Drive Connect Template Builder.
- Select Browse Template Gallery.
- Click on Opportunity Proposal
- Click on the Add This Template button.
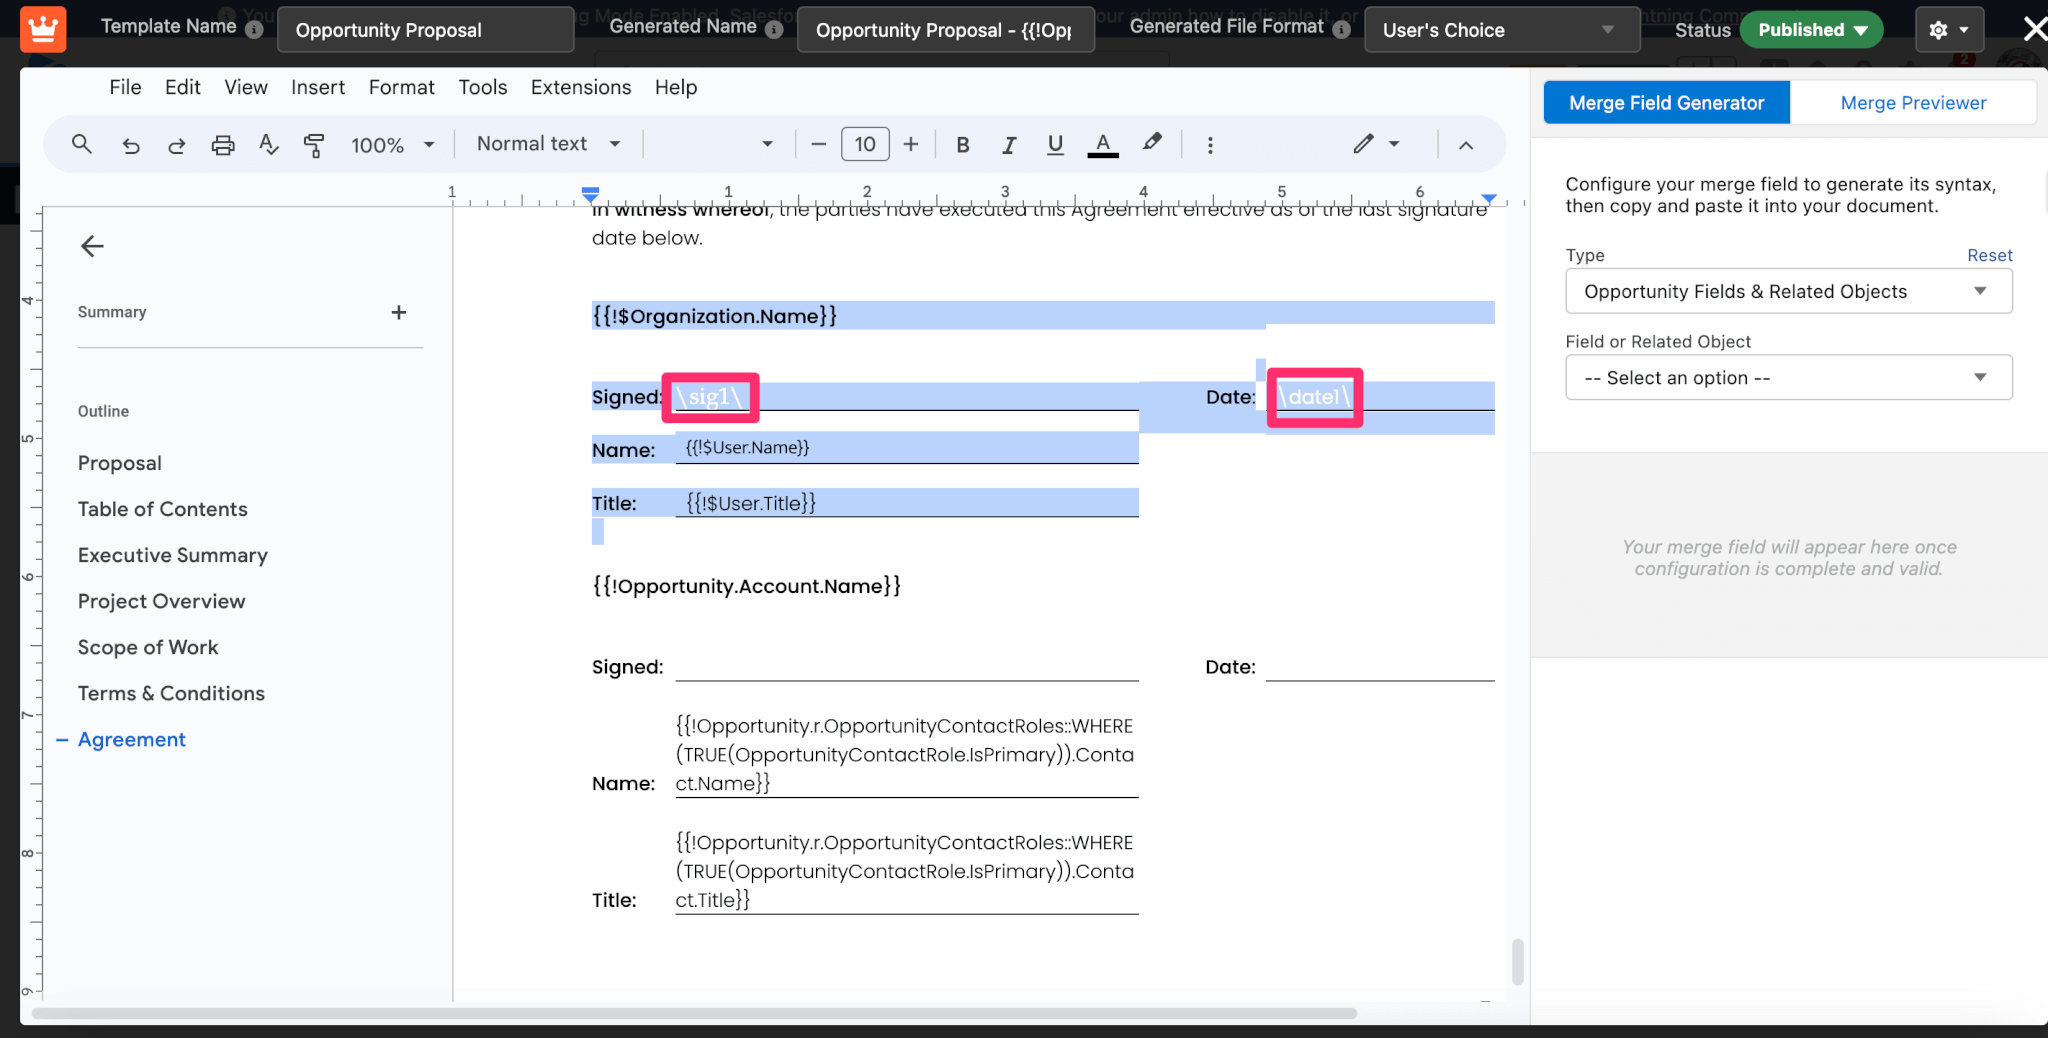
- Scroll to the bottom of the file and use the same syntax we used above but only for Signature and Date for the first of the two signing sections. As before changing the color of the font to match the background of the file. Also make sure that the Status is set to published.
- Once you exit the editor, go to Sales.
- Go to Opportunity.
- Select a record.
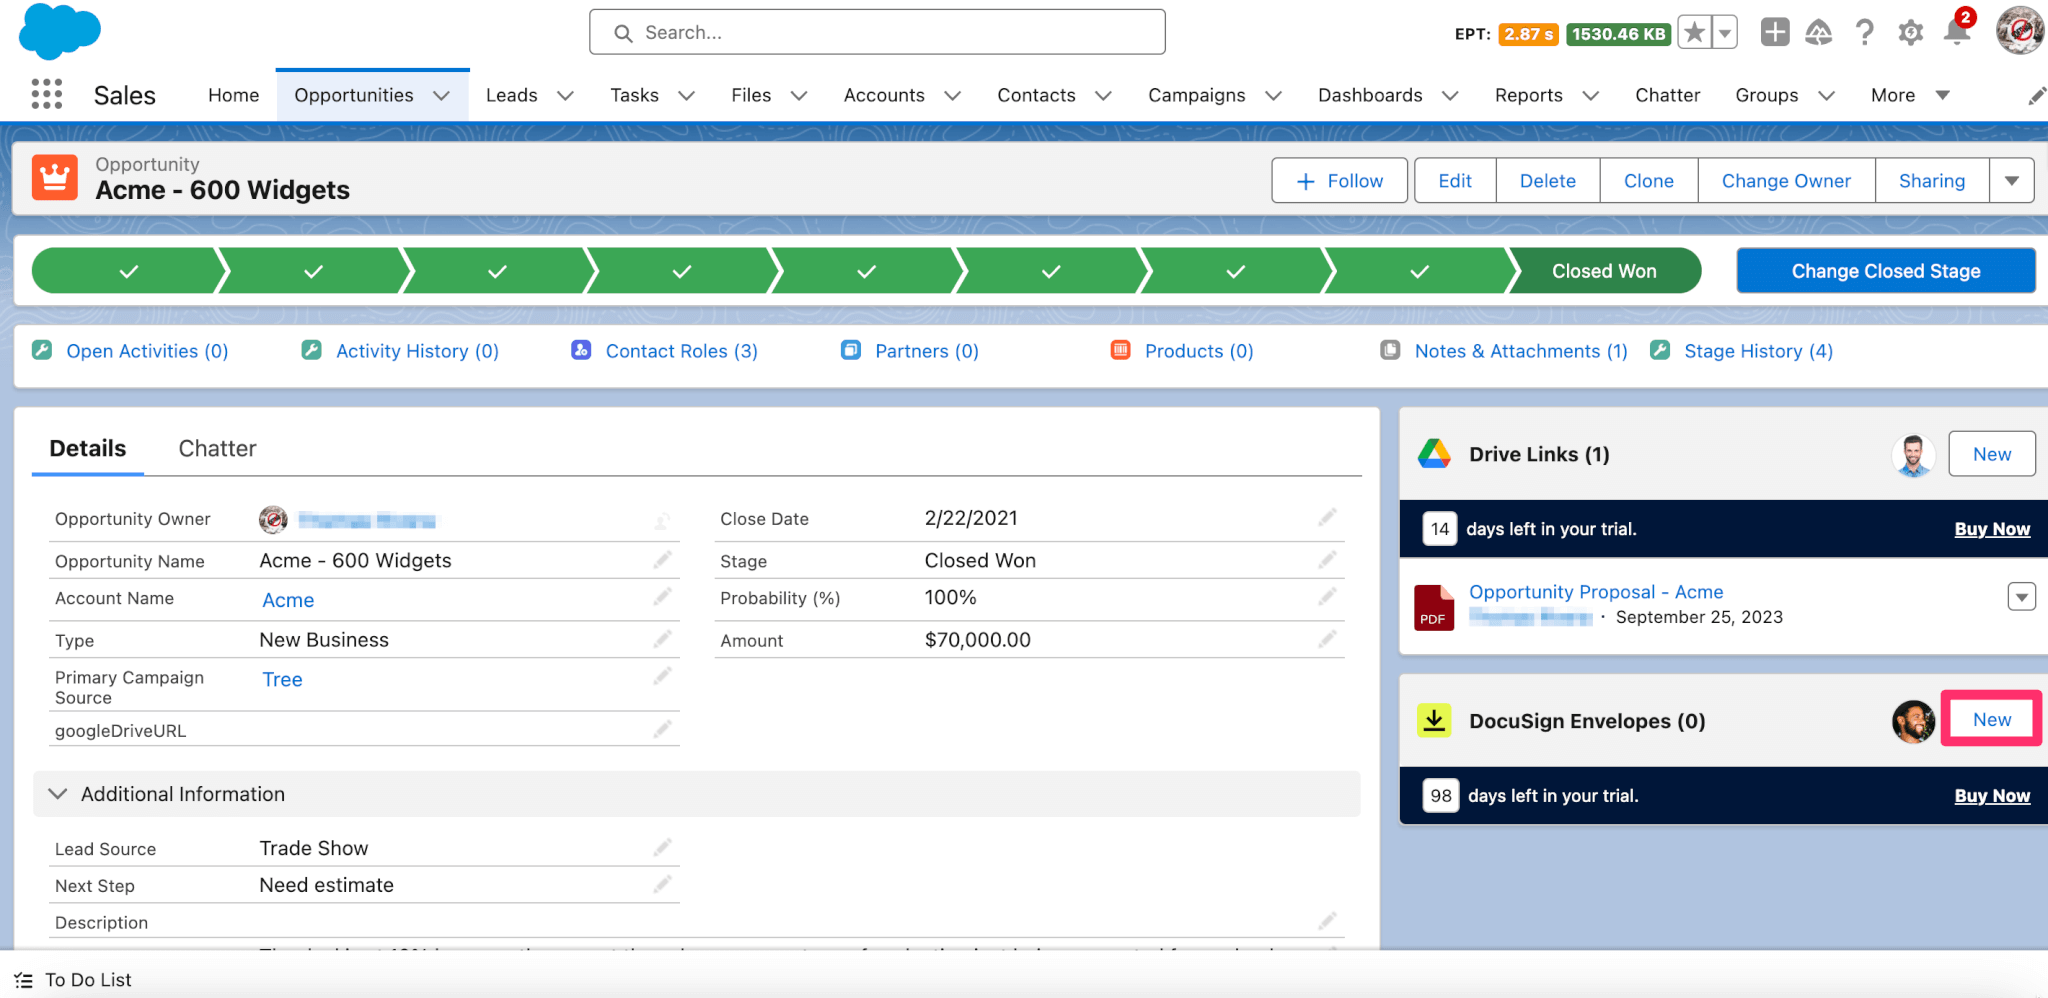
- Under the Drive Links component select New -> File from Template

- Select the Opportunity Proposal document and click Generate.
- Once completed you will see the file linked to the record.
- Click on New for the DocuSign Envelopes component.
- Under the add files and our file in Drive Files Linked to this Record select our file.
- Once added, click on the drop down, select Add Template and then select the DocuSign template with our anchor tags. Click on the Add Template button.
- You can then make any other adjustments to the envelope and once ready click on the Create button.
- You be taken to the tag placement portion of the DocuSign envelope sending process. You will see that the tags were automatically placed.