Drive Connect File Upload
Drive Connect gives users the ability to upload files directly into Google Drive from the Drive Links component in Salesforce as well as delete any files that were uploaded from Salesforce.
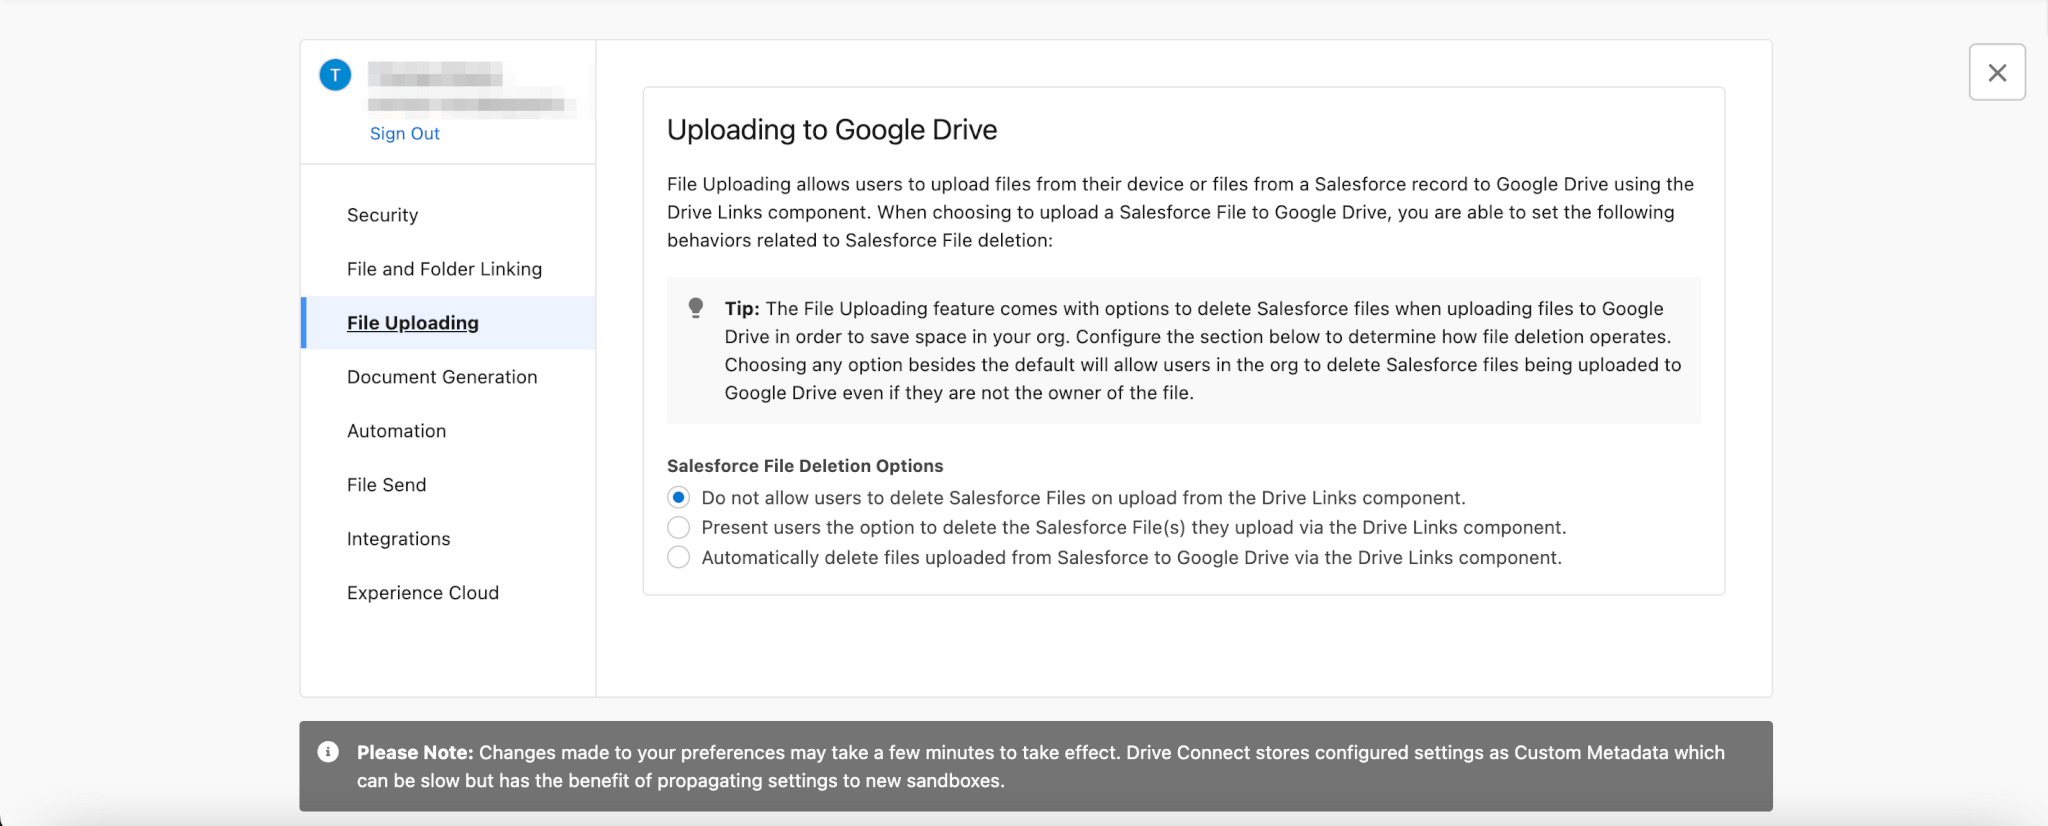
Setting up Salesforce File Deletion for Upload
- Navigate to Setup – Preferences
- Click File Uploading
- Select one of the 3 options for Salesforce file deletion
- Do not delete files automatically (default)
- Prompt to decide if files should be deleted or kept
- Automatically delete files
Upload a file into Google Drive
- Navigate to a Salesforce record page
- Click New on the Drive Links component
- Select File Upload
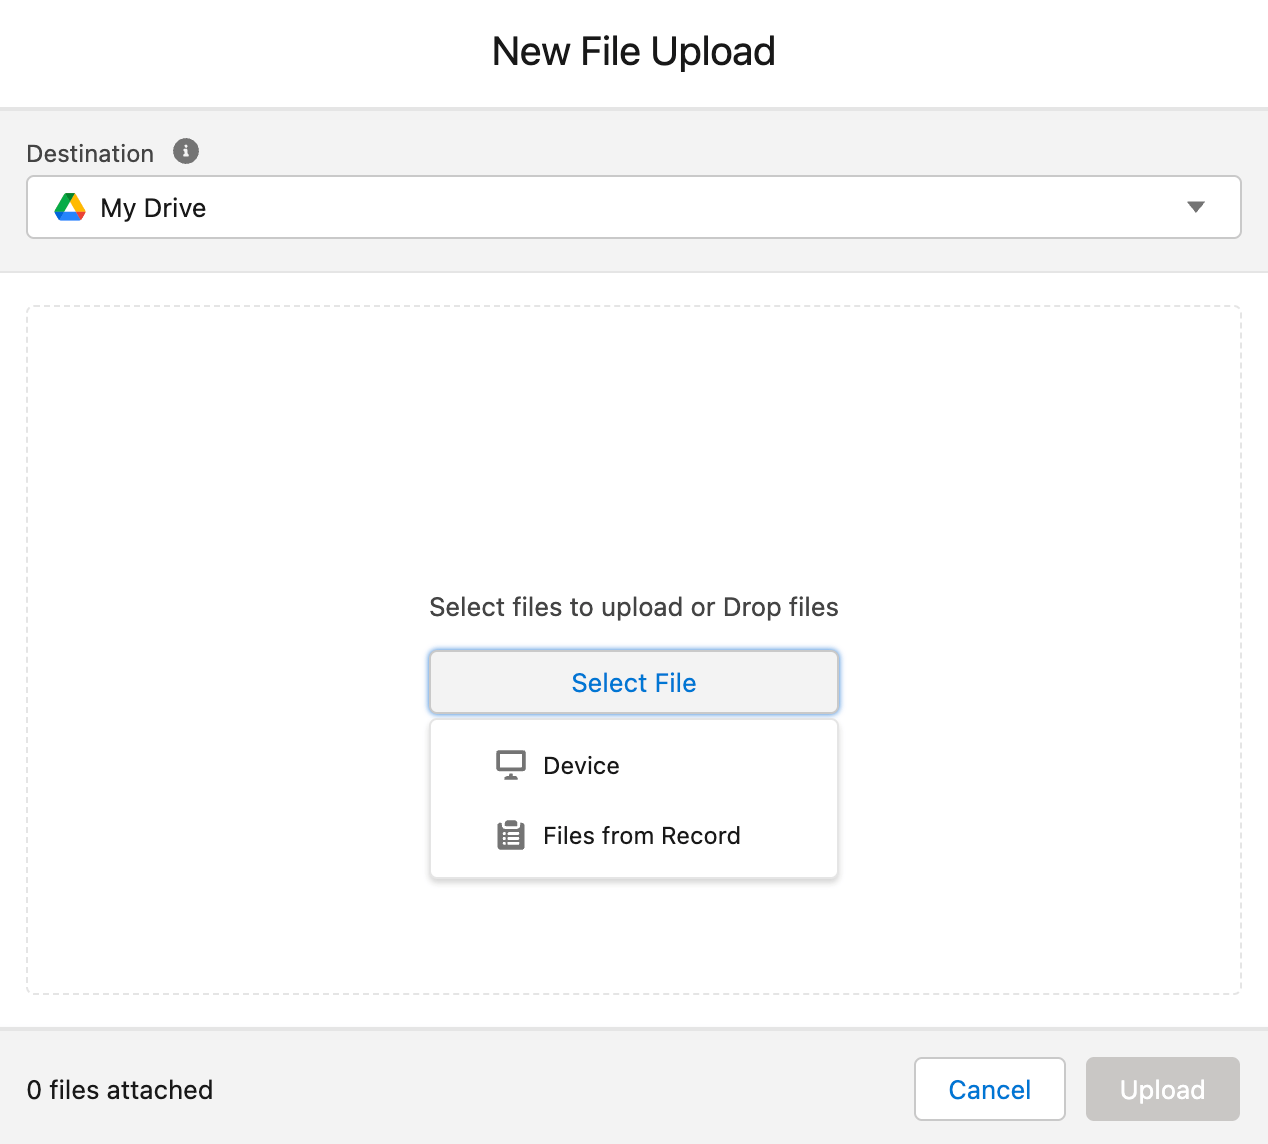
- Select the destination, these are the following available destinations:
- Default object folder (Default if one is set and no default record folder)
- Default record folder (Default if one is set)
- Existing folder
- New Folder…
- My Drive (Default if no default record or object folder are set)
- Click on Select File or drag and drop Files into the modal
- Selecting Device will prompt the local devices modal for file selection
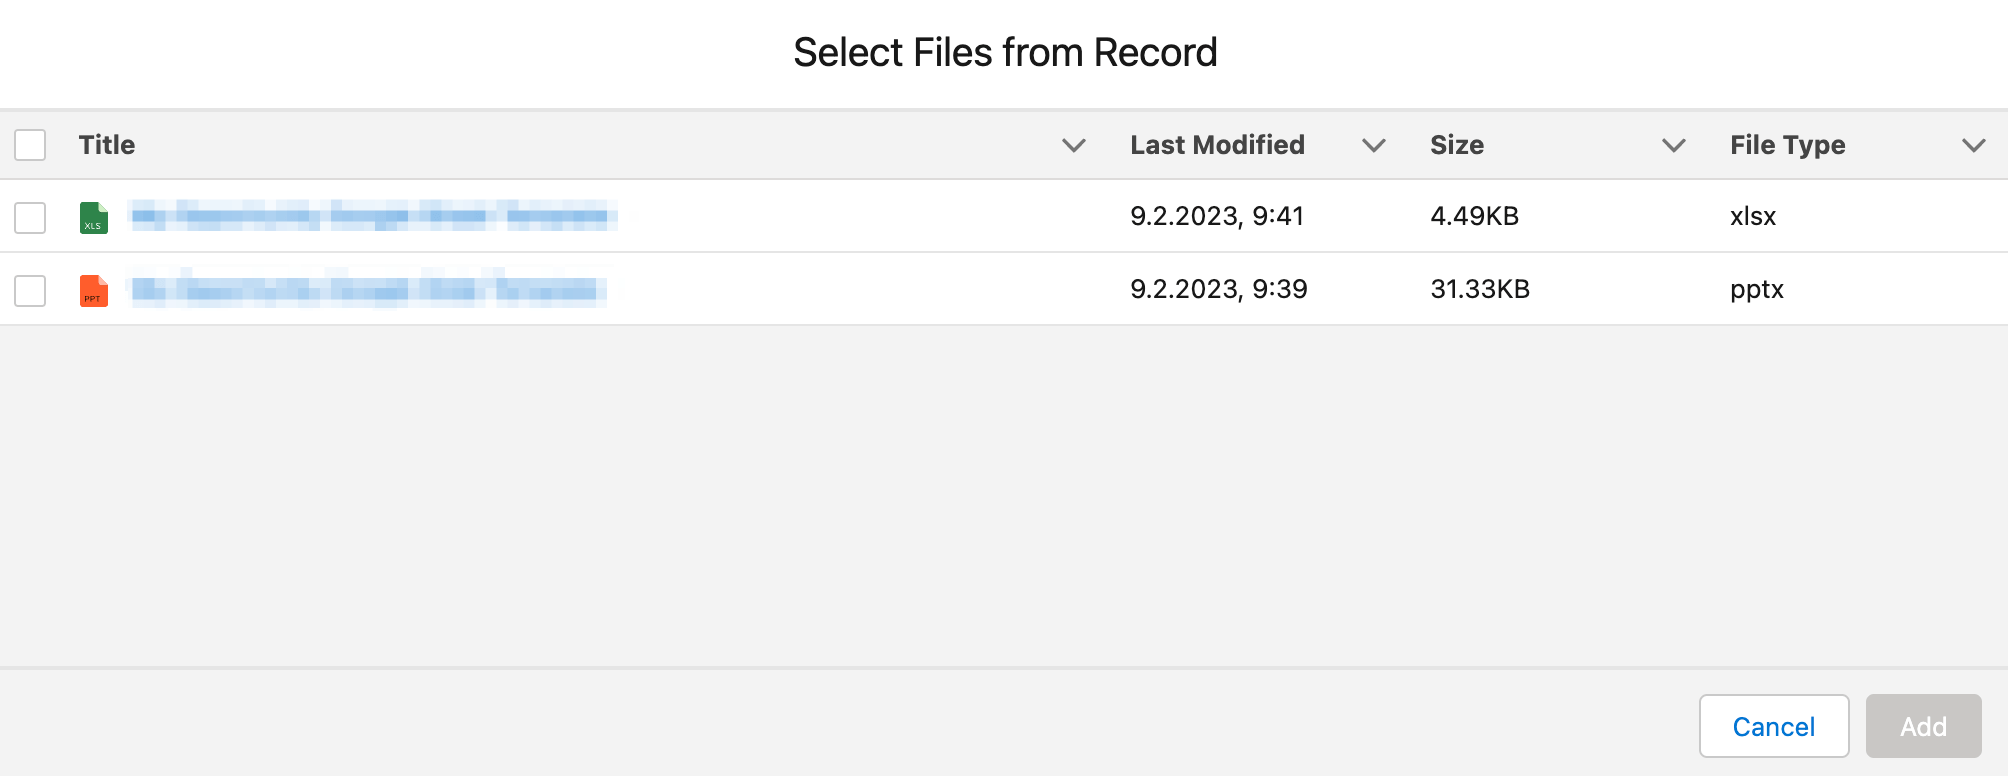
- Selecting Files from record will prompt an additional modal in which files that are saved to the Salesforce record can be selected
- Click Upload
- If Files from record were added to the upload feature and changes were made in setup for file deletion, additional prompts may appear
- Optional: Rename the file(s) and check/uncheck Link file to record checkbox
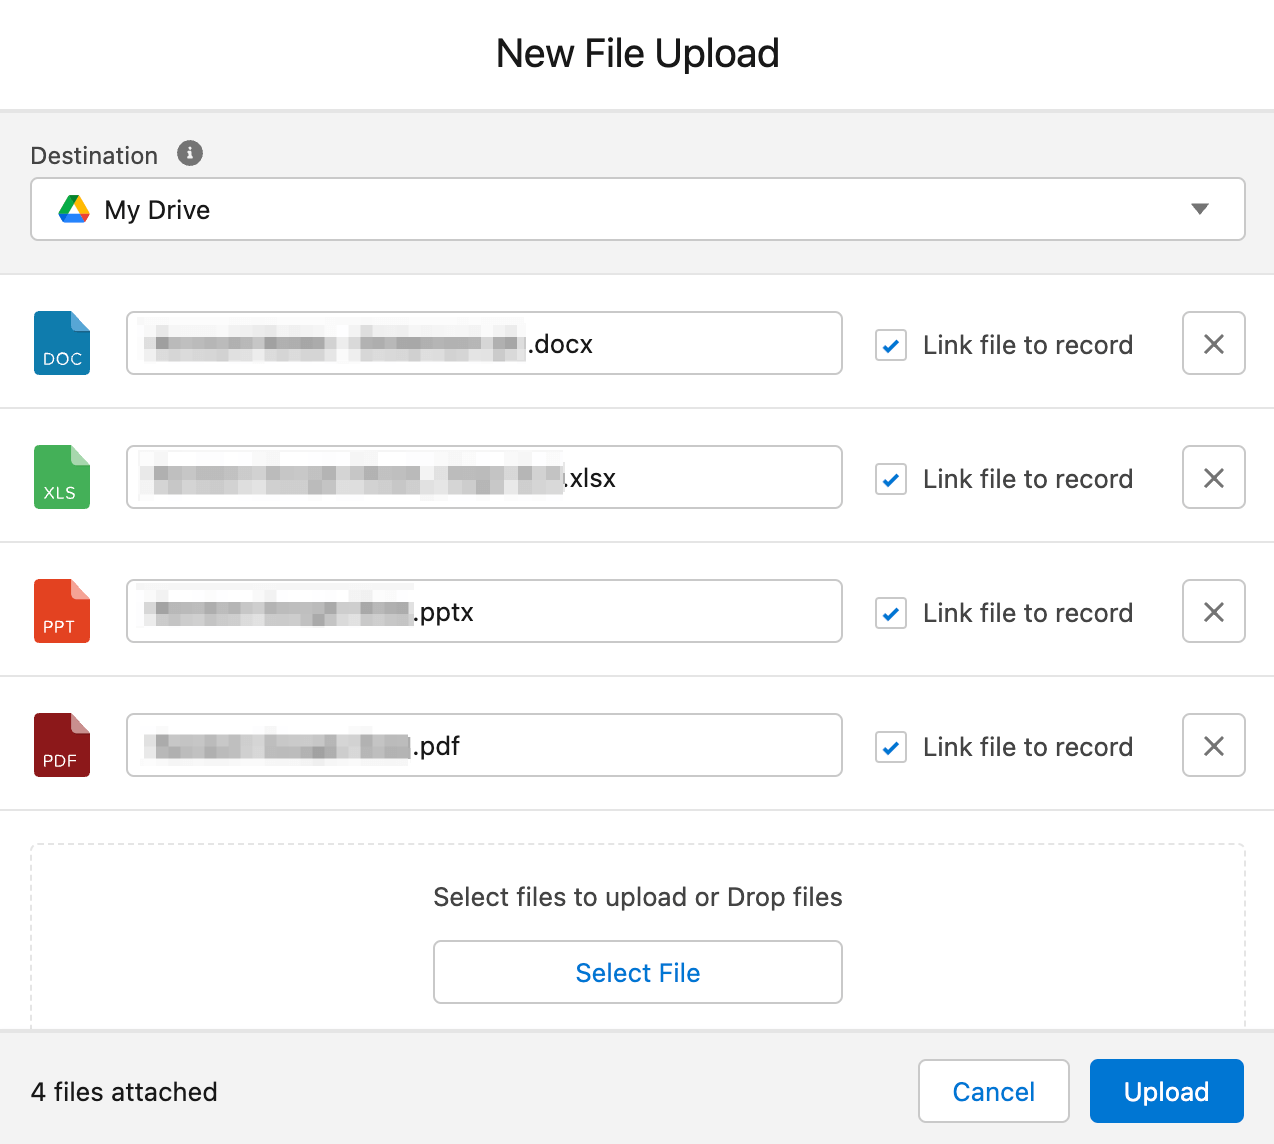
- Progress bars will fill in as the files are uploaded and will indicate upload completion with a green checkmark
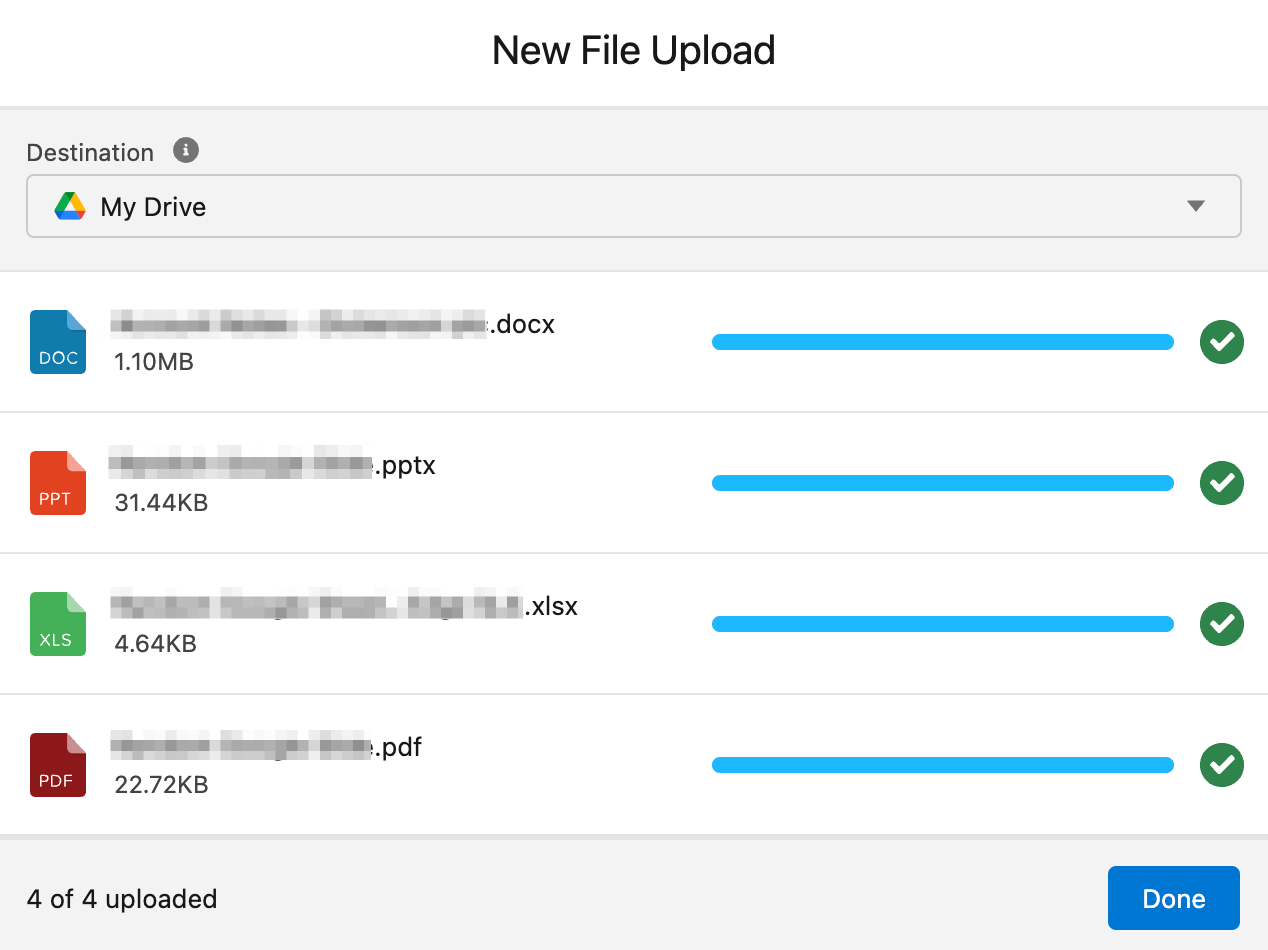
- Click Finish
Note: When initially uploading files from the Google picker, the files will first be placed in My Drive. Once a destination is selected, the files will move to that destination seamlessly in the background. If cancelling out of the upload flow, files will be moved to the trash.
Related Articles
Need more help?
You can contact us directly and a member of our team will reach out to assist you as soon as possible.